
Bond Bug ZZR1400 Project |
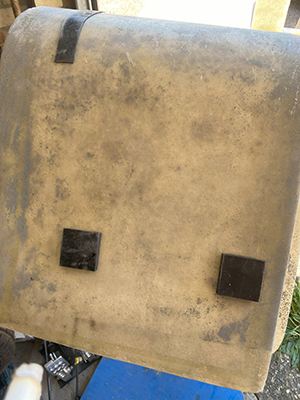
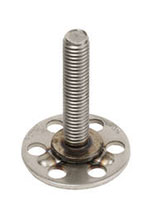
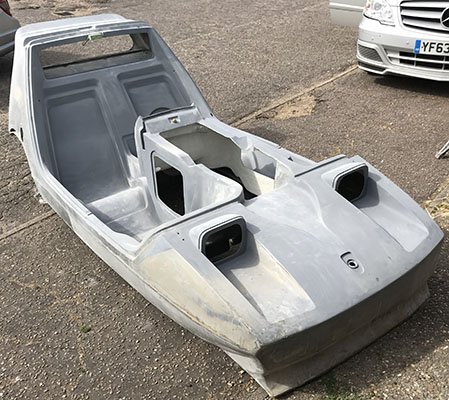
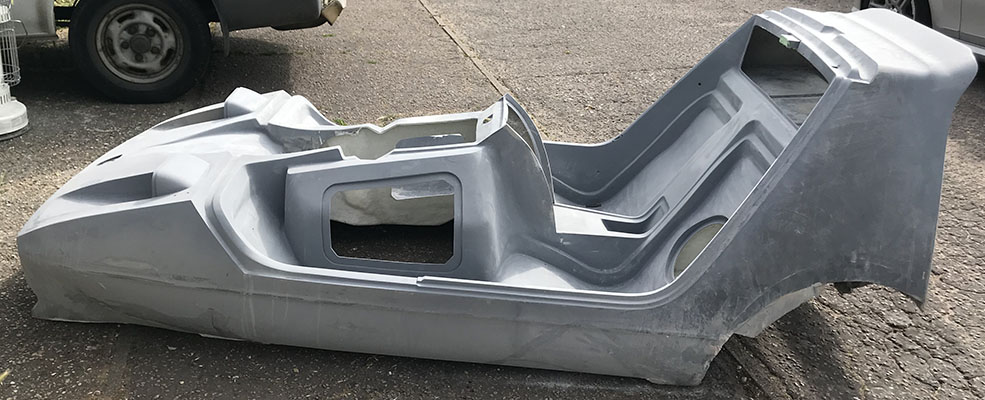
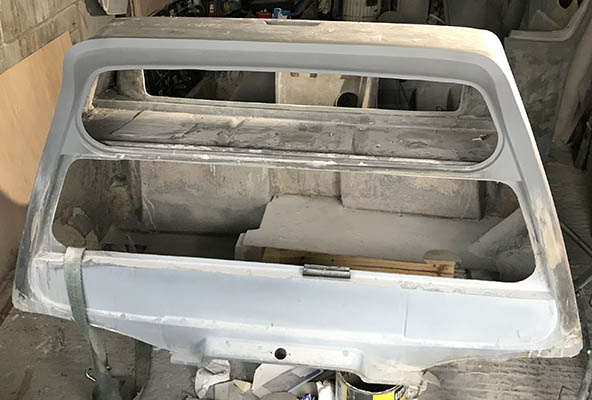
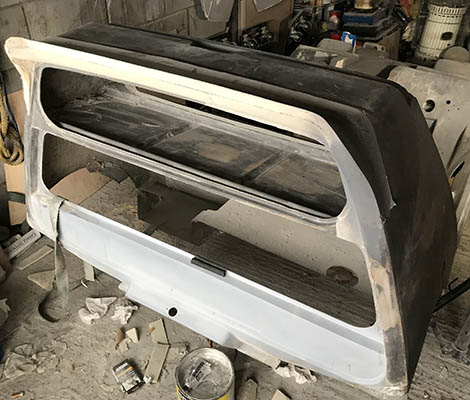
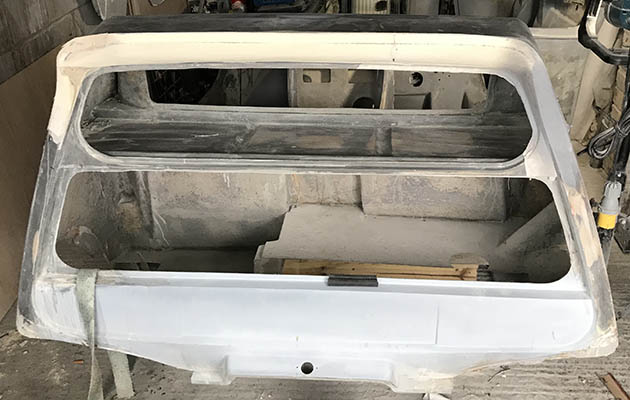
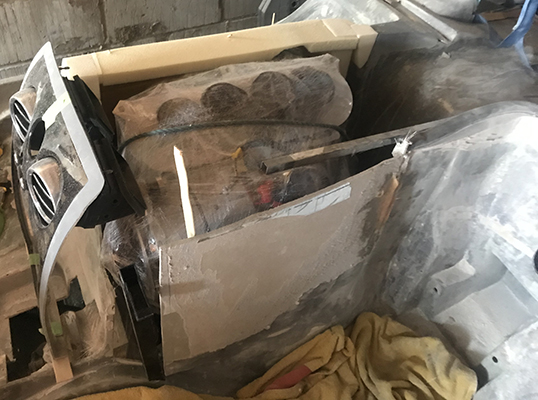
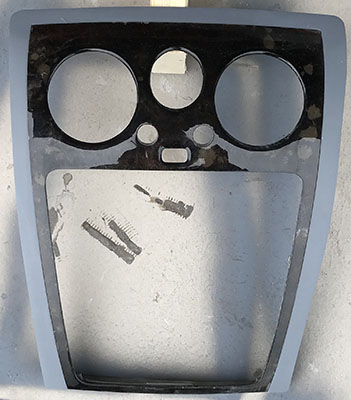
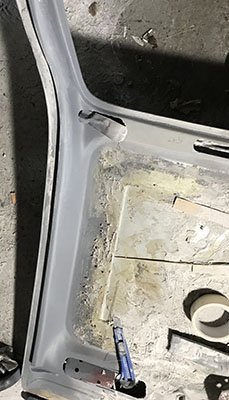
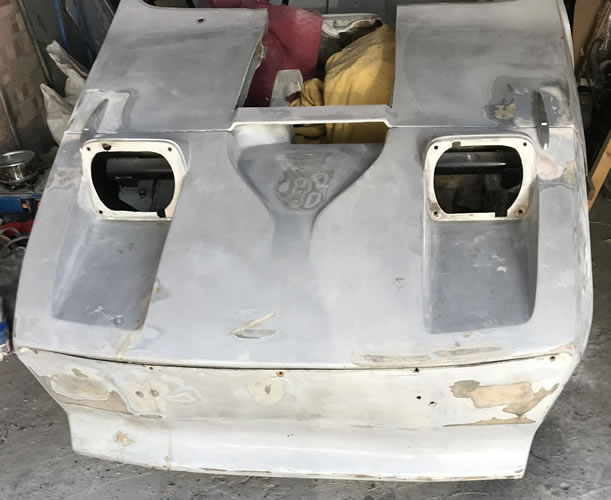
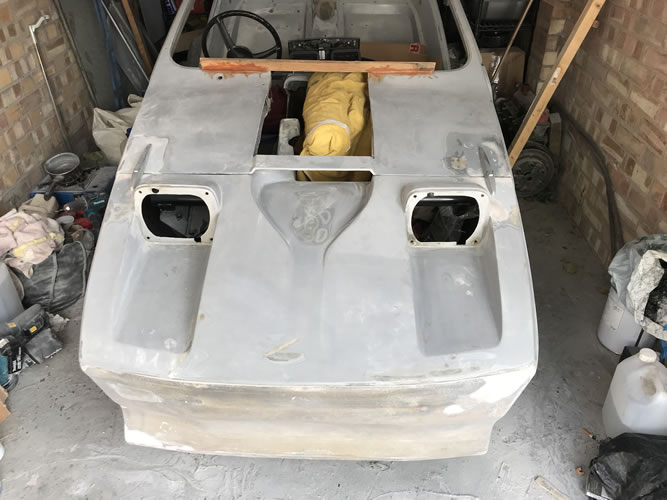
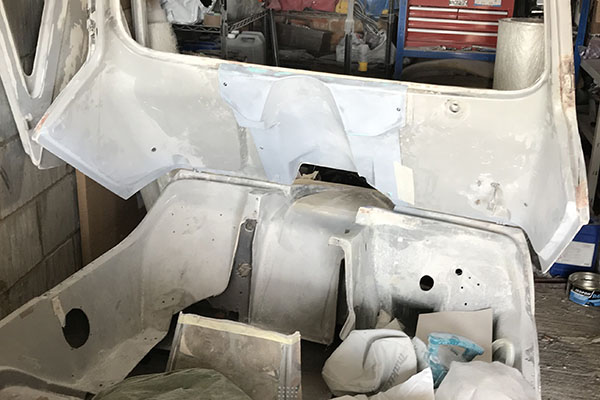
The existing body work is all fibreglass with steel inserts for fixings. All the steel inserts for the canopy hinges etc have rusted and 'blown' with age making the fibre glass bulge.
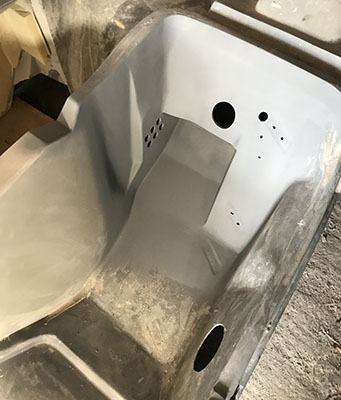
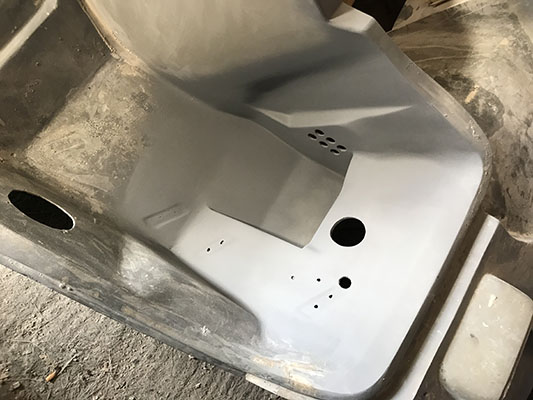
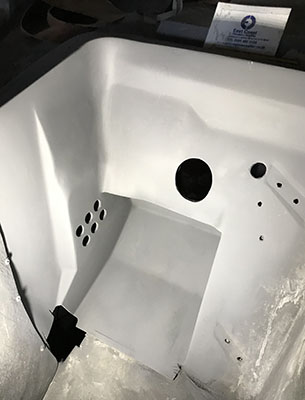
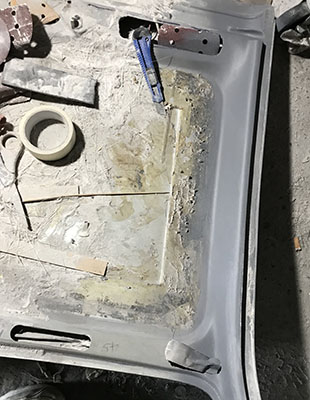
I have had stainless steel plates made up to replace all of them. Every existing hole for rear lights, gauges, stereo, speakers etc have been filled in with fibre glass to give it a blank canvas for upgrades.
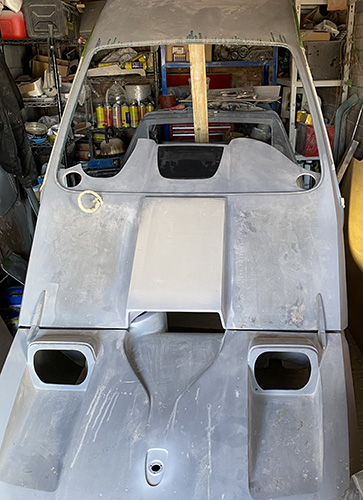
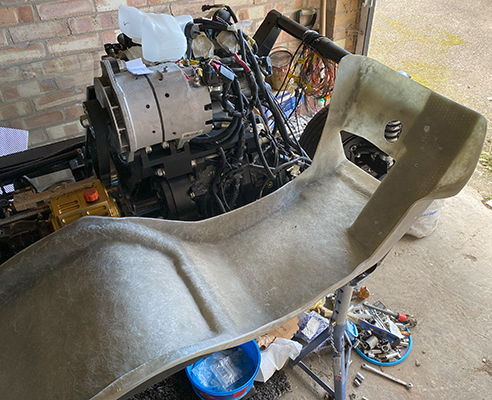
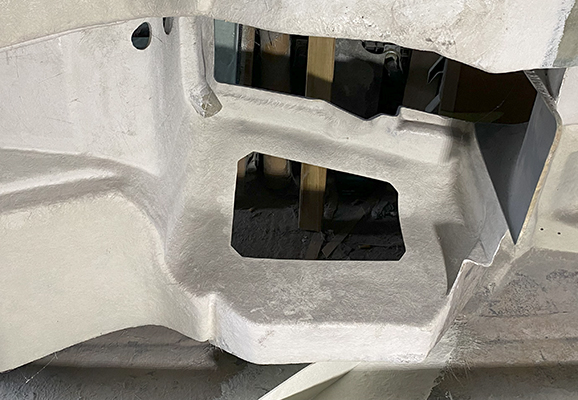
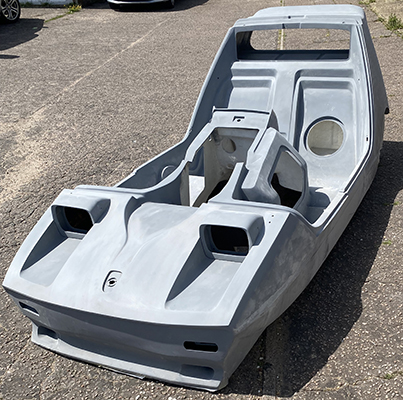
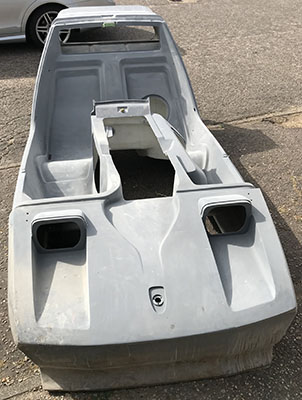
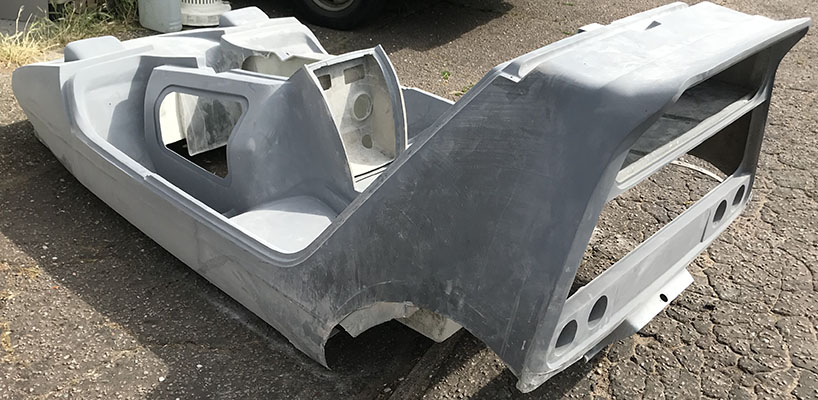
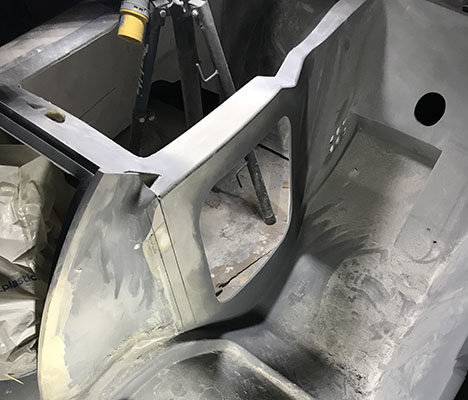
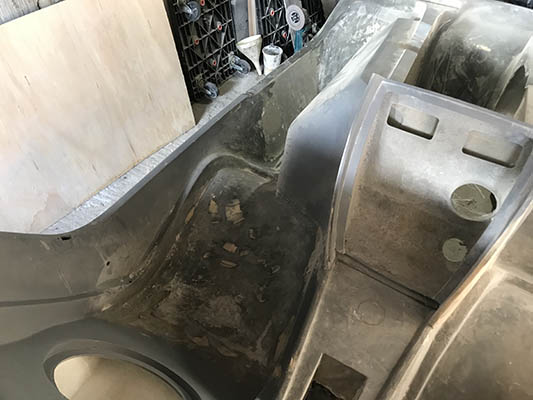
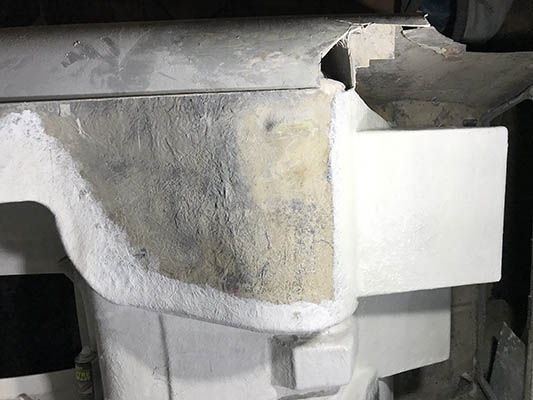
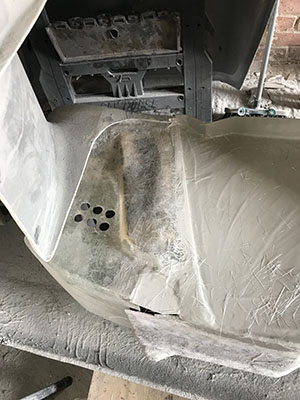
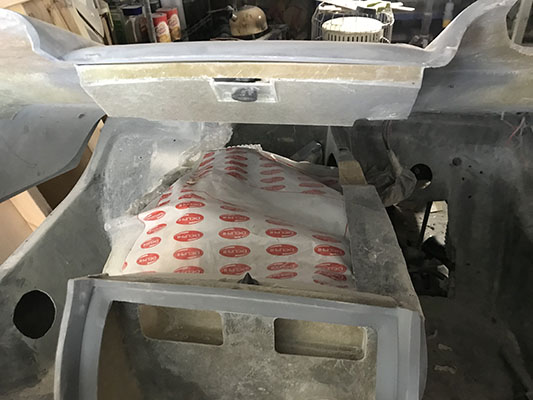
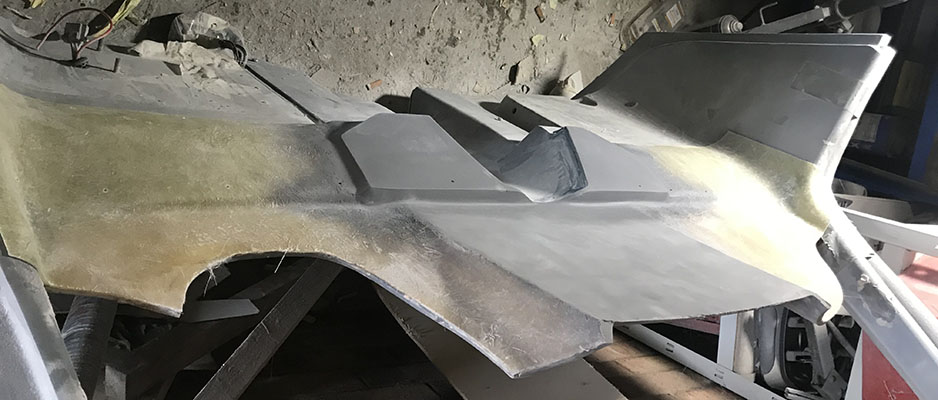
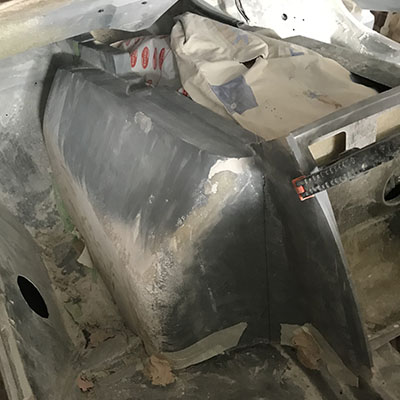
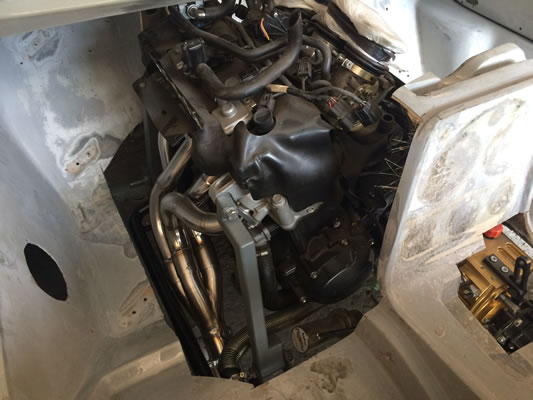
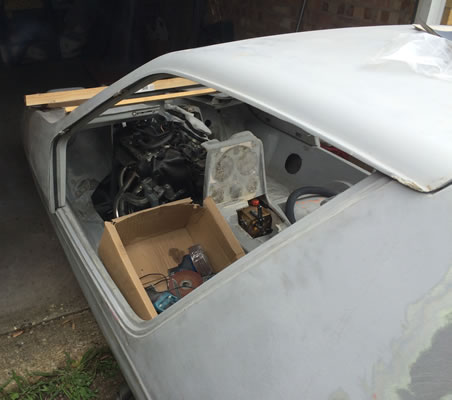
Huge chunks had to cut from the existing shell to accommodate the larger engine.
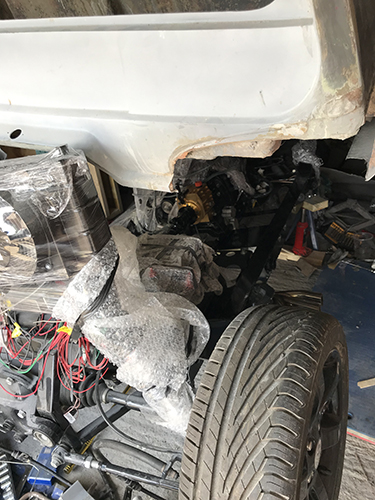
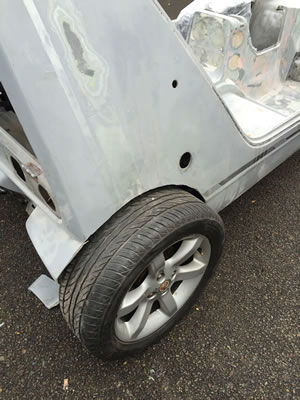
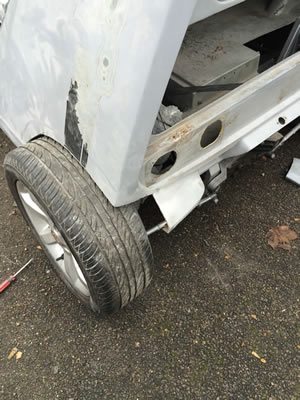
Wheel arches had to be cut out to suit the change from 10 inch to 15 inch rear wheels and the wider stance on the new axle.
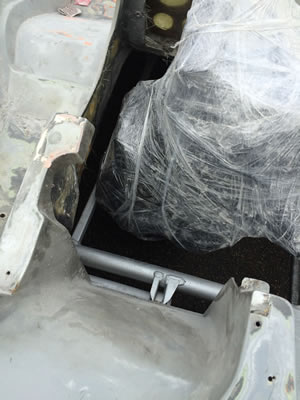
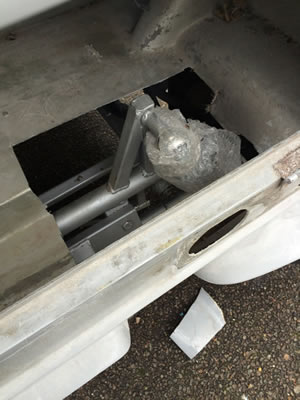
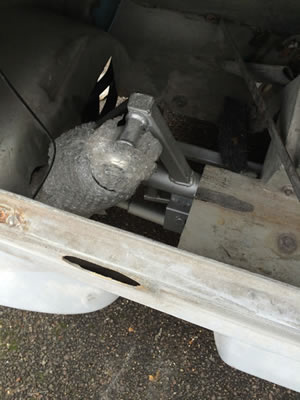
The gear knob and hand brake lever have been taken out as they are now electronically operated. The only lever in the cabin will be the Quaife reversing gear box.
Huge amounts more work to be done yet.
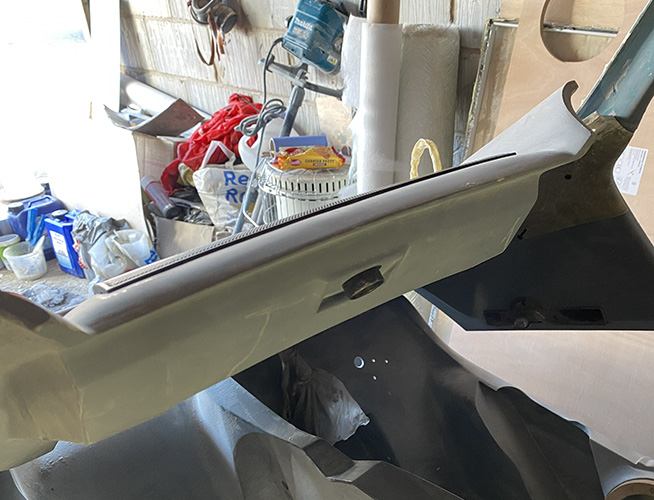
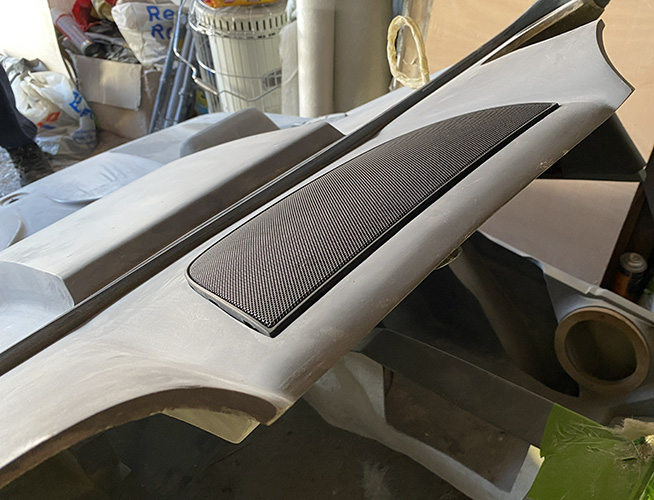
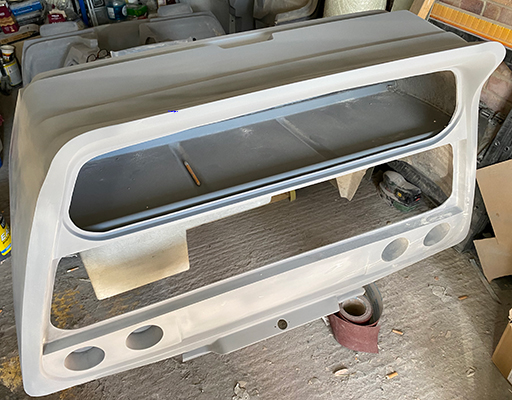
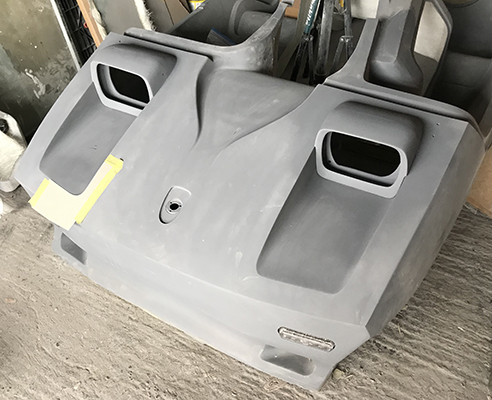
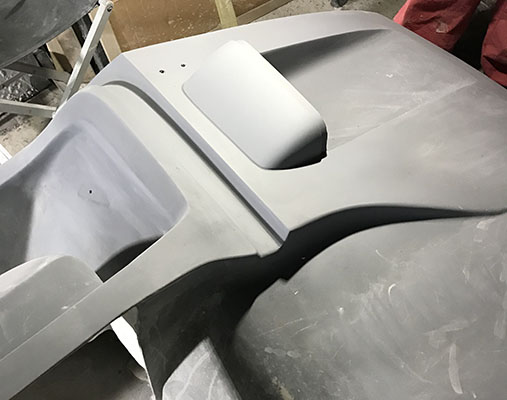
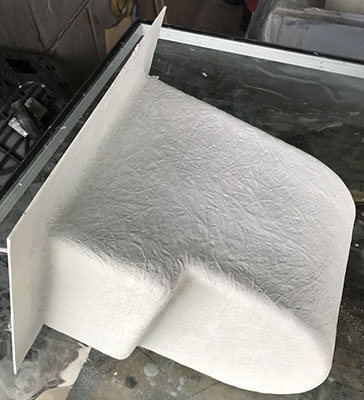
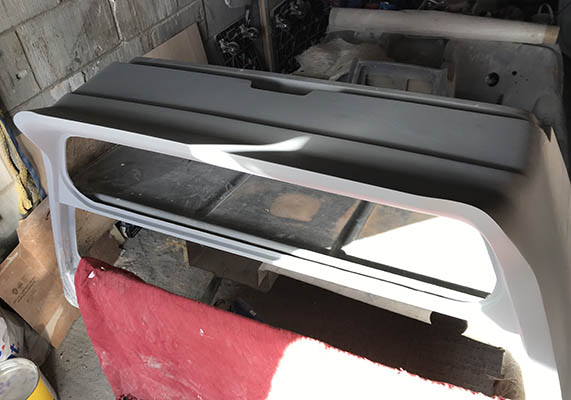
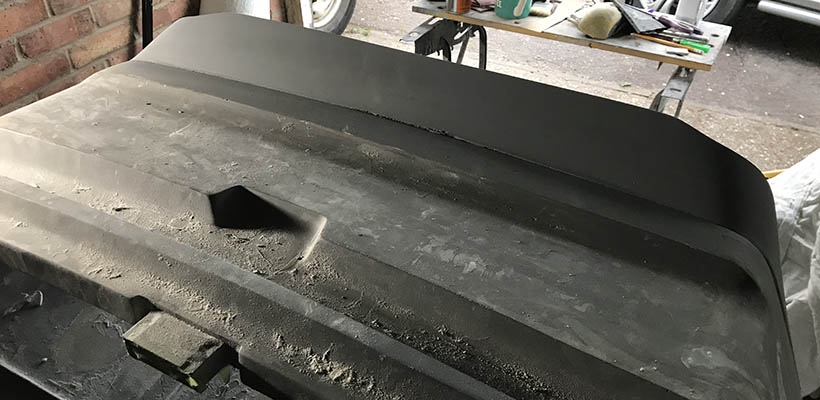
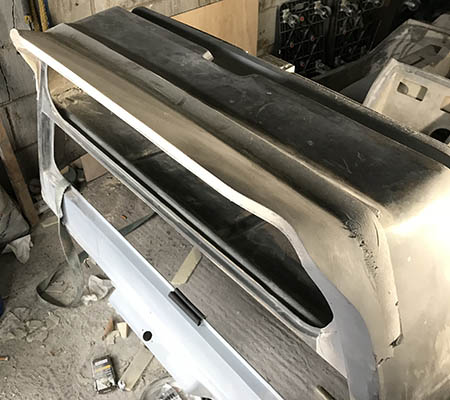
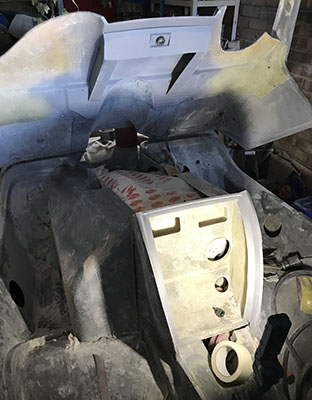
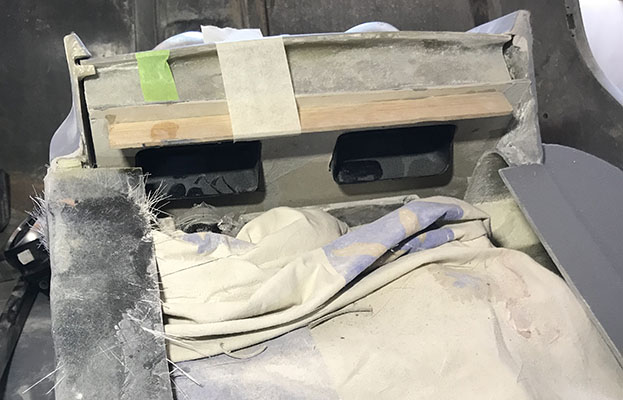
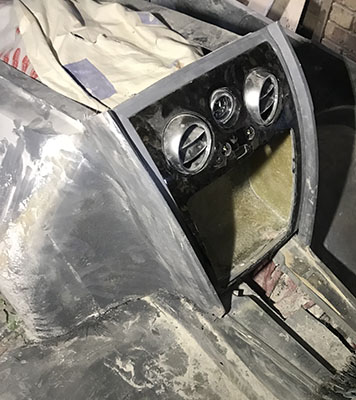
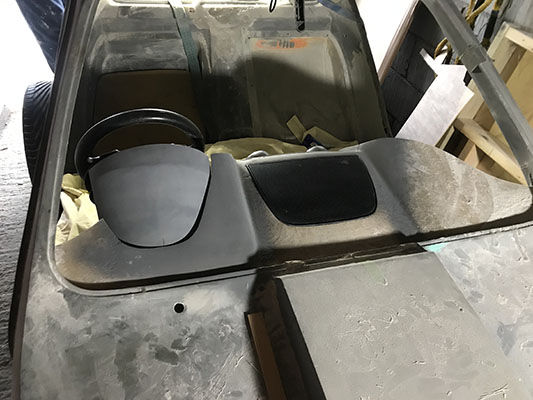
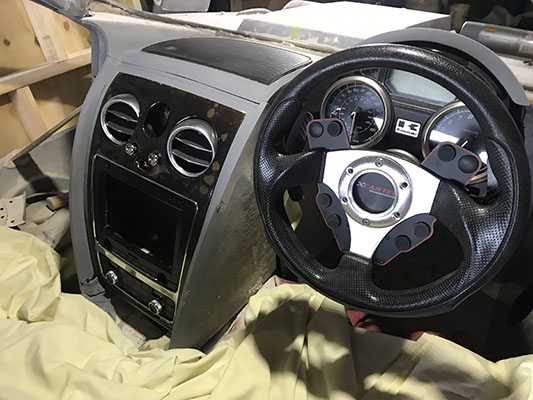
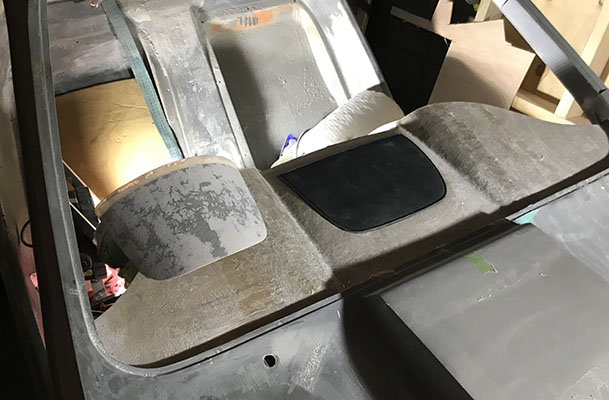
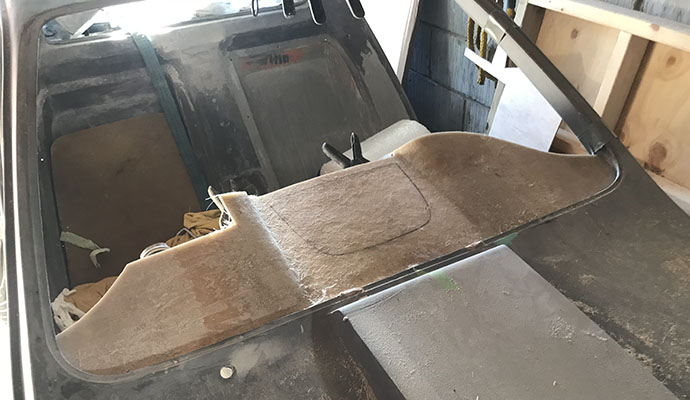
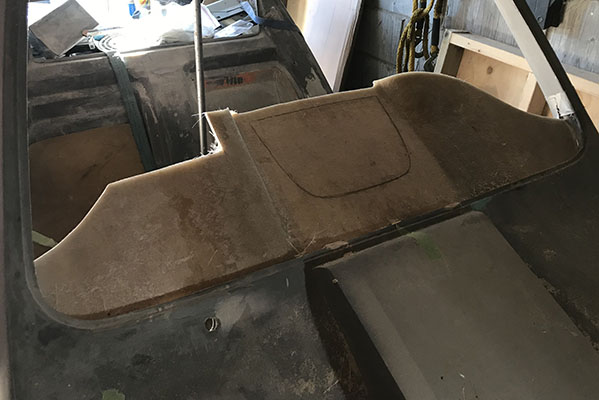
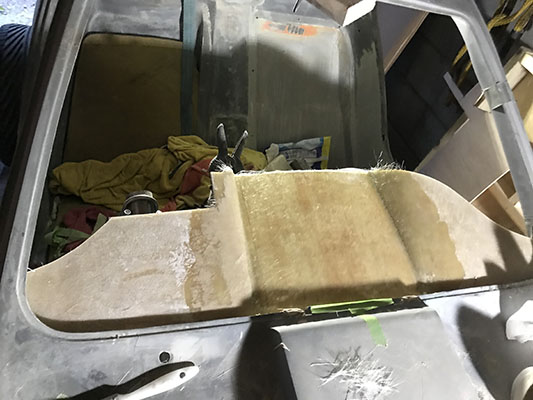
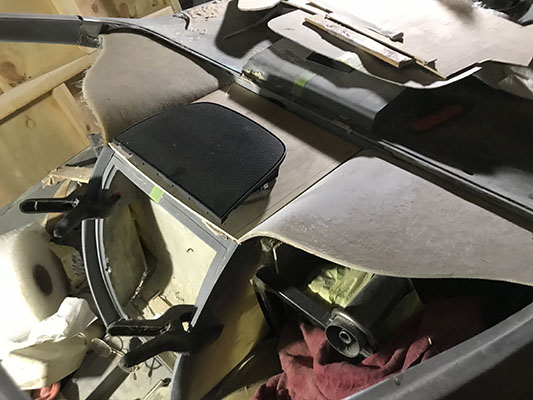
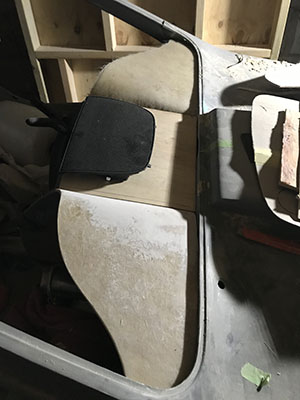
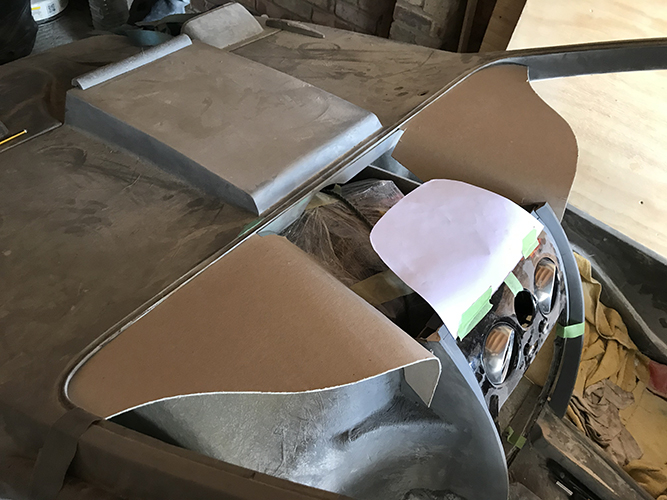
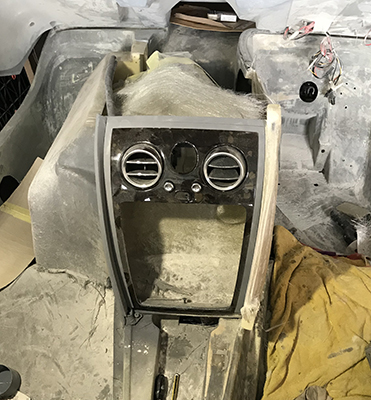
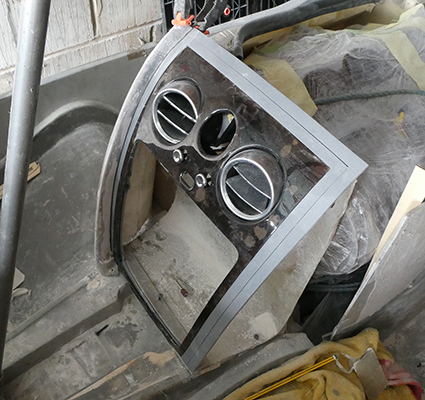
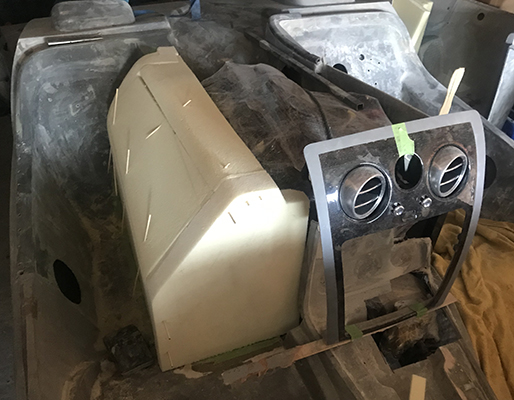
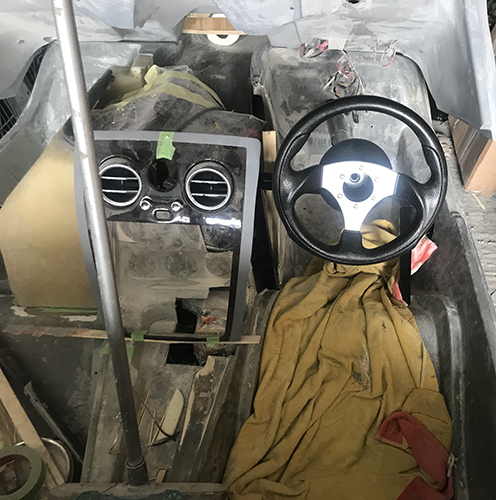
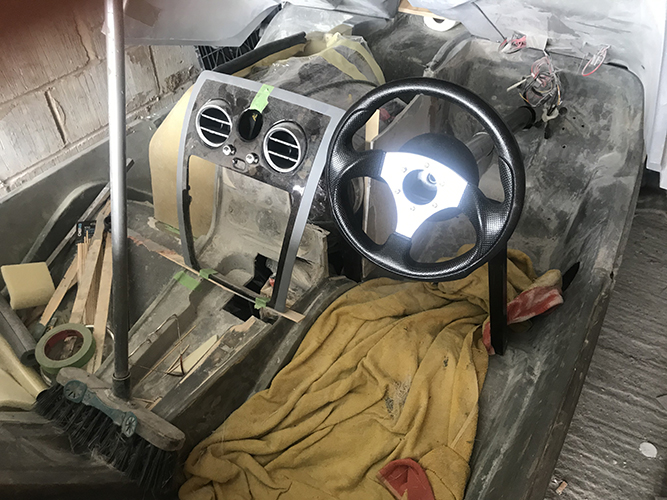
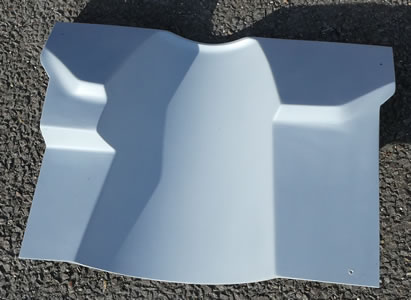
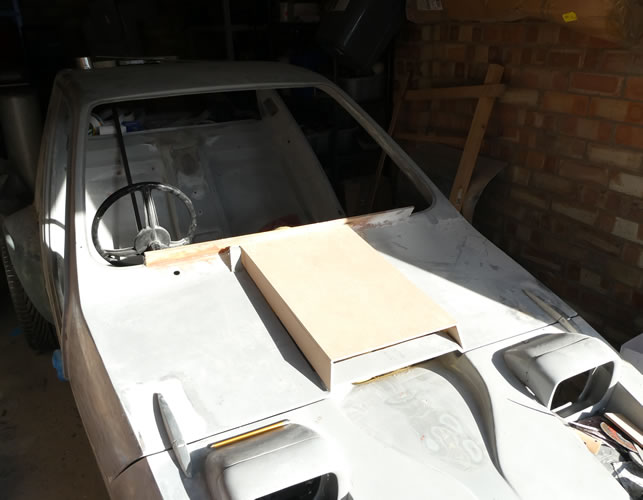
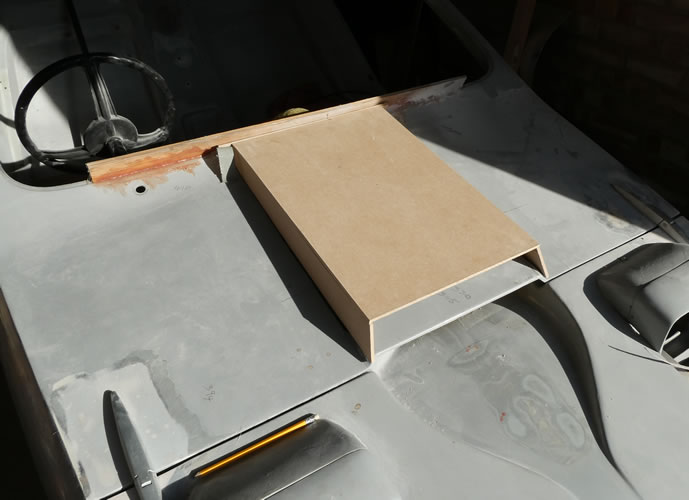
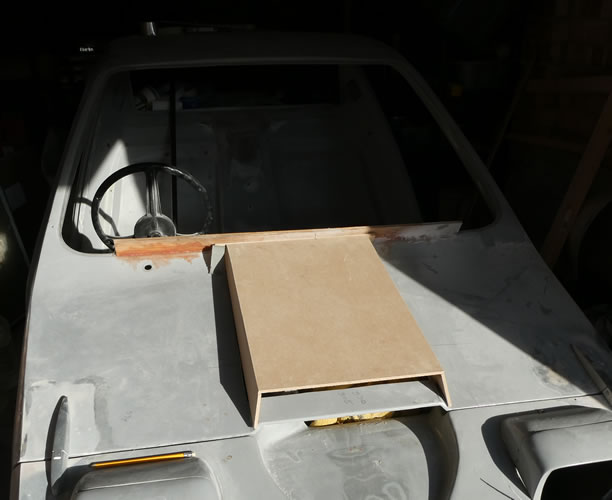
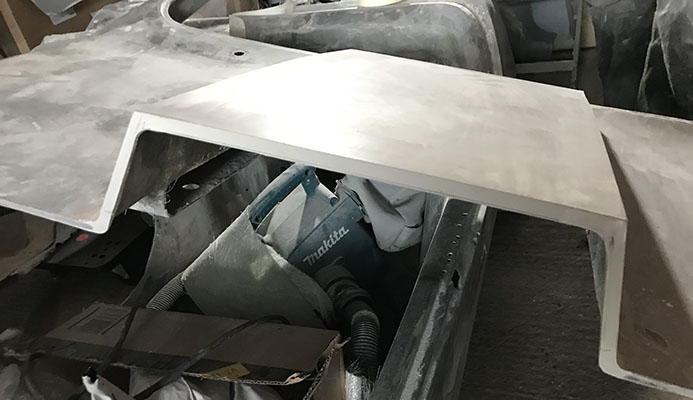
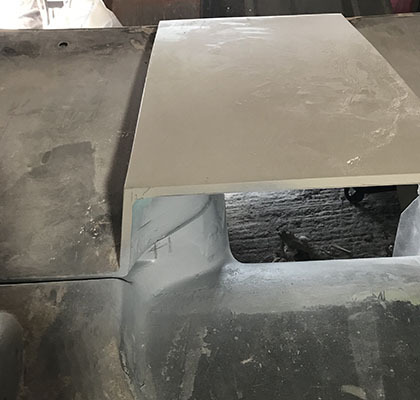
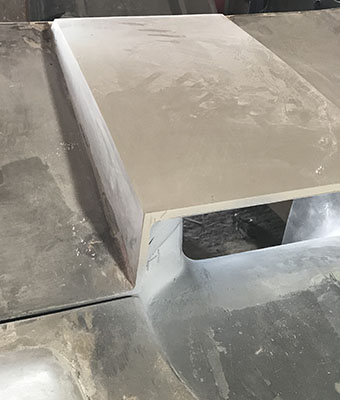
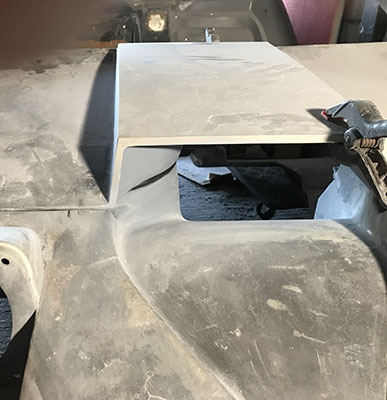
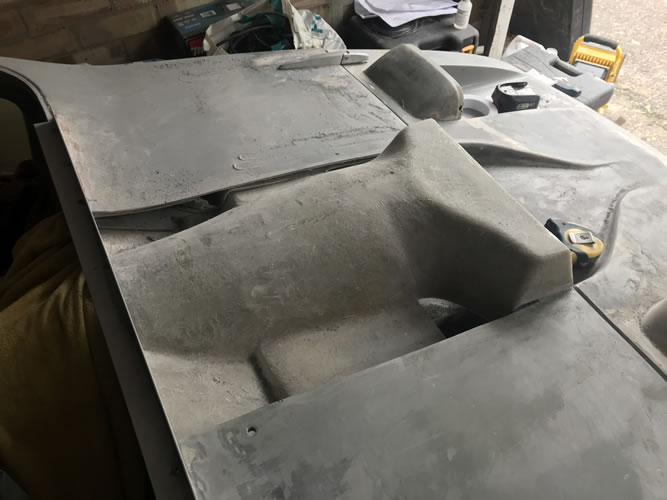
Dashboard top fitted to canopy - note Bentley Coninental grill loosly laid into formed recess
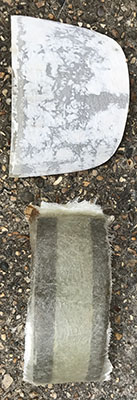
Mouldings for leather coverings panels started. The whole of the interior to be fitted out in black leather
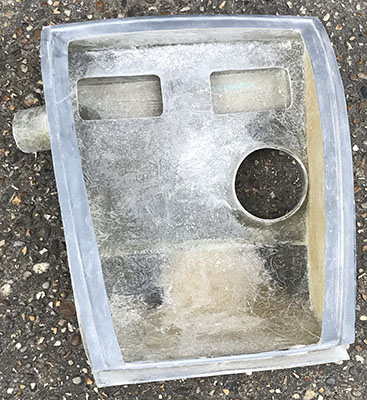
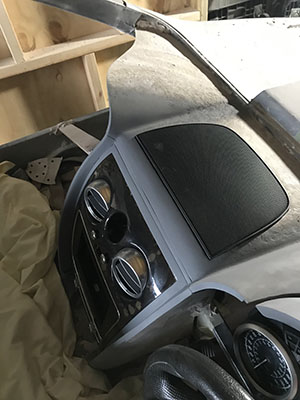
Dashboard speaker holes cut

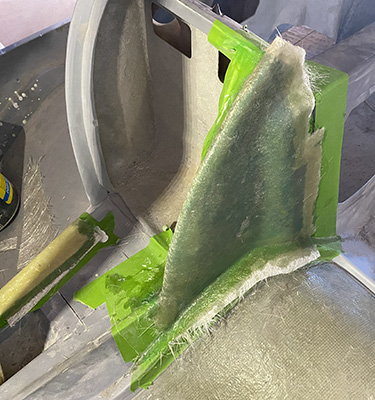
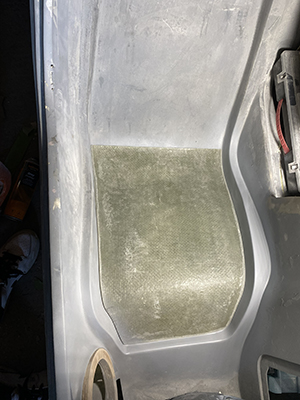
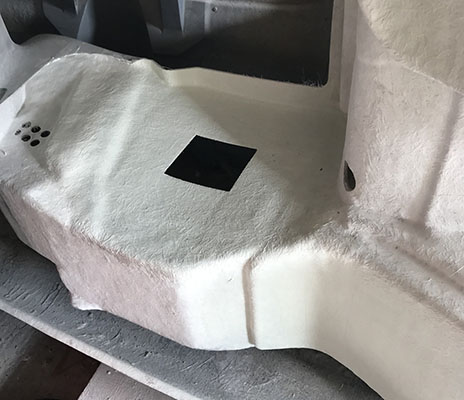
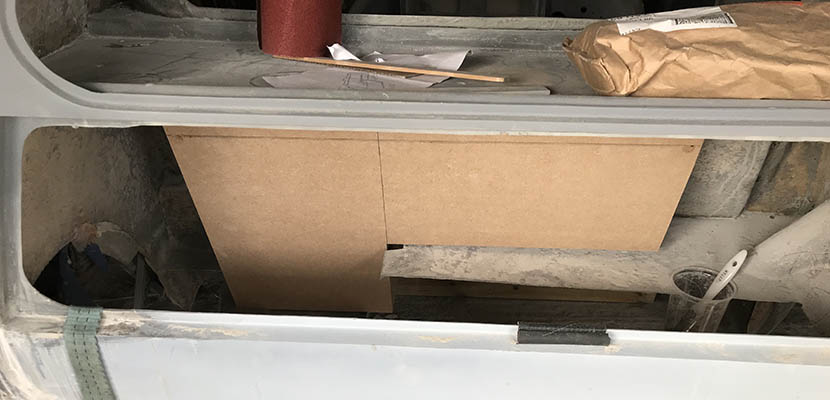
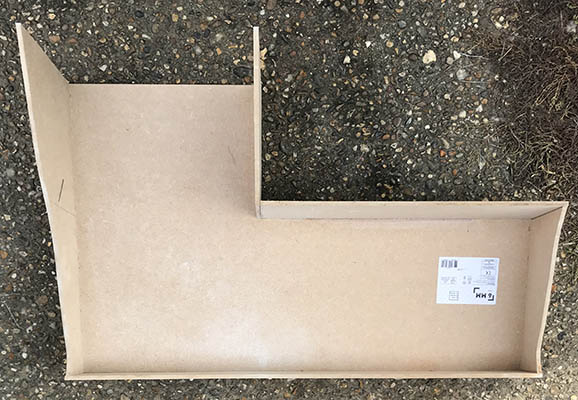
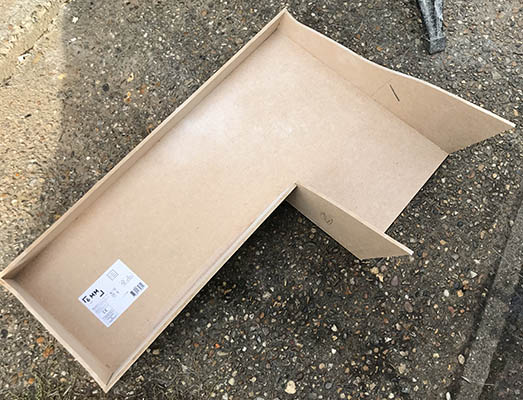
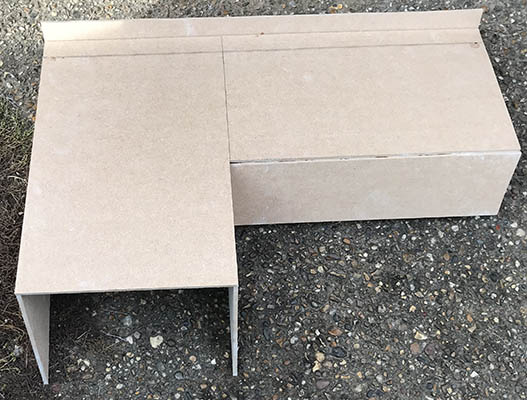
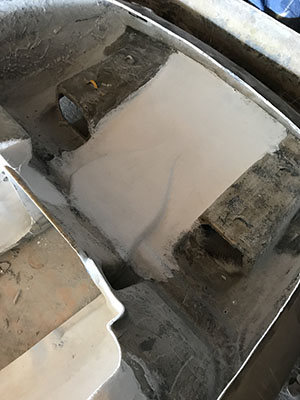
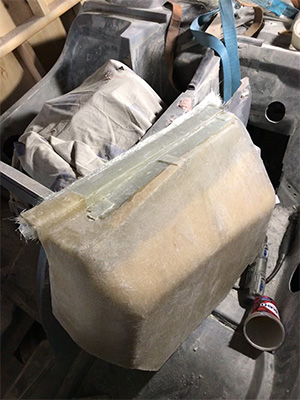
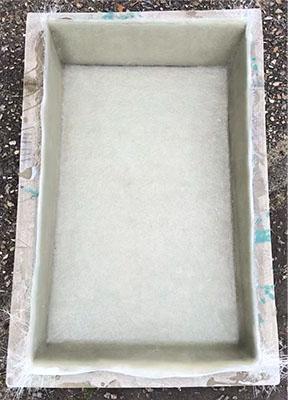
Underseat boxes ready for trimming
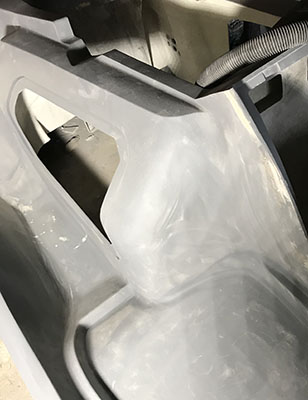
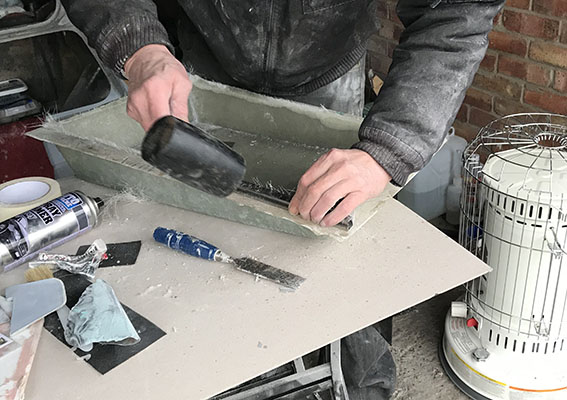
Final side of under seat box being laminated

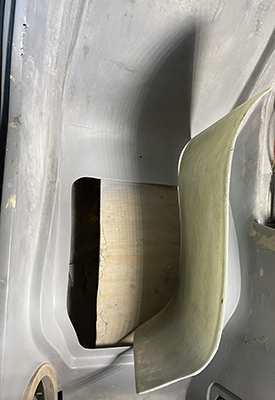
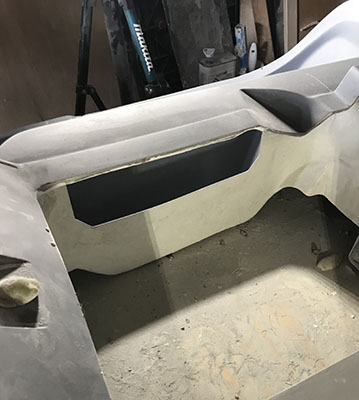
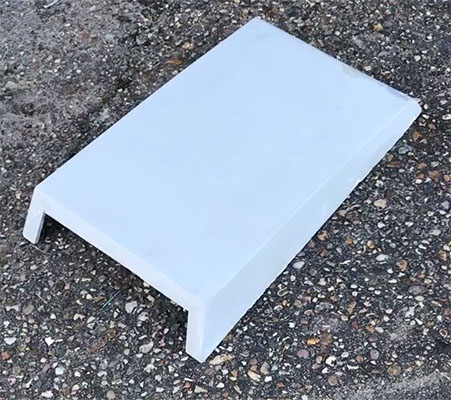
Underseat passenger side box for amplifier etc
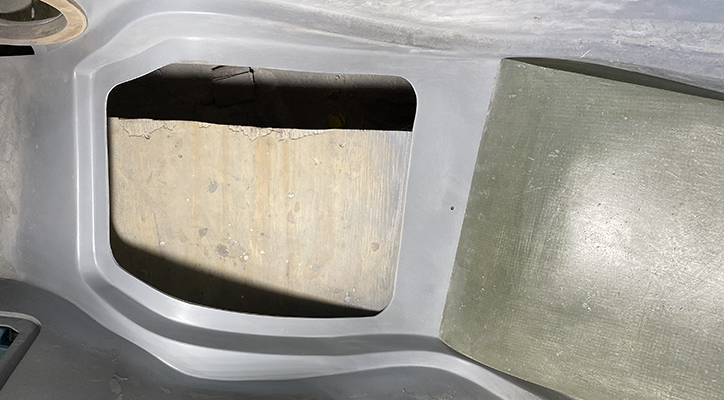
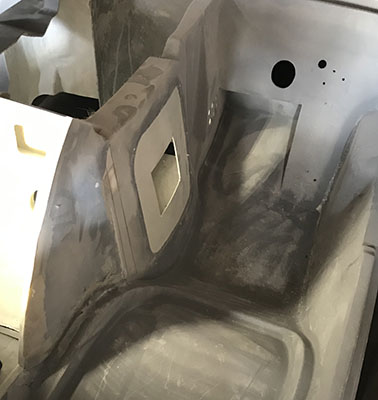
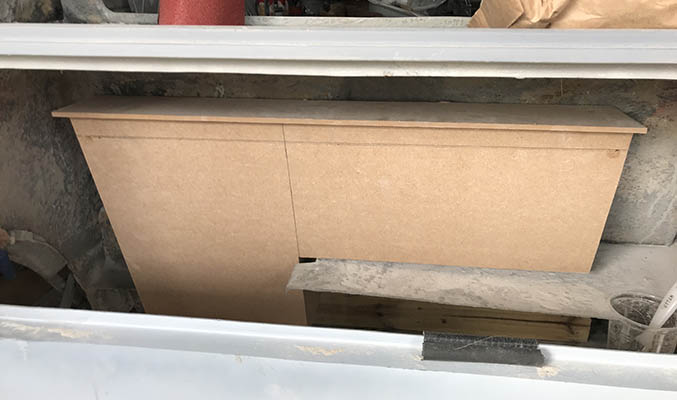
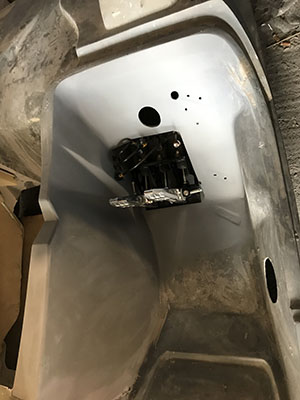
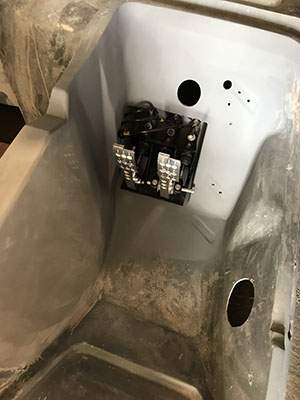
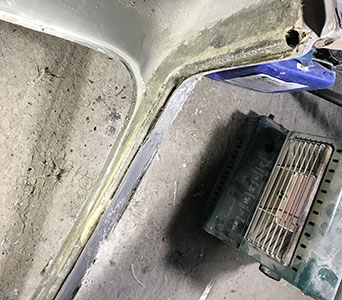
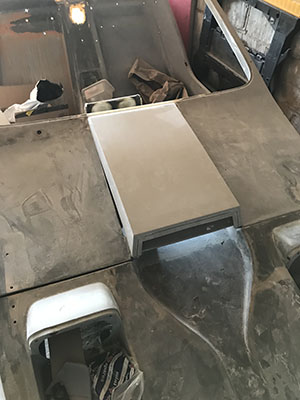
Underseat - drivers side wiring box fitted and finished - all ECU's, fuse box etc will be located here
Underseat - passenger side amplifier box now fitted and finished

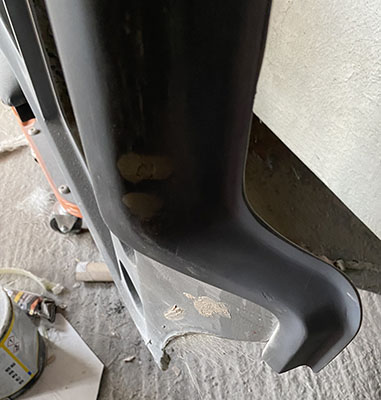
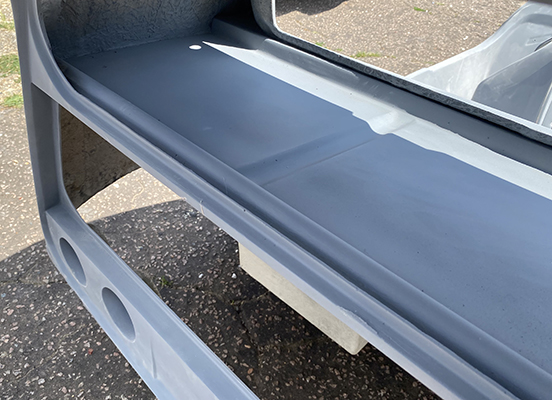
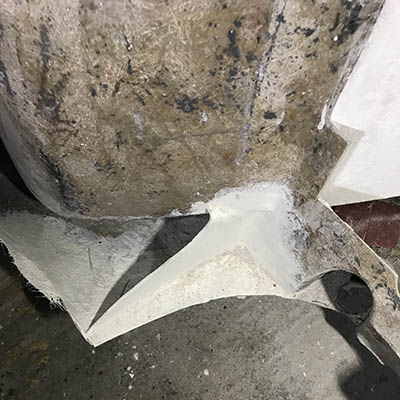
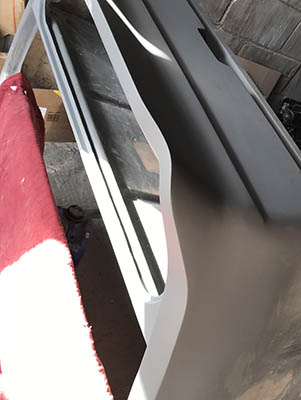
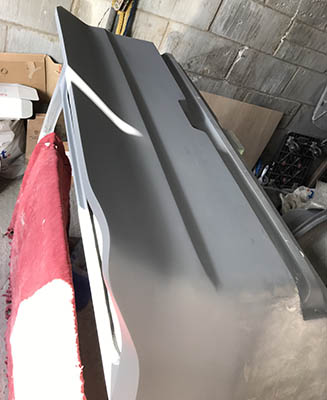
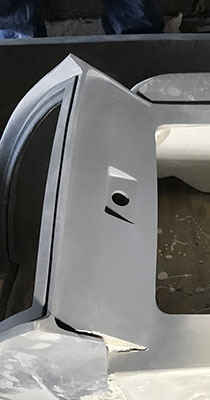
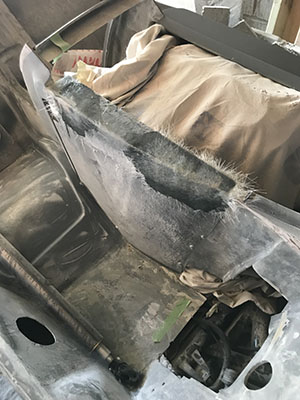
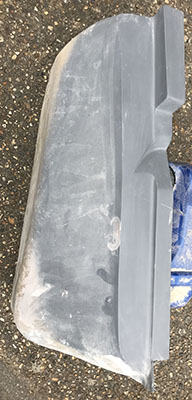
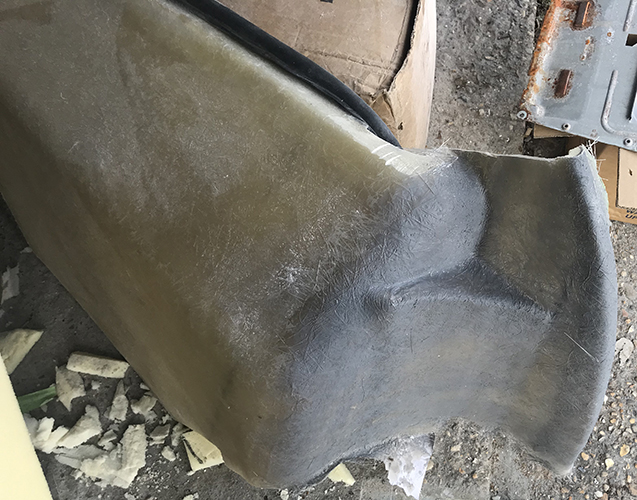
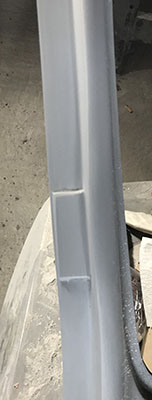
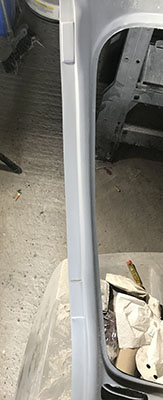
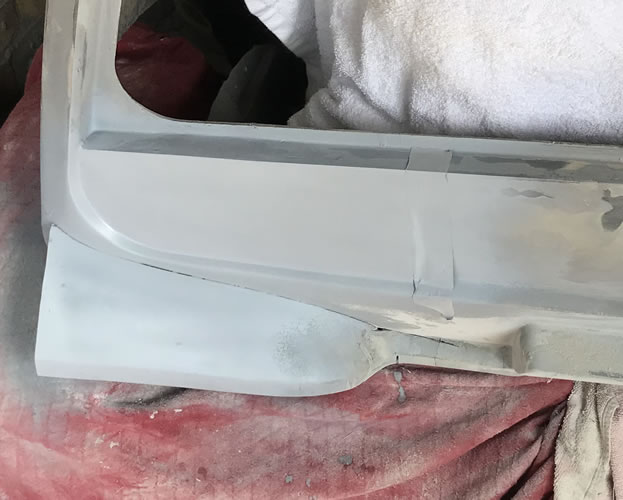
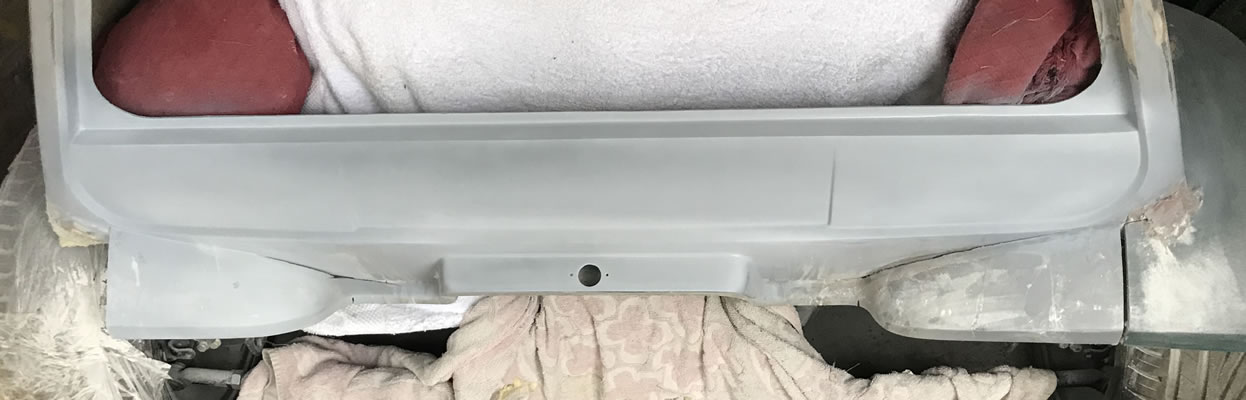
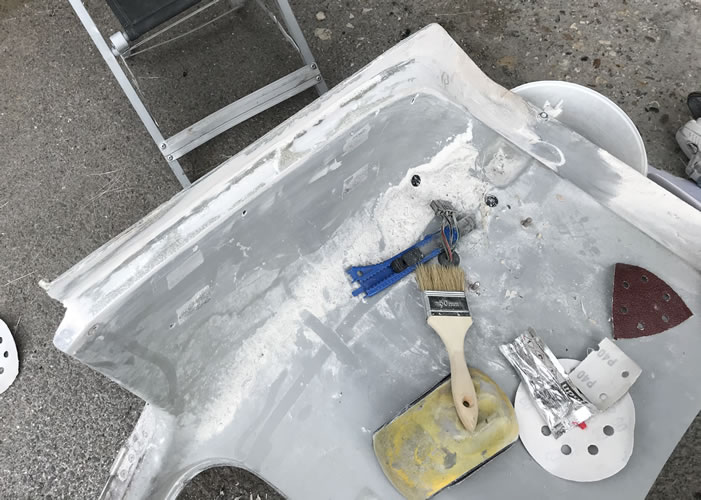
Body side skirts repaired
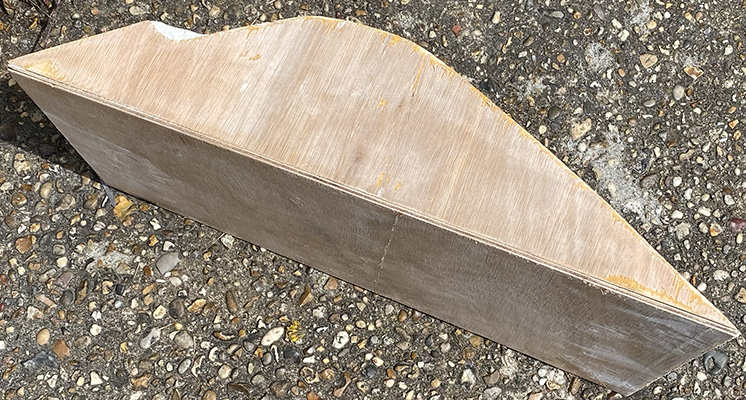
Underseat amplifier mount constructed from plywood, sandwiched between fibreglass
Driver side seat panel cut out for main sound amplifier positoning - Seat cover to be secured with easy removable fasteners.
Passenger seat cut out panel and cover made ready for electrical wiring box. Kawasaki 1400 engine has ECU's etc to be housed in an easy access waterproof box.
Seat cover to be secured with easy removable fasteners.
Passenger seat side rail created

Canopy pillars tweeter spreaker fittings
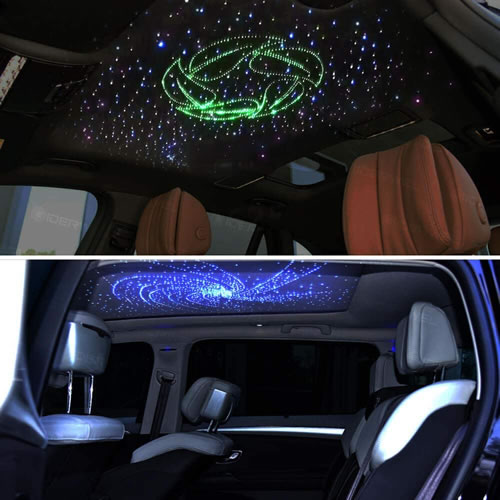


GIDERWEL Smart App Controlled LED Fiber Optic Lights Kit,200pcs 2m 0.75mm Optical Fiber Star Ceiling Lights with 7W Smart Light
Fibre optic kit for head lining in the Bug

The roof lining is having the 200 fibre glass lights fitted into it like the Rolls Royce has.
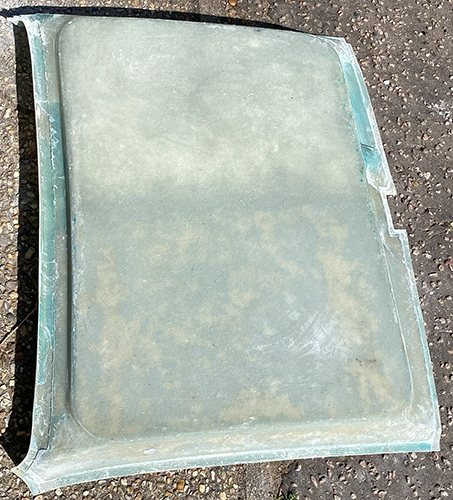
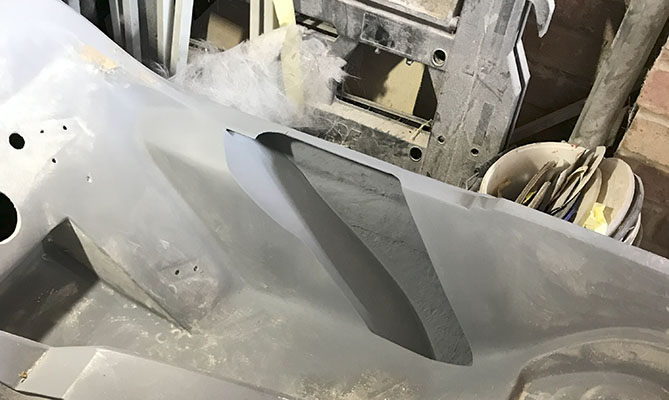
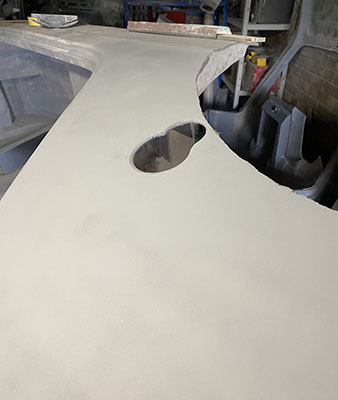
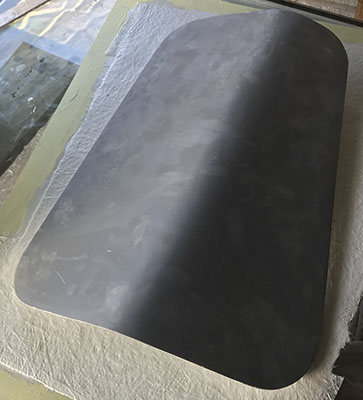
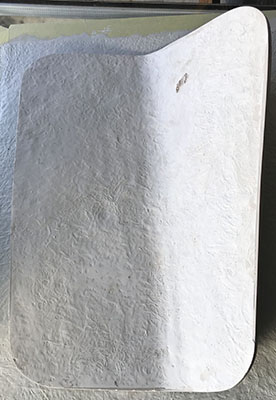
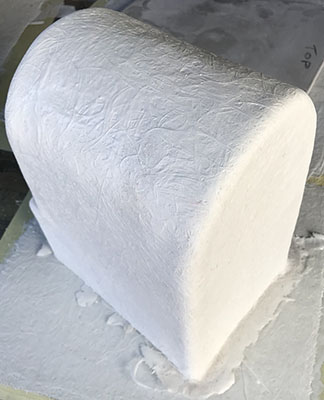
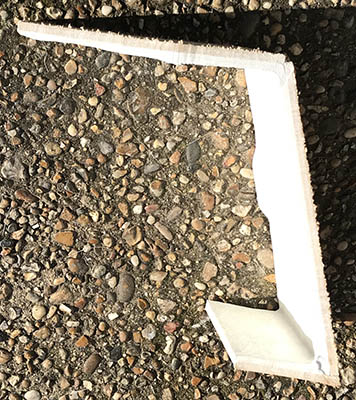
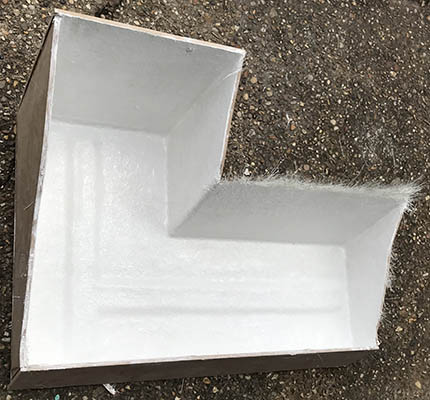
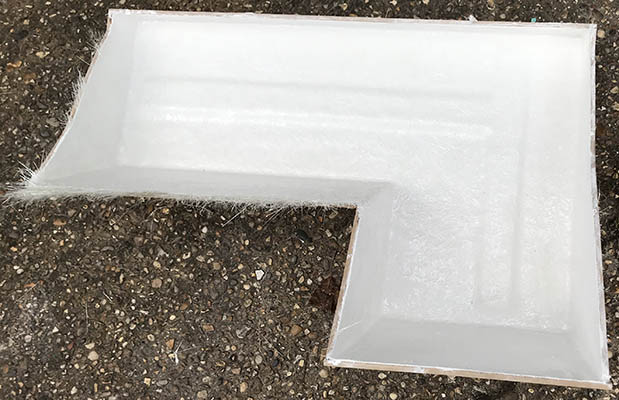
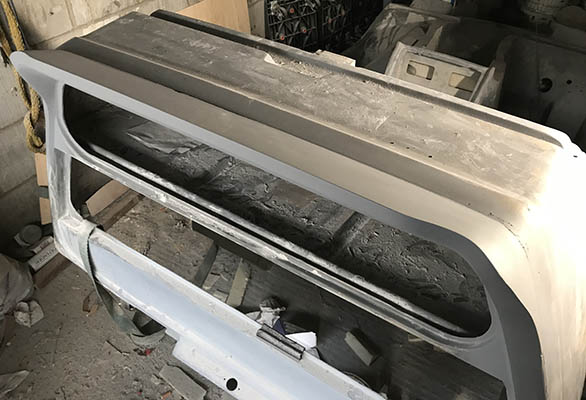
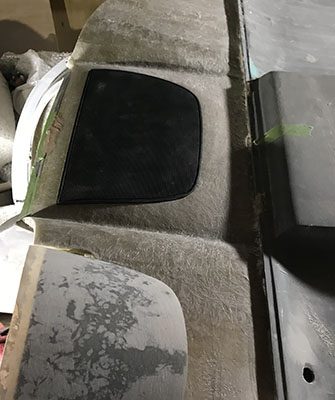
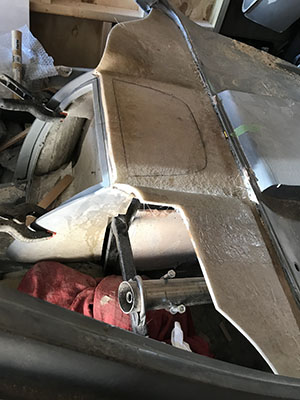
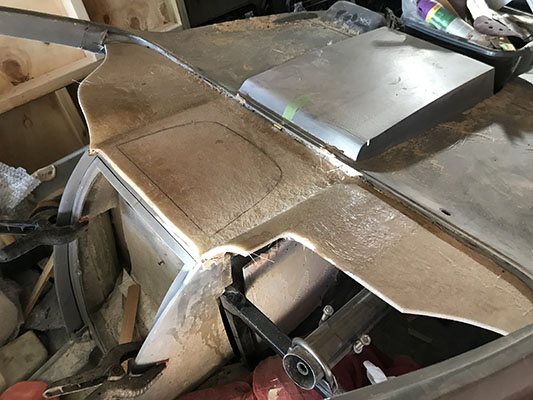
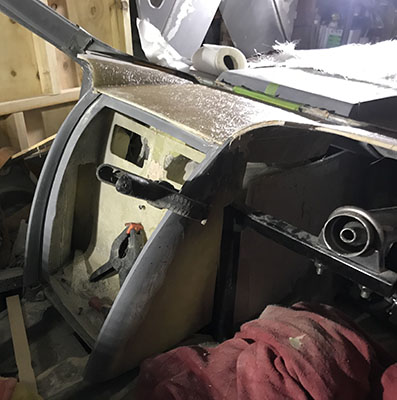
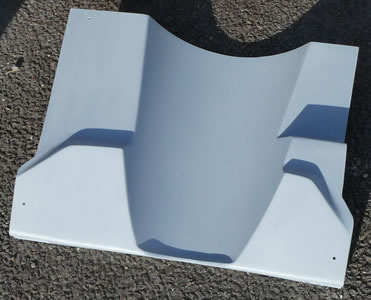
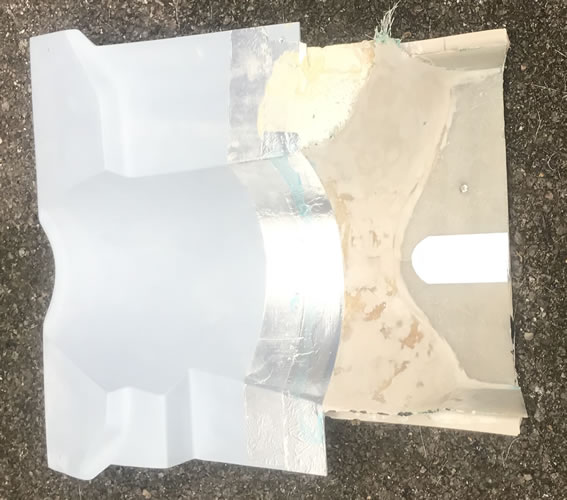
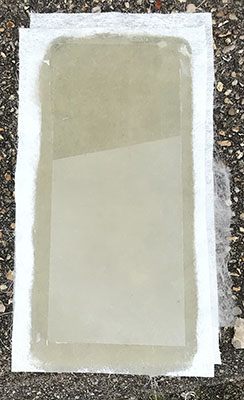
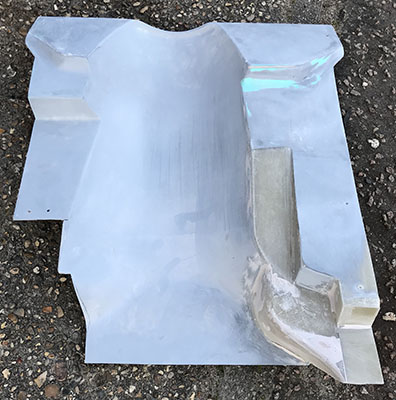
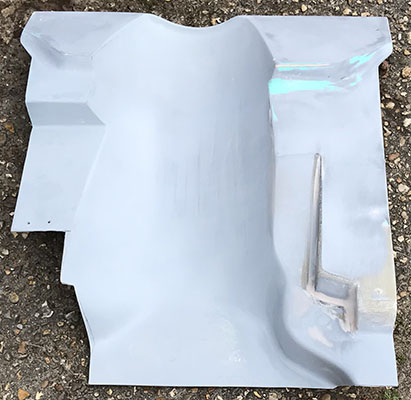
The roof lining for the ceiling insert panel is moulded in fibre glass. This will be drilled and covered in leather then pop fastened to the canopy.
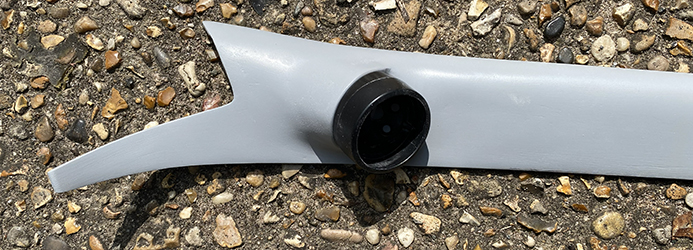
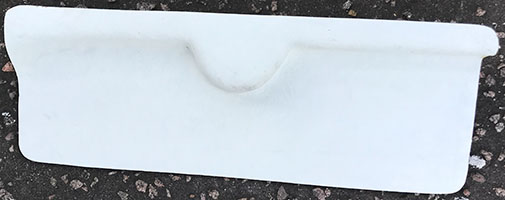
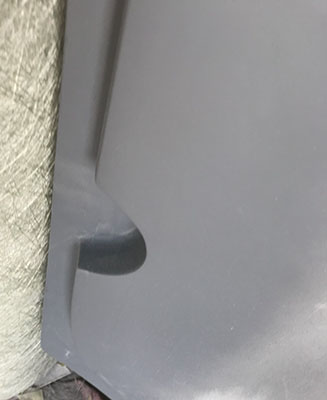
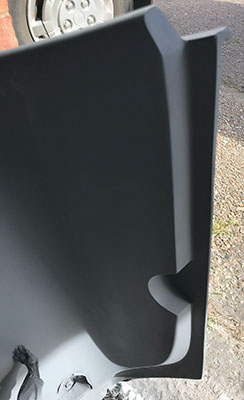
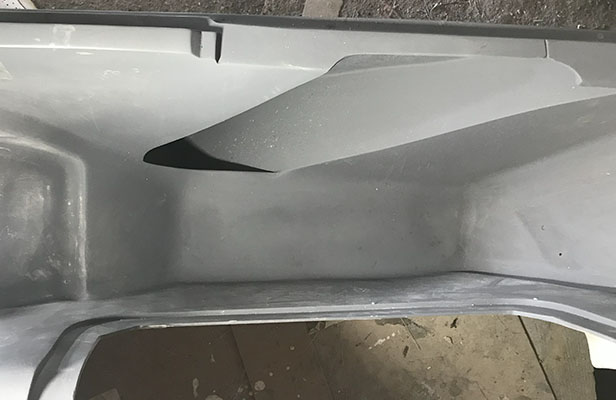
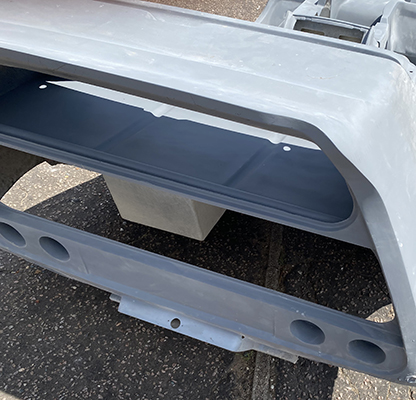
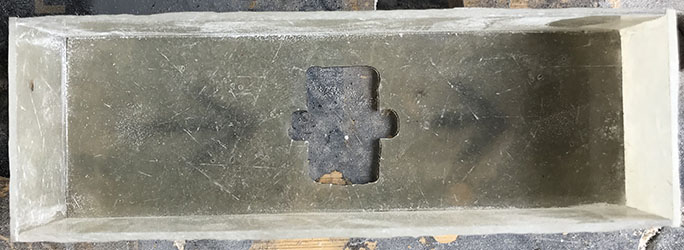
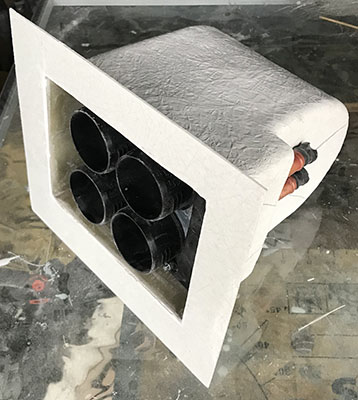
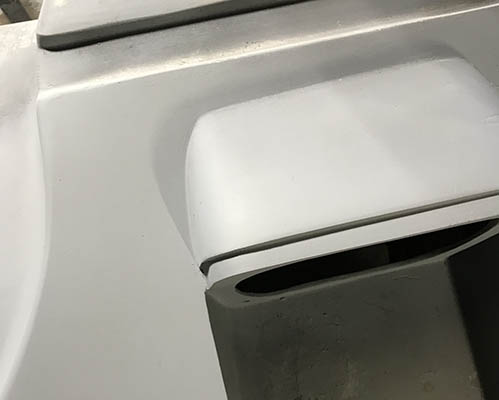
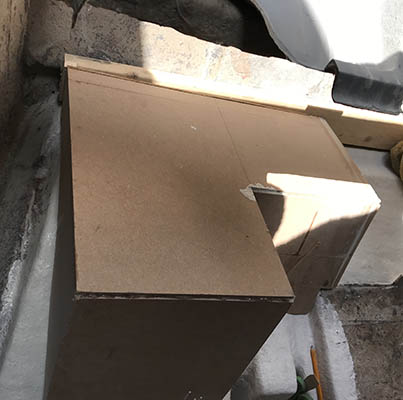
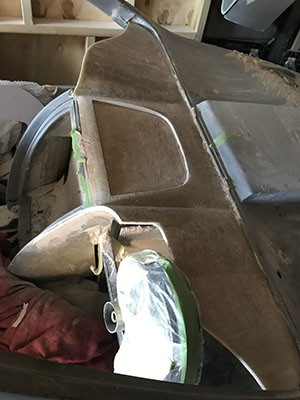
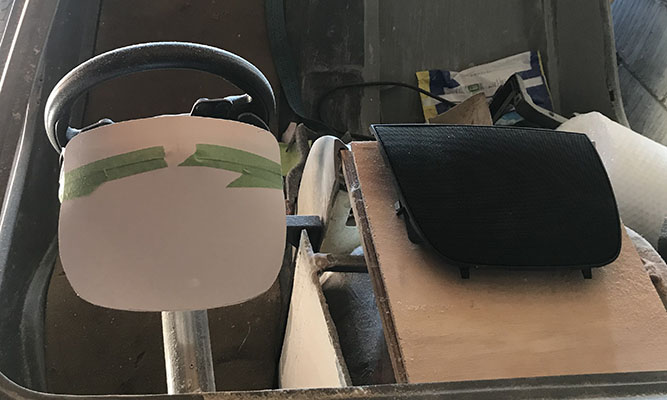
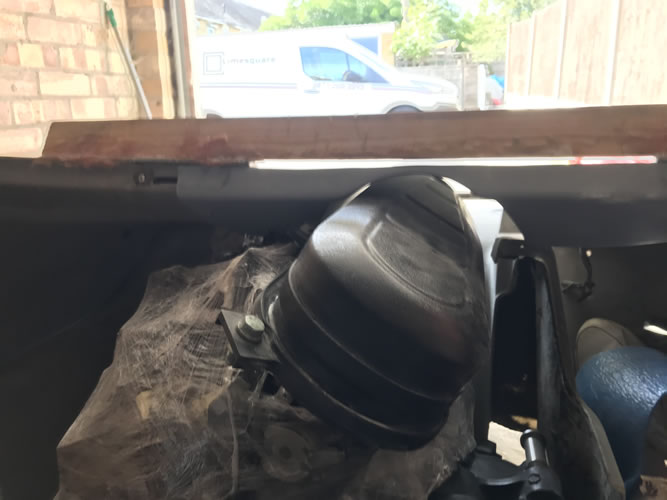
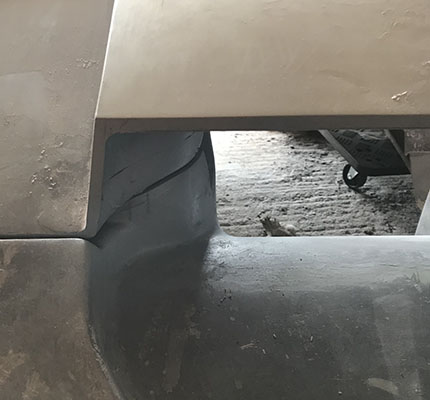
The bulge in the canopy frame (bottom left) is moulded to fit over the light unit and will be have a fine mesh inset to allow for venting of the heat generated.
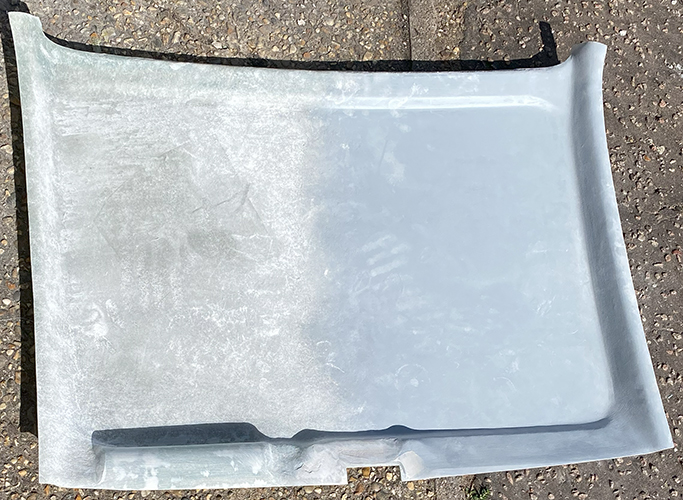
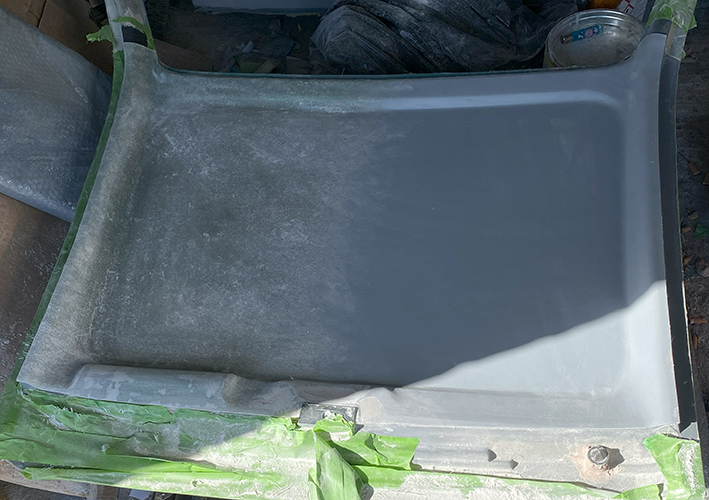
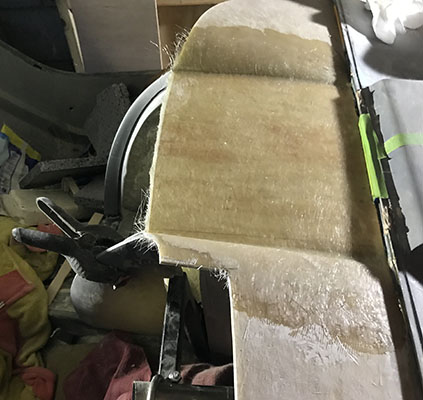
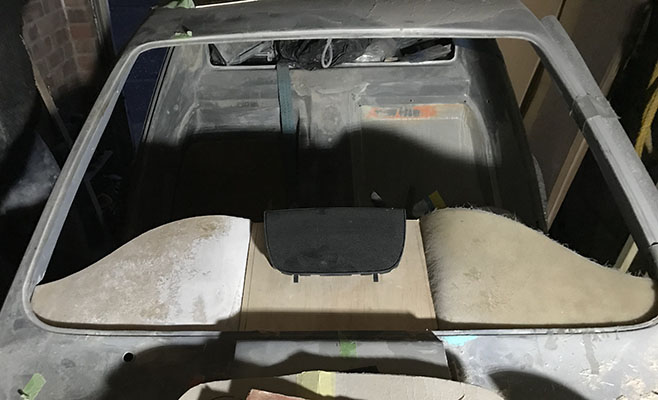
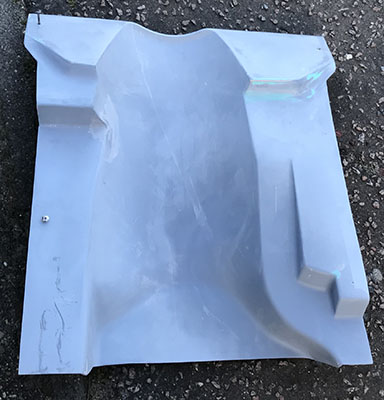
Ceiling panel/head lining almost ready to go to the leather trimmers after 200 random holes are drilled for fibre optic strands.
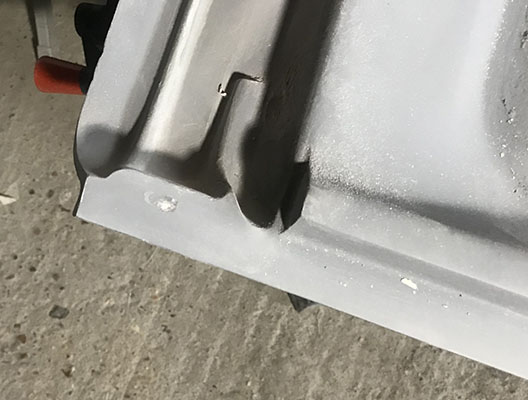
Trimming of body work bottom panels
Reversing Gearbox lever cut out glassed back in


Speaker tweeters being mounded into canopy upright post covers

Canopy upright post covers - these are being covered in leather

Both side speakers housings being moulded in

Side speaker mount moulding taking shape
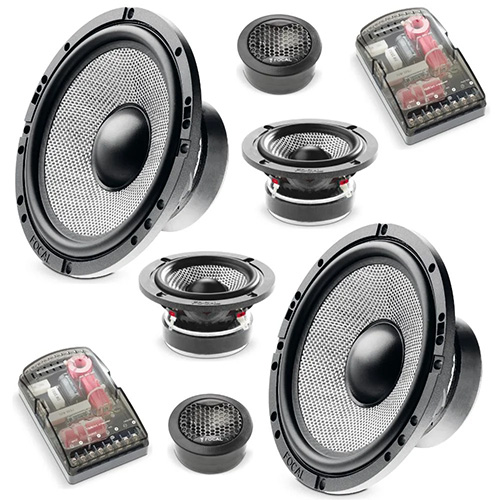


New side speaker mountings being moulded into body side using 18mm plywood


New driver seat panel insert to make new trap door for amplifier housing box

New passenger seat panel insert to make new trap door for ECU housing box


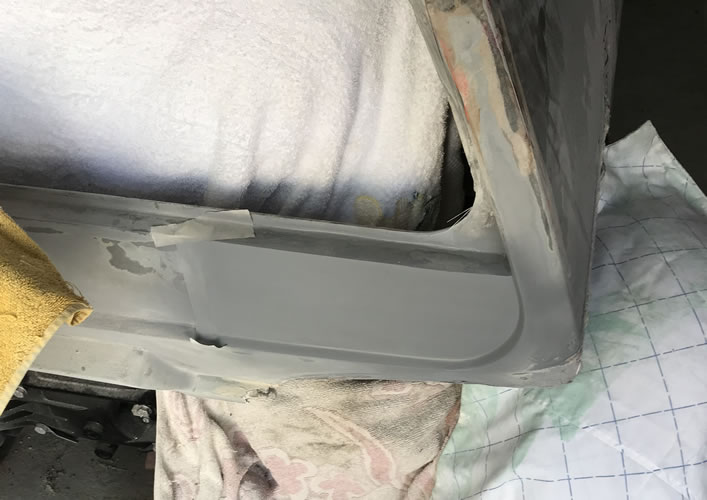
Detailing of sides

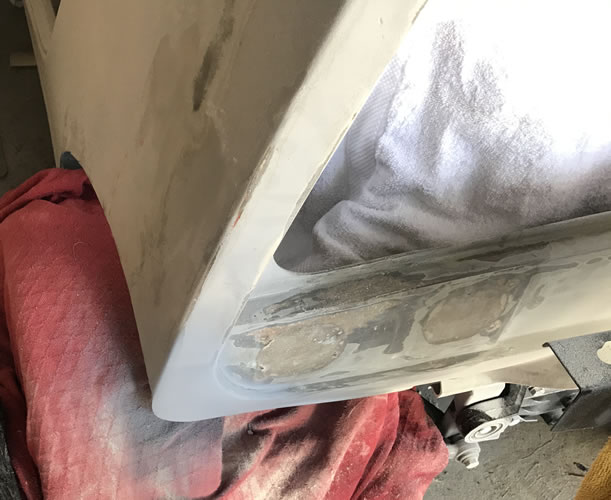
New side mould made to repair skirt
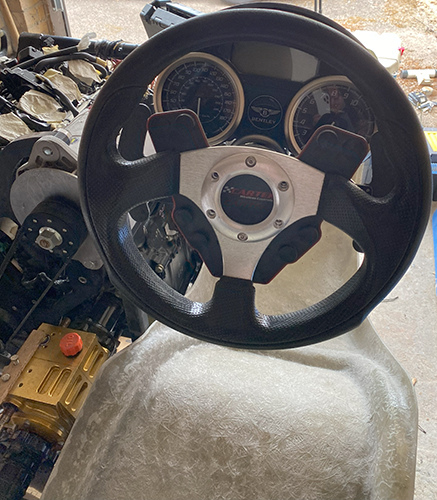
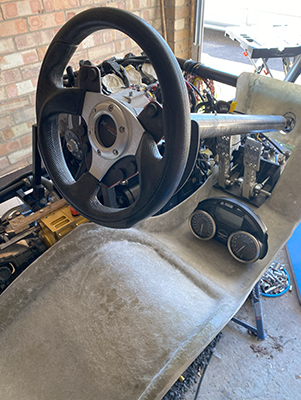
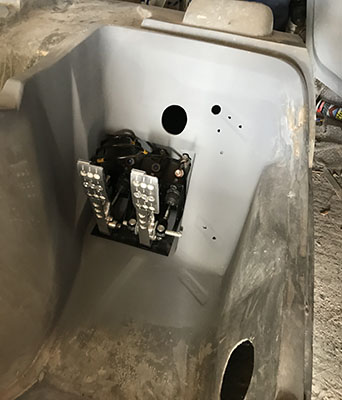
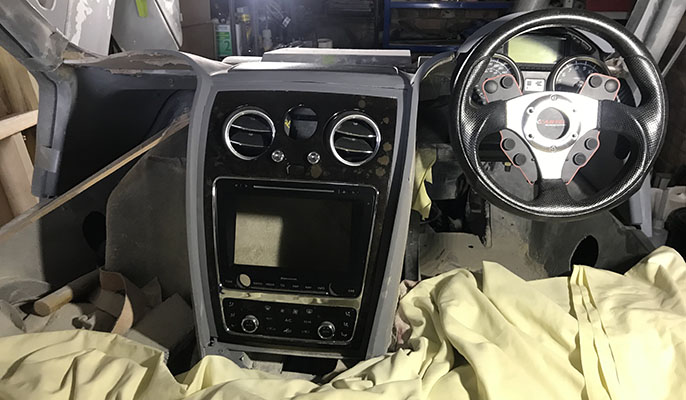
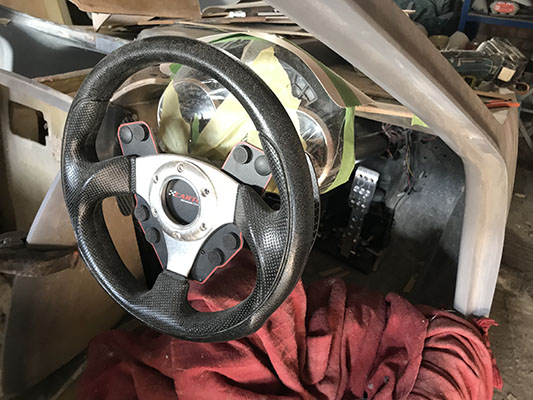
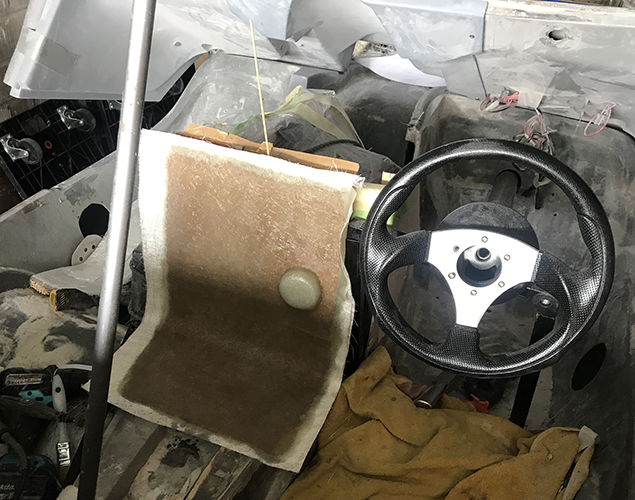
Test seat dials and flappy paddles fitted
Rubber mounted the test seat
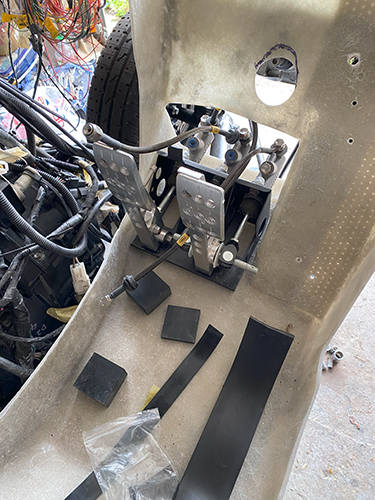
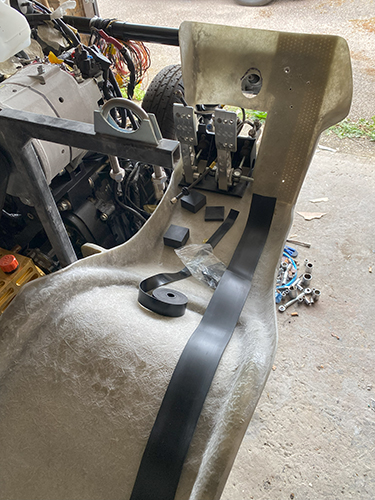
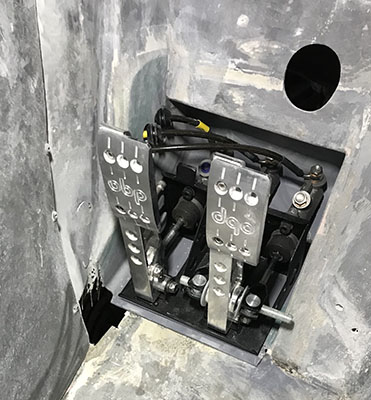
Test fitting of pedal box
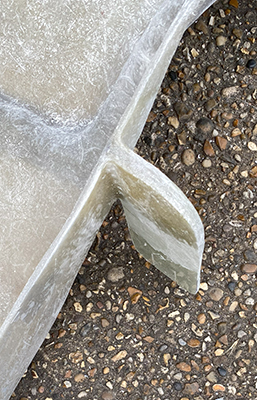
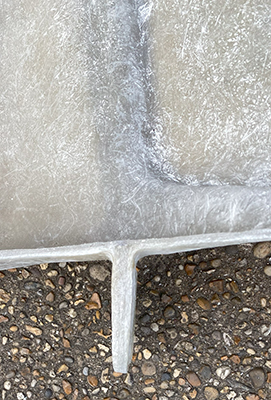

New seating - really strong tang added to secure seating unit to frame for testing
New seat losely laid in position
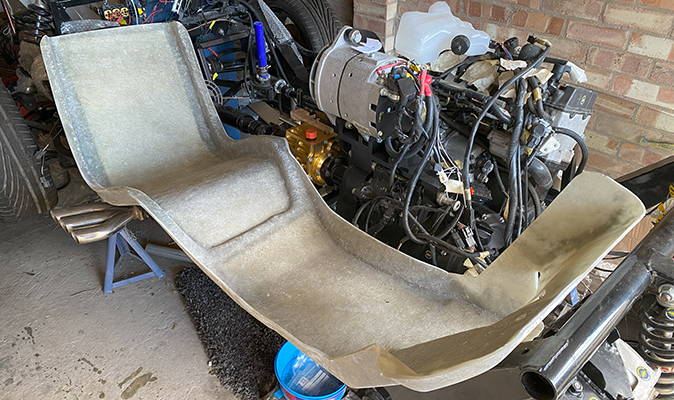
New seat made for road testing on new frame and engine
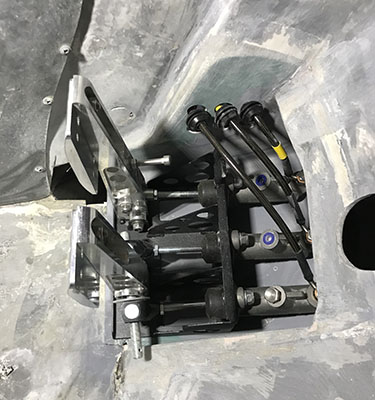
New fibre glass drivers seat and pedal box under construction. This will removed from the body and transferred to the engine and new frame set up so it can be tested like a go kart without the body being on.
I need to do serious testing of the overall handling, damper settings, brake balancing, paddle shift steering wheel, quickshifter etc prior to the final body going back on.
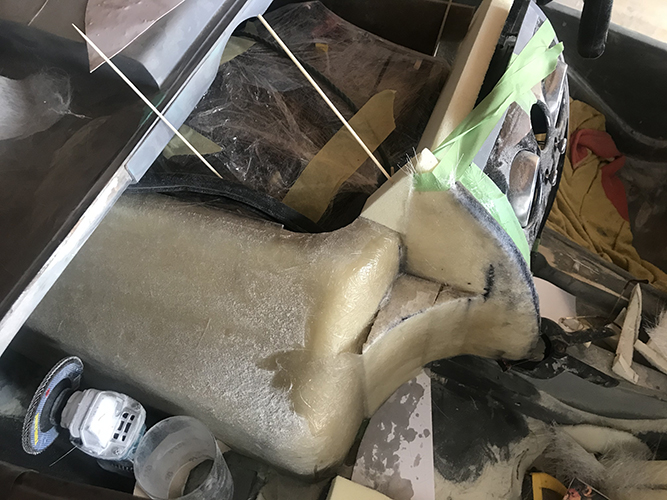
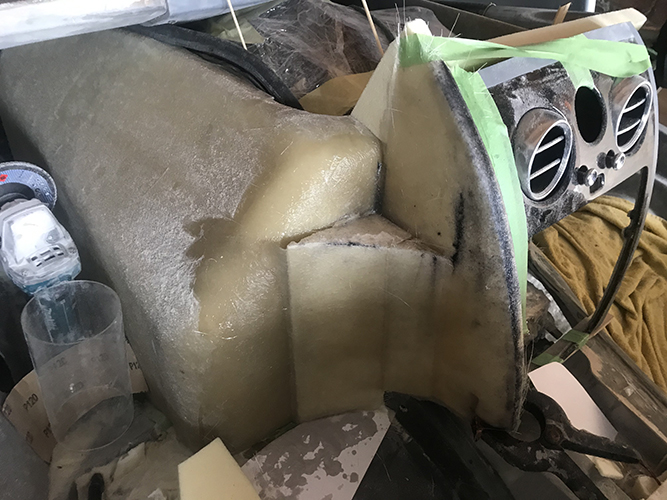
Airvent side surround moulded in foam ready for fibregalssing


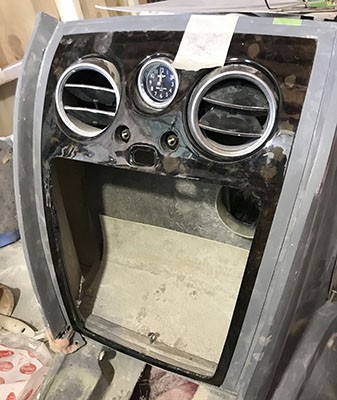
Modded Bentley air vent on dashboard
Right front dash speaker fitted and Bentley air vent cut to suit


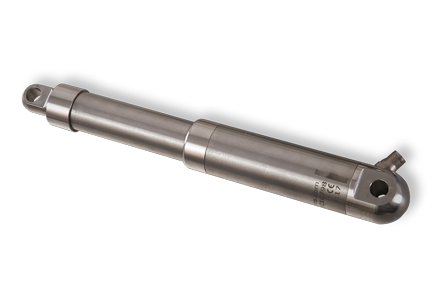
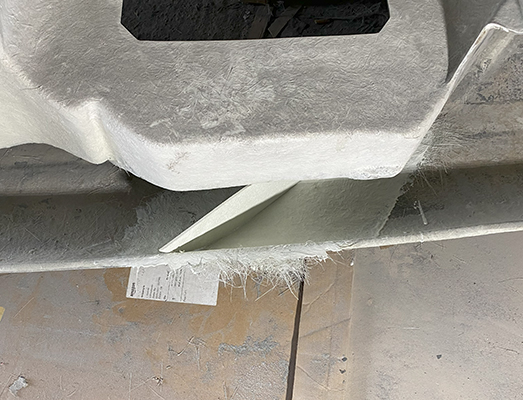
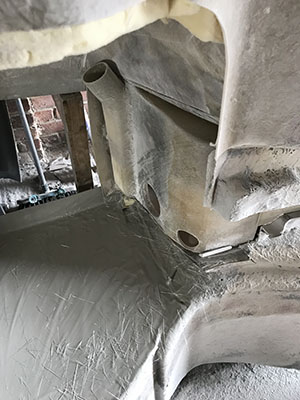
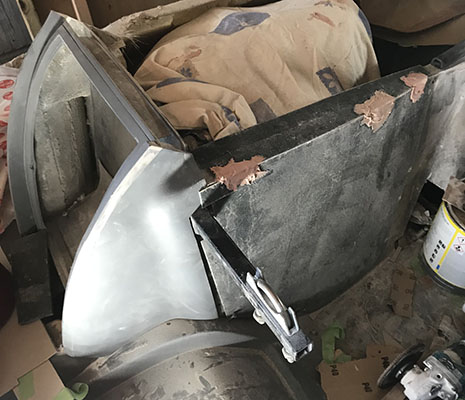
Internal canopy actuator bottom support brackets mocked up in fibreglass. These will now be copied in 4mm thick steel plate with a welded construction.
The finished metal bracket will be bolted to the already reinforced main body. The new metal support bracket will have a welded captured nut to support the actuator pivot bolt.
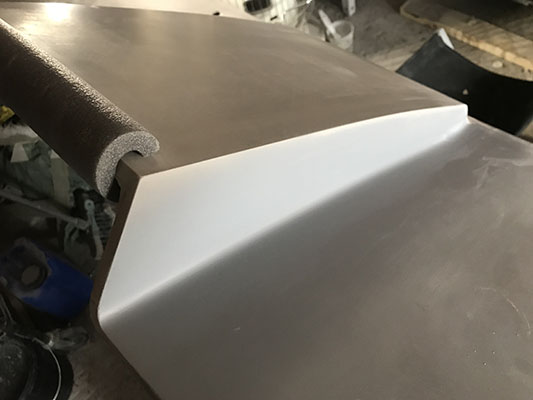
Canopy scoop inner detailing


Actuator mount moulds to make fabricated metal inserts and mounting plates - note the tricky curved shapes
Canopy actuator mounts
Actuator internal body side mount construction
2nd bottom canopy actuator mount finished

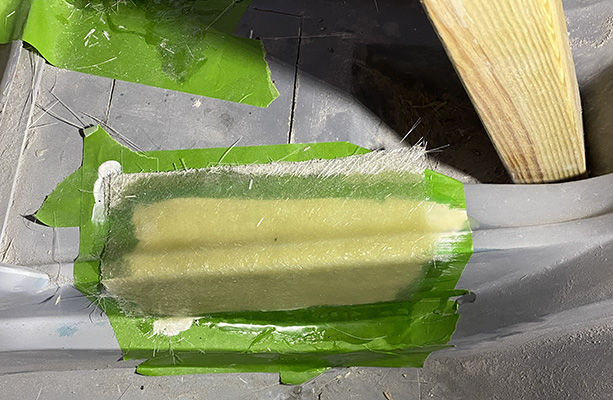
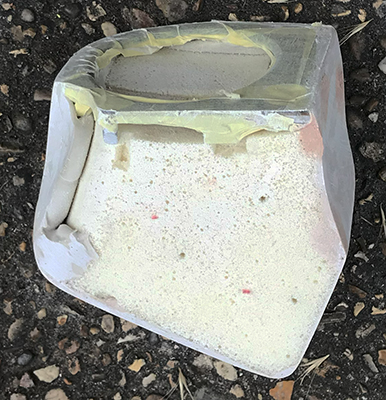
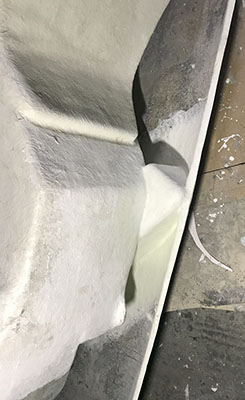
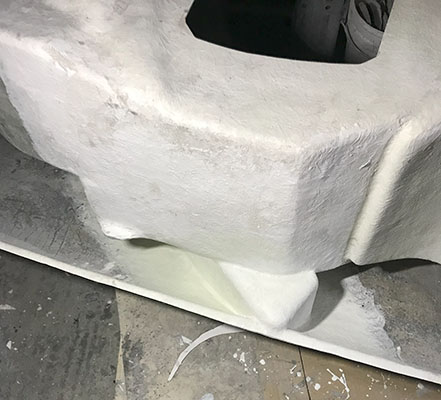
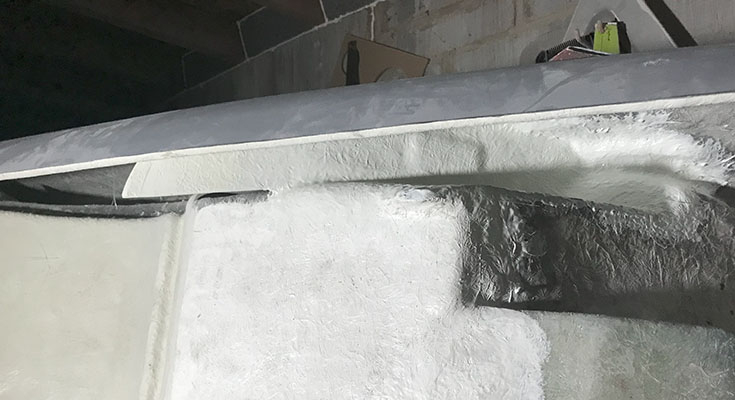
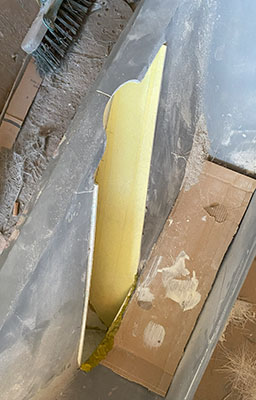
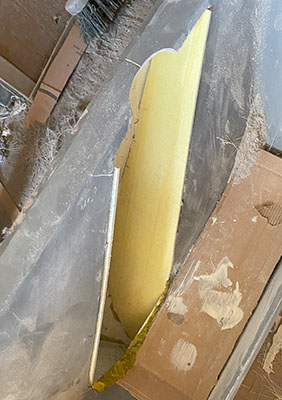
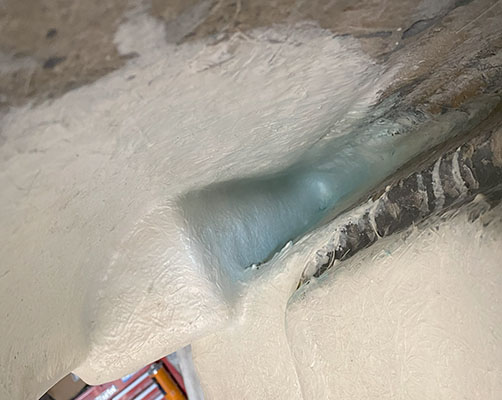
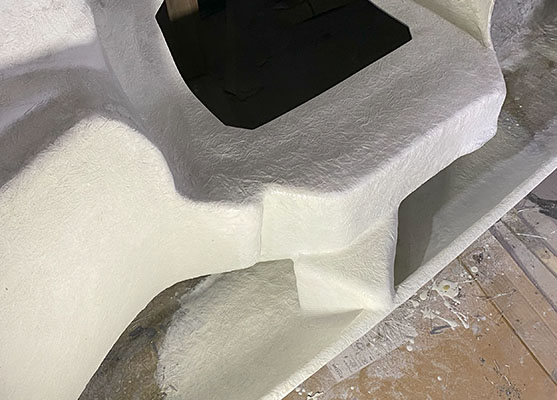
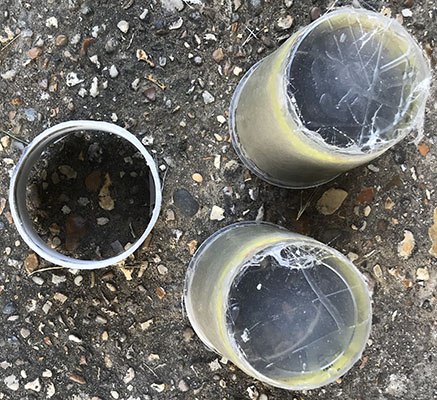
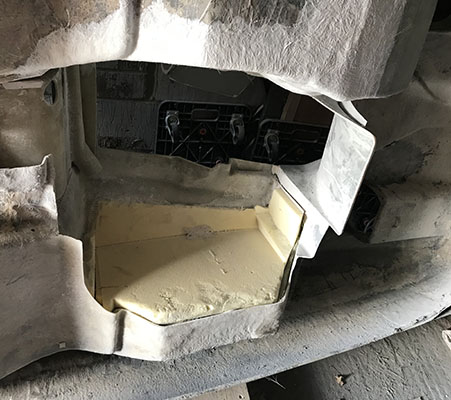
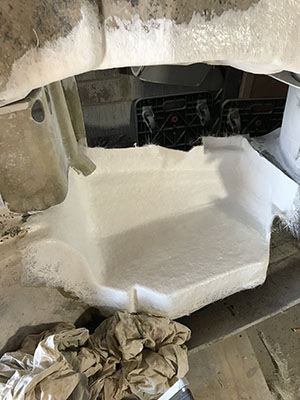
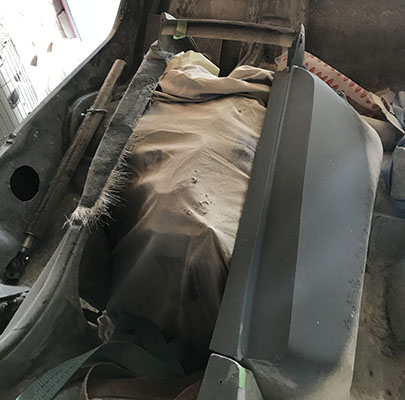
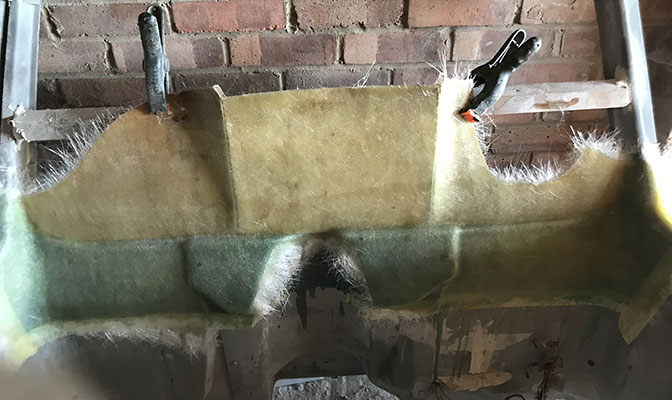
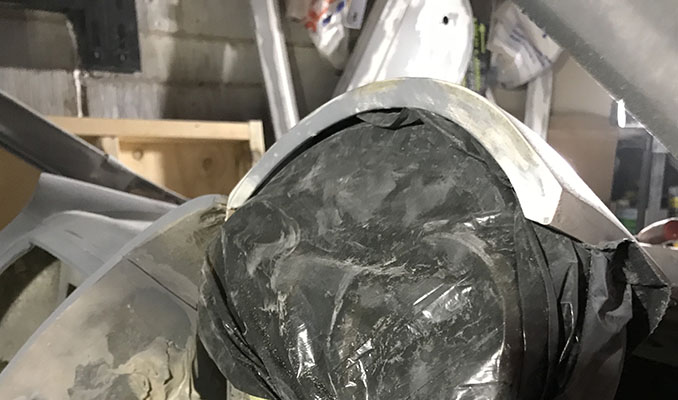
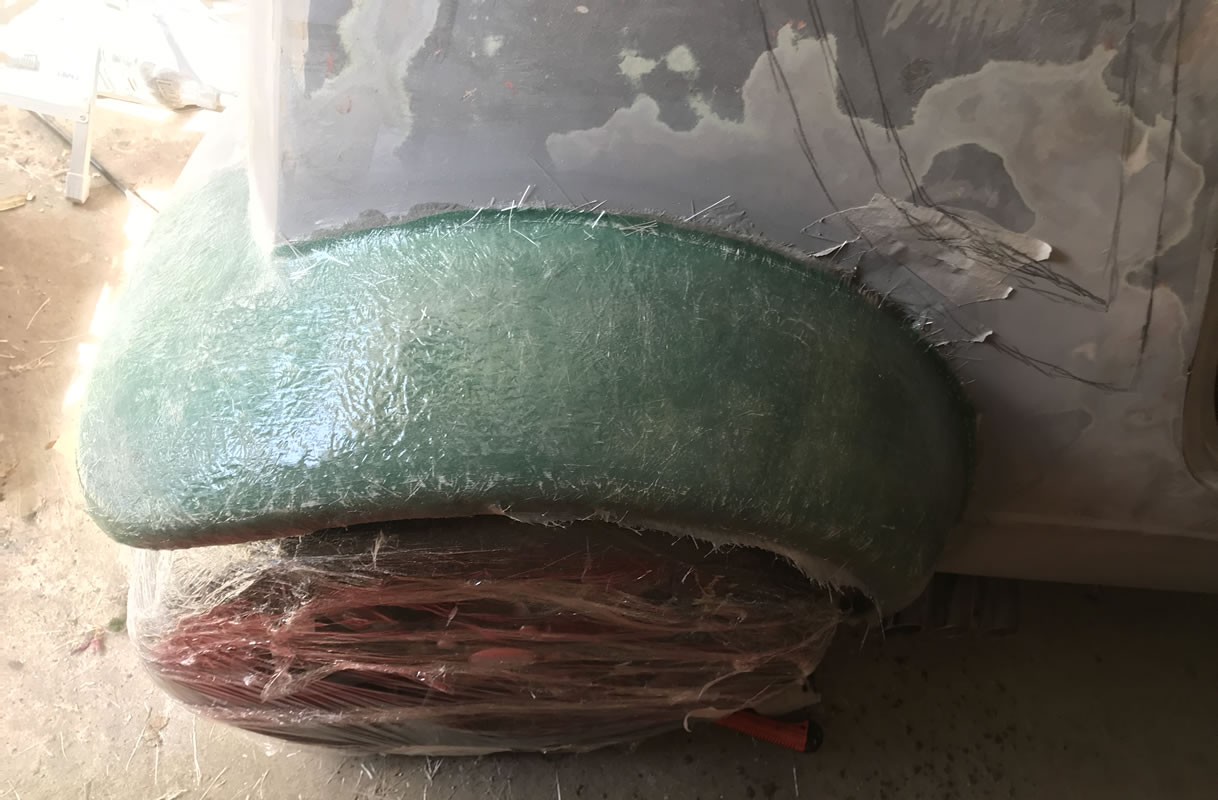
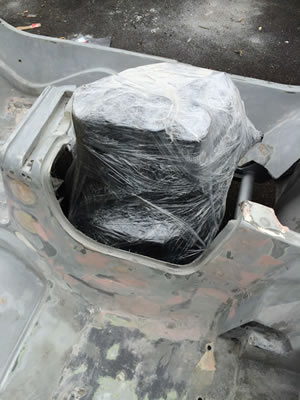
Super strong canopy now - filled with expanding foam from top to bottom
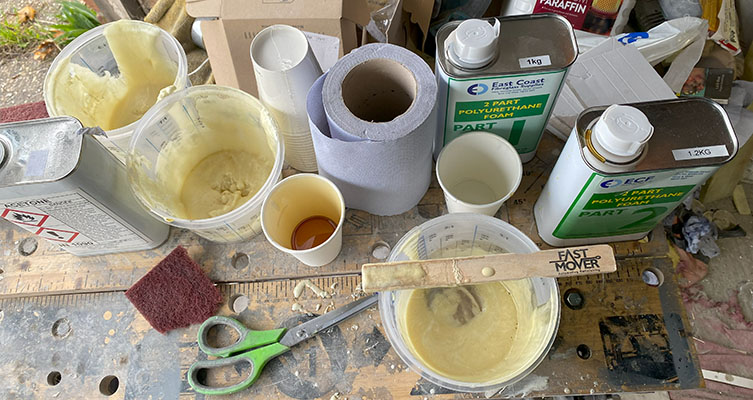
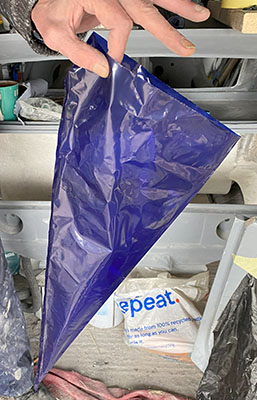
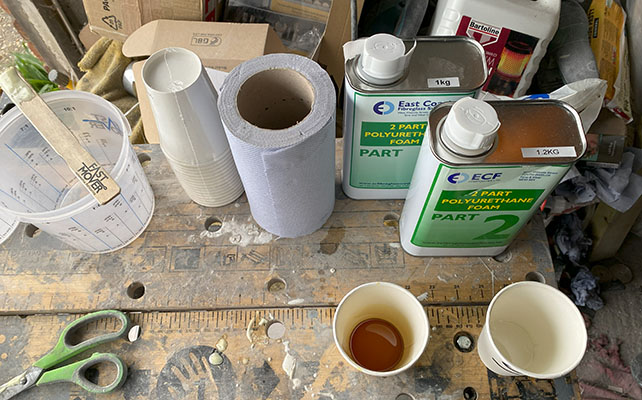
Two part liquid foam used with a plastic icing cake bag
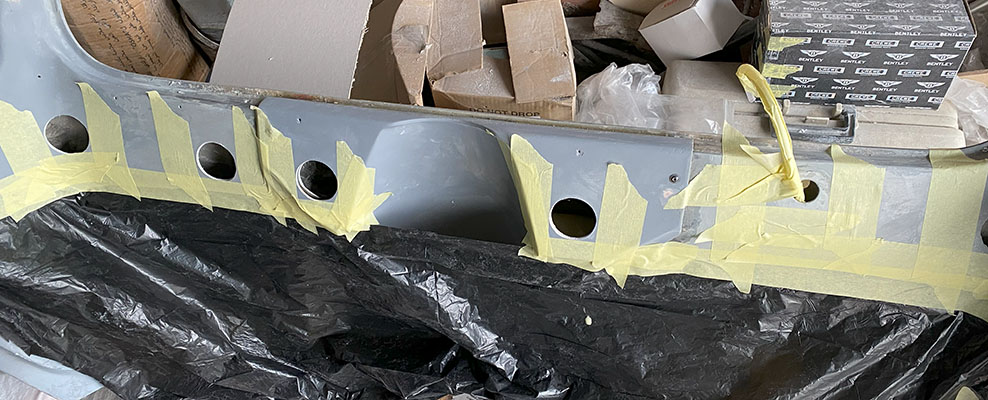

Access holes drilled into underside of canopy for foam filling.
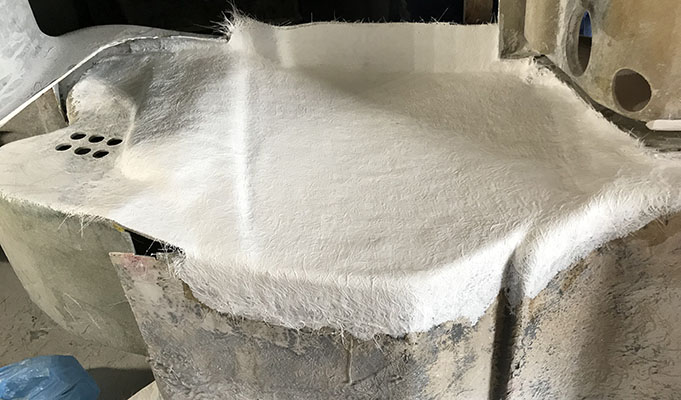
Inner actuator boxing being glassed
Massively strong actuator bottom mount
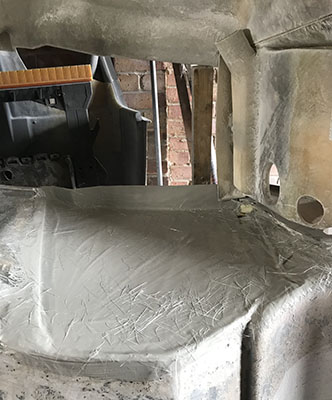
New dual canopy lifting actuators supports being fibre glassed into place. Inner super strng box being formed inside the wing for the metal mounting pivots.
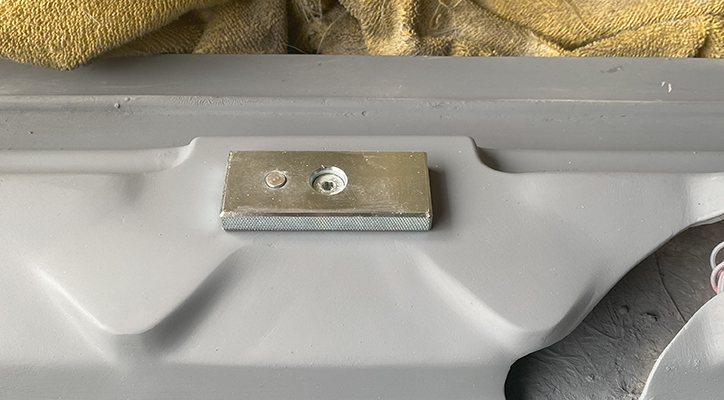
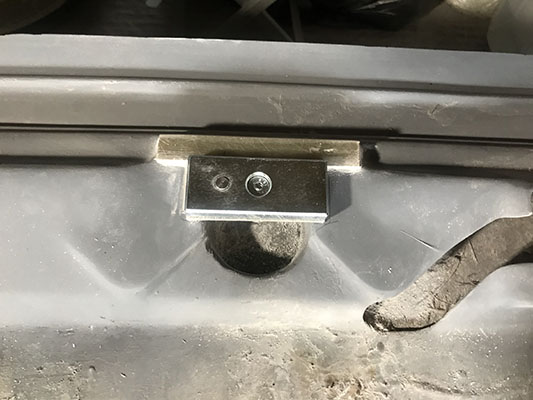
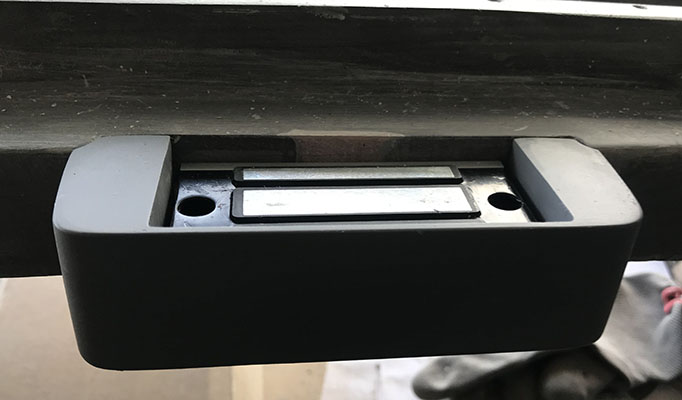
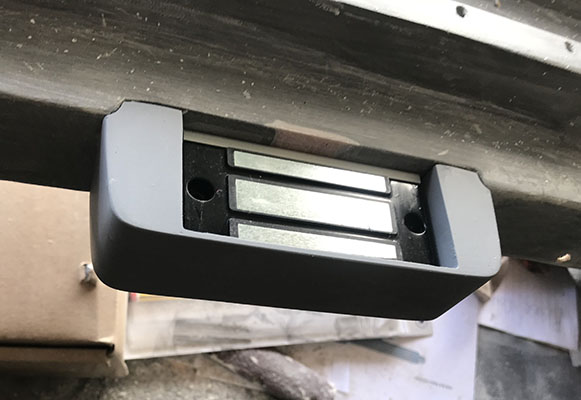
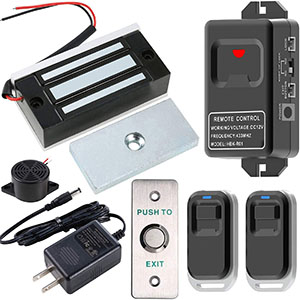
Magnetic Canopy lock plate fitted to heavily reinforced original lock position - this has to be mega strong to take the pull of the magnetic lock
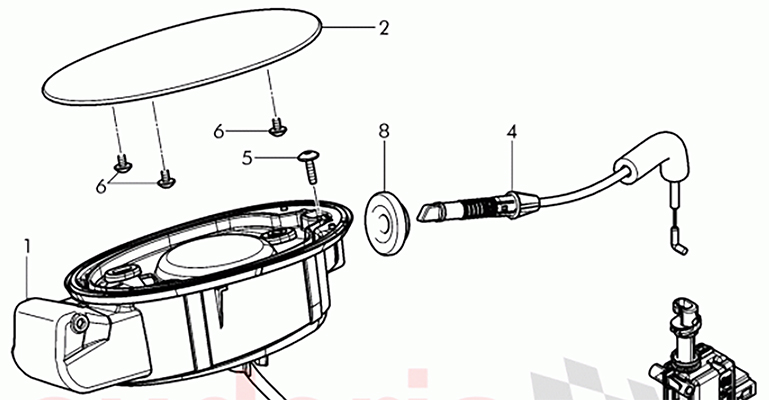
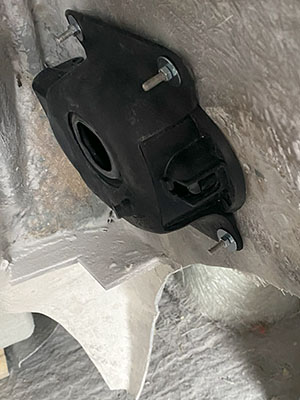
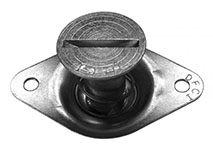
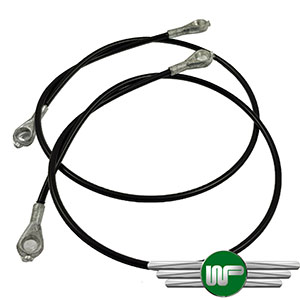
Electric fuel flap operator cable and gromet arrived

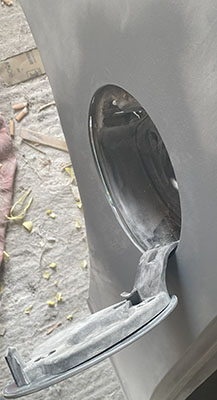
Bentley fuel flap with custom made neck and jewel cap
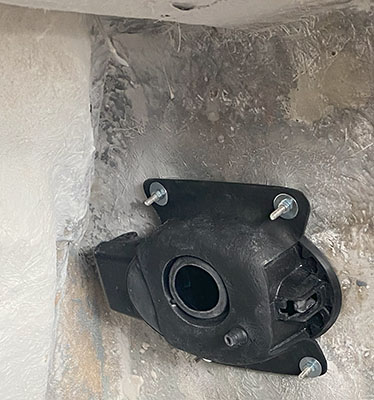
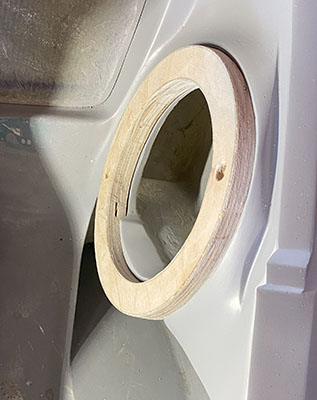
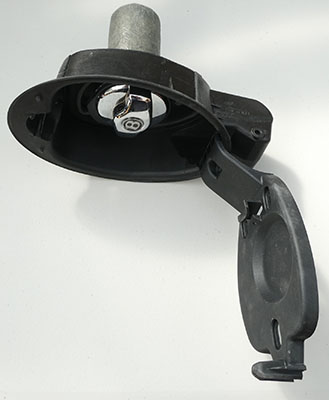
Inner mount now fitted - big head fittings use
Big head fittings fibre glassed in for mounts

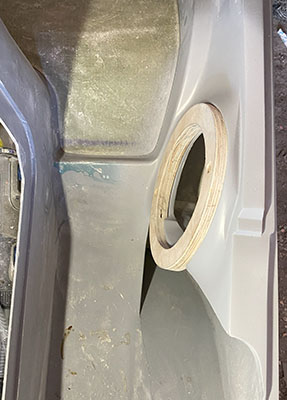
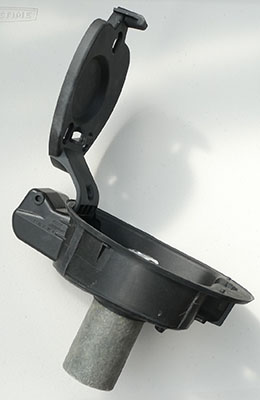
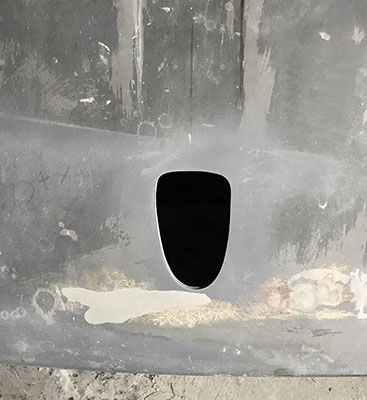
New fuel filler inner mount
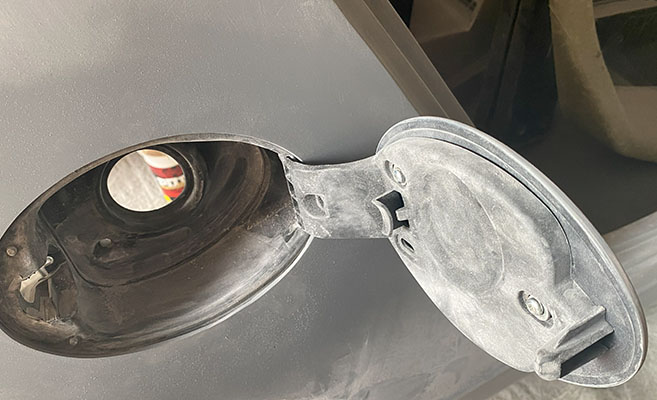

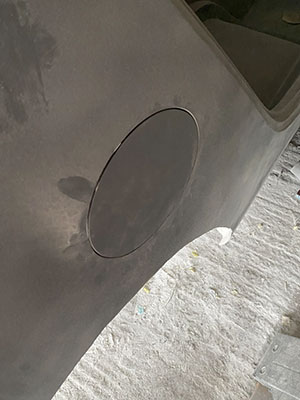
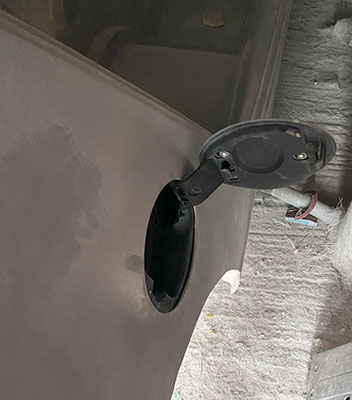
Bentley Continental flush fuel filler door fitted
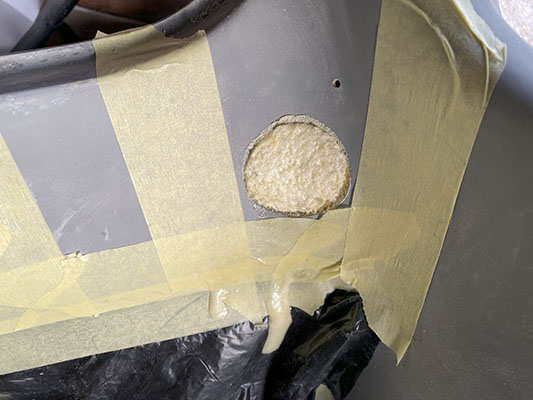
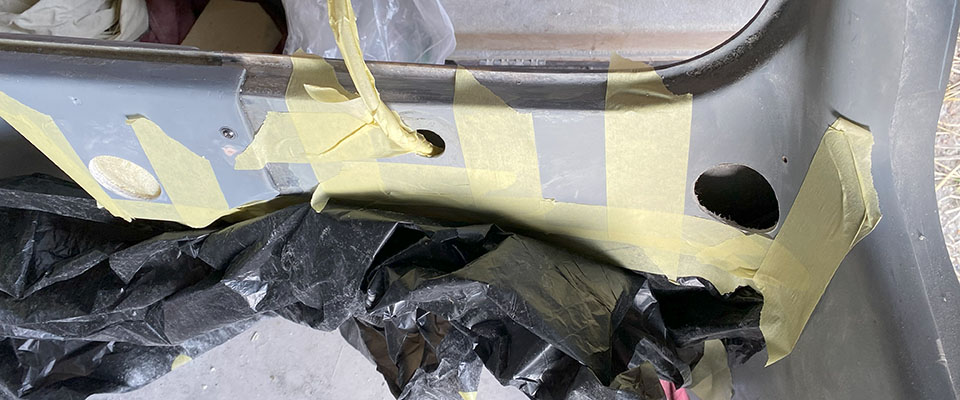
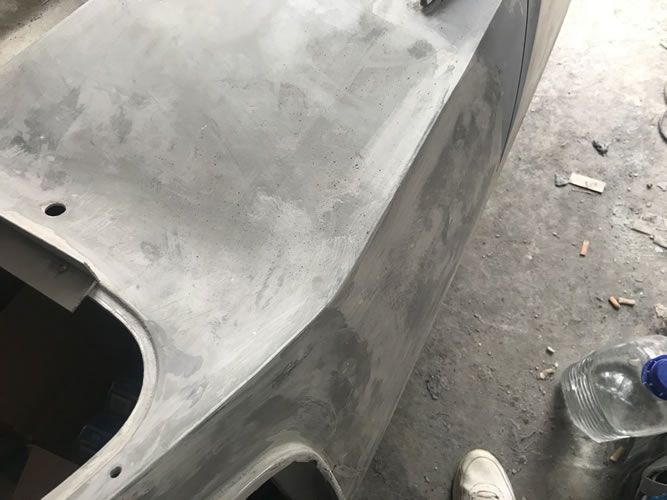
More detailing work
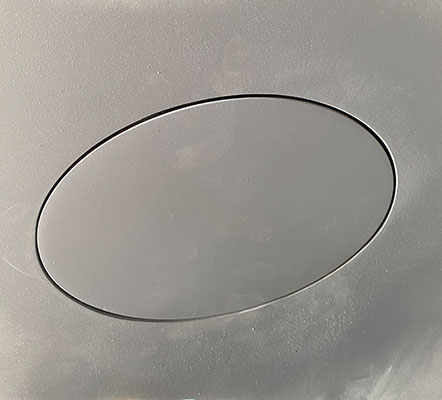
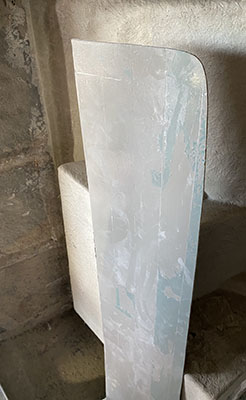
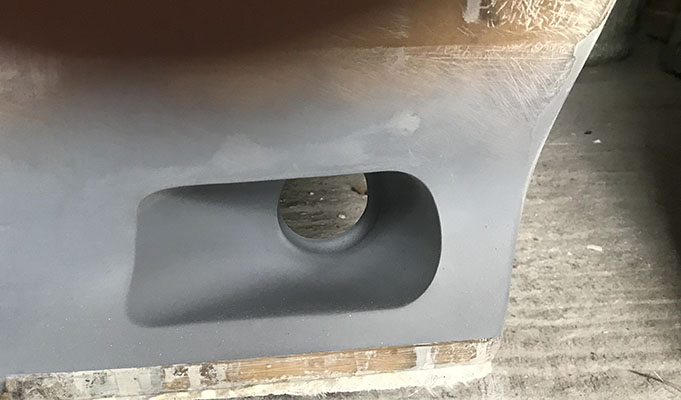
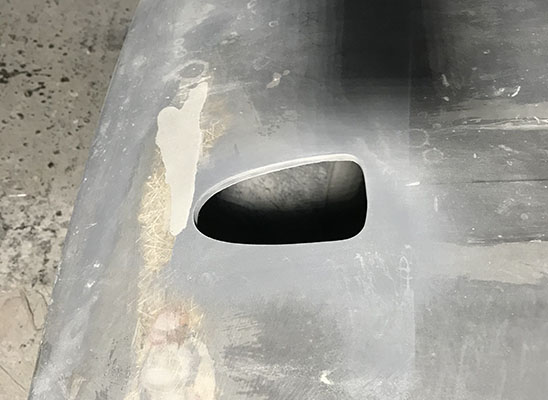
Side detailing finished- fuel hole finished
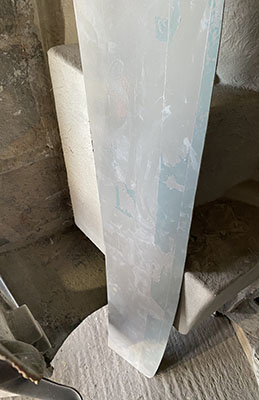
Flattening out side panel for detailing and fuel filler hole now fibre glassed in
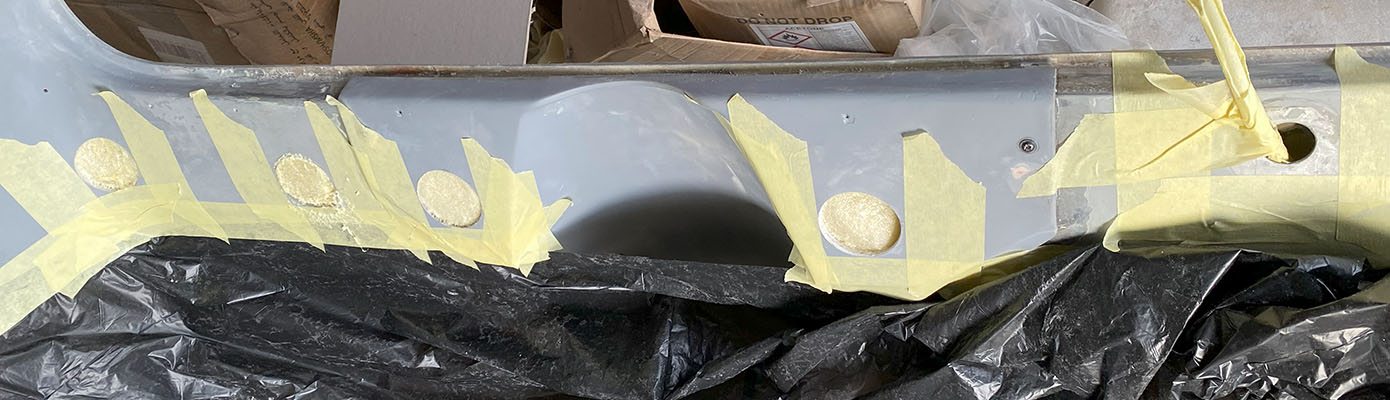
More side detailing work - grinding out star cracks
More edge detailing
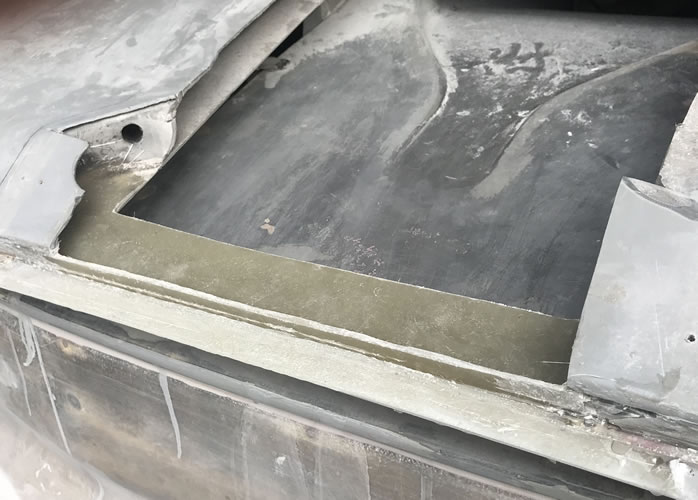
Detailing of rear body edges, new boot floor ready to go in
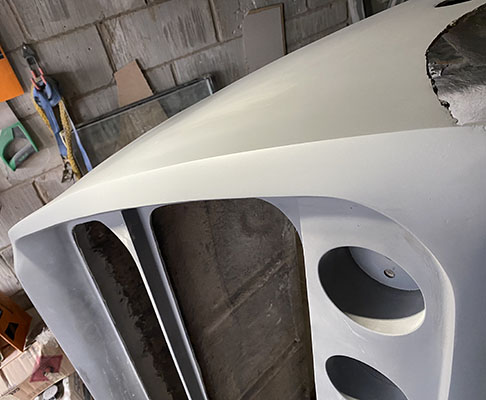
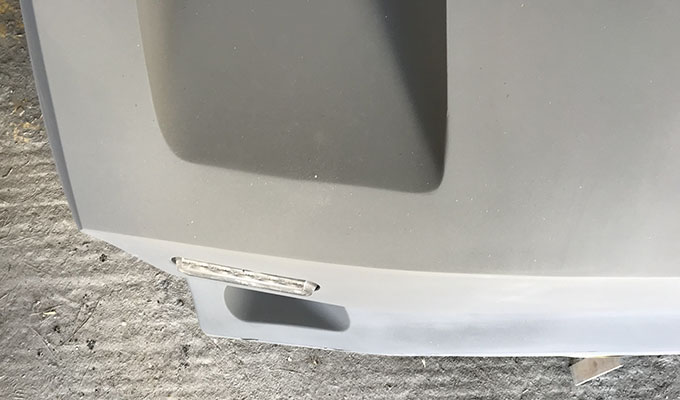
New front indicator recesses fibre galssed in
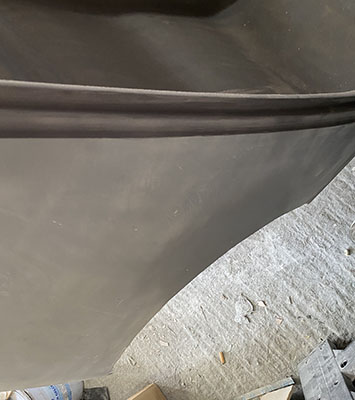
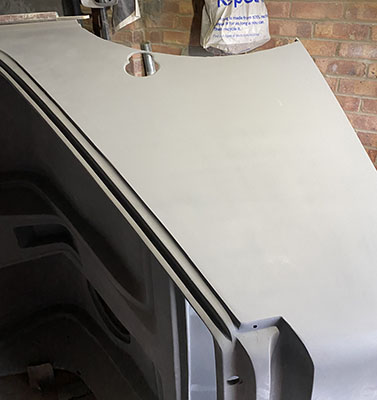
Swage lines detailed
Front spoiler detailed
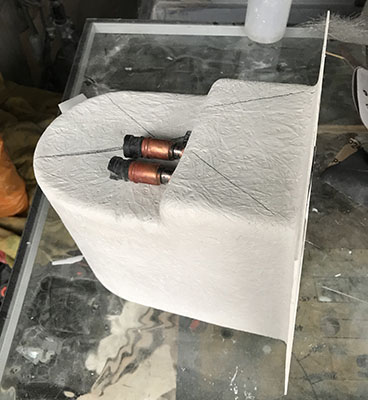
Inner air scoop and indicators fibre glassed in


Parcel shelf now detailed
Bug out ready to flipped onto its side
Headlight cowellings detailed
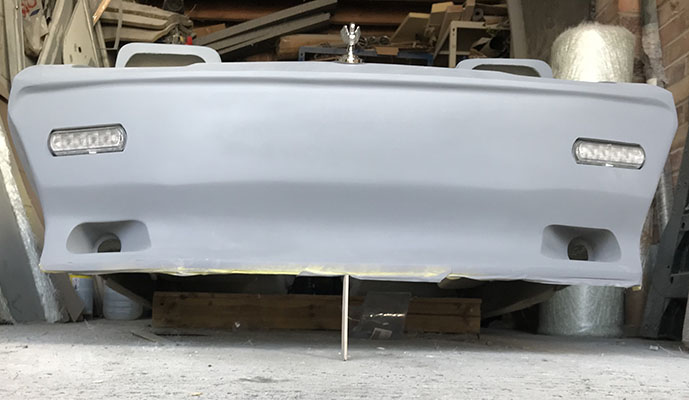
Front indicators and air scoops fitted
New air scoop now moulded into the spoiler - new indicator recessed
Slowly getting there with the mods
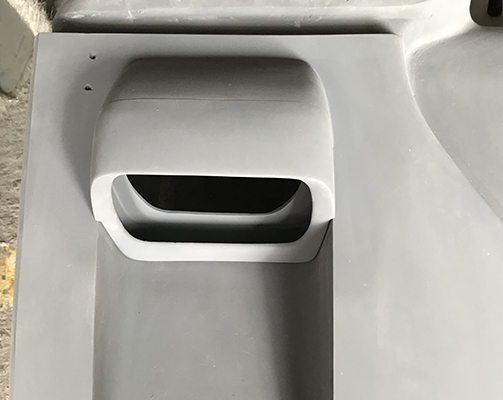
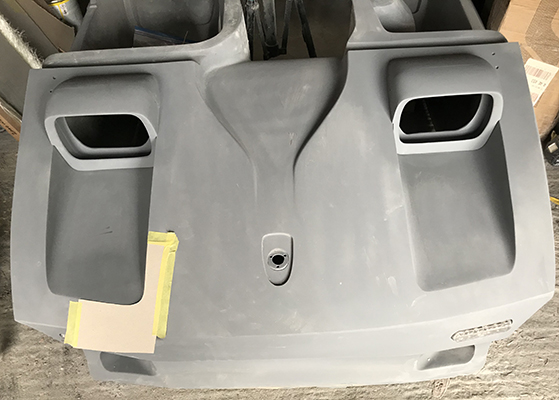
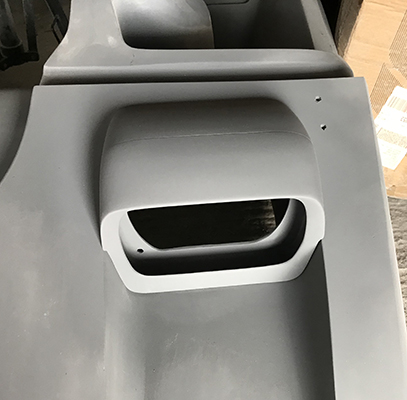
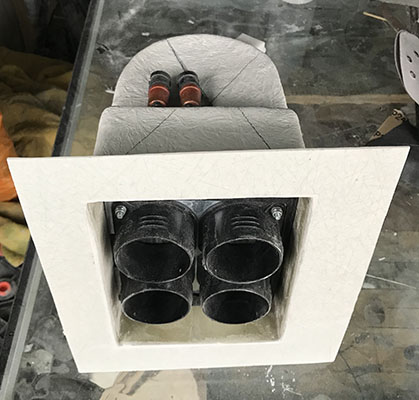
Two new fresh air intakes remade in fibreglass - fitted into front spoiler with ducting for fresh air intake into cabin


Front indicator lenses being recessed into front spoiler - fibre glassed box being made
Light pods moulded in
Four new light pods finished
Rear light pods being constructed
Engine side flaps finished - Using DZUS fasteners to secure panels
Detailing head light and bonnet
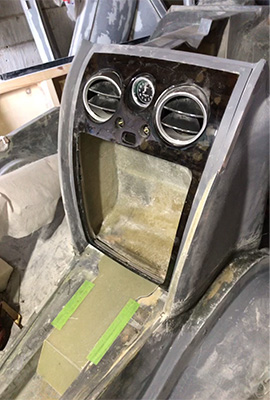
Detailed central console
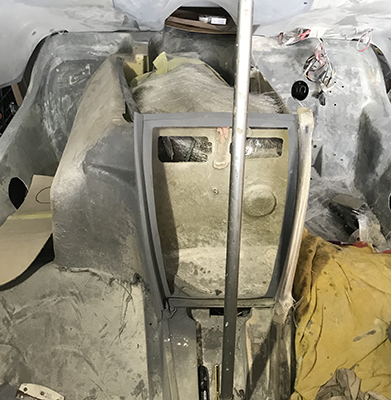
Steering column recess finished


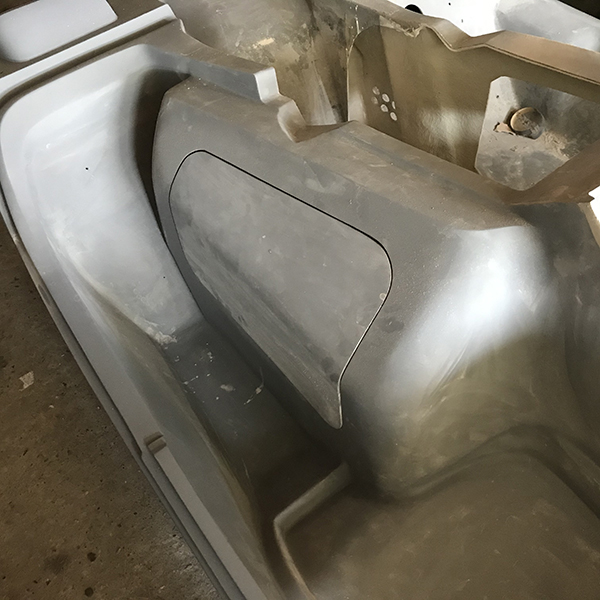
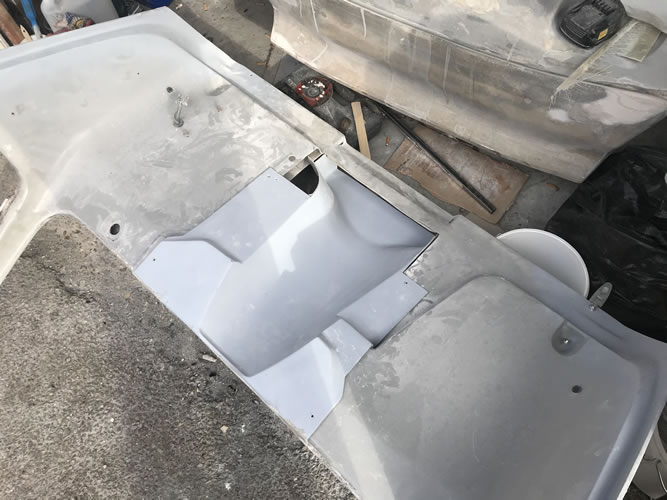
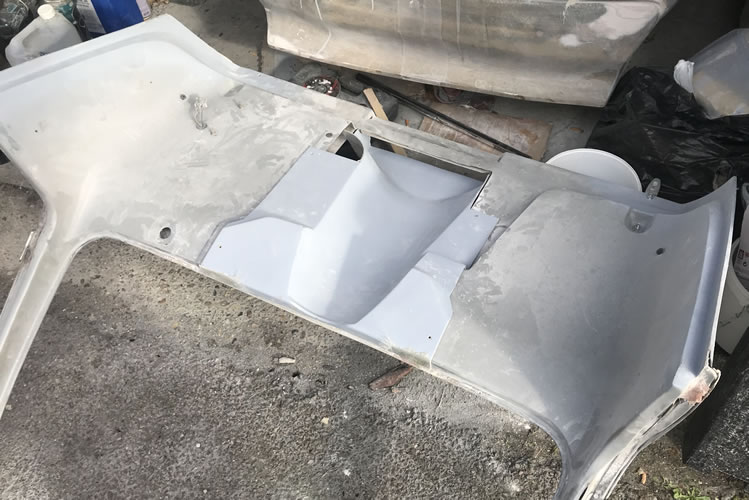
Engine passenger side access panel finished

Engine driver side access panel finished
Engine side cover recess formed- Using DZUS fasteners to secure panels
Engine side covers - using DZUS fasteners to secure.
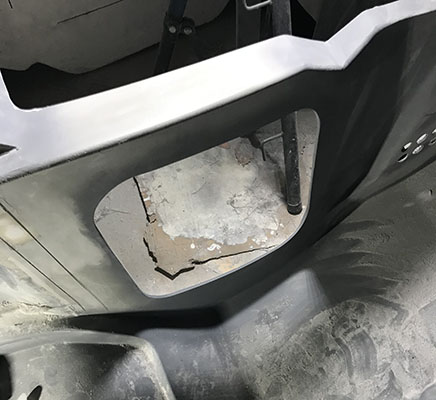
New engine side access covers cut
Heater box finished

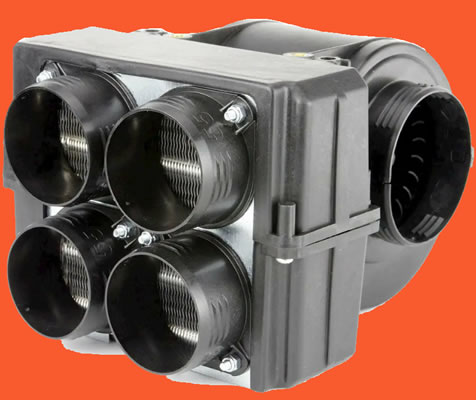
Compact hot water fed heater- triple speed fan
Max air flow 170m3/hour
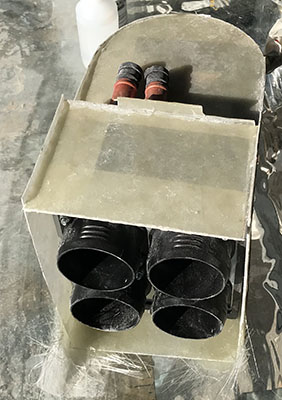
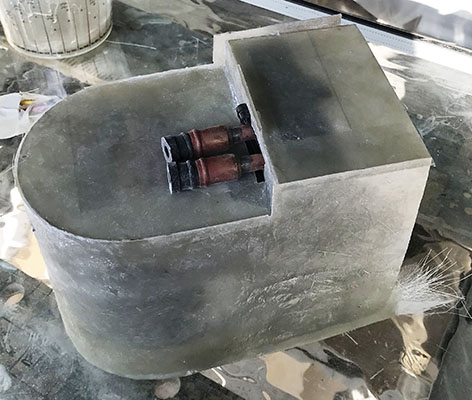
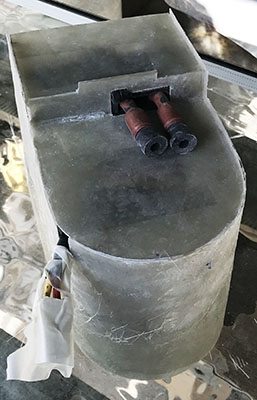
New fibre glass heater box under construction
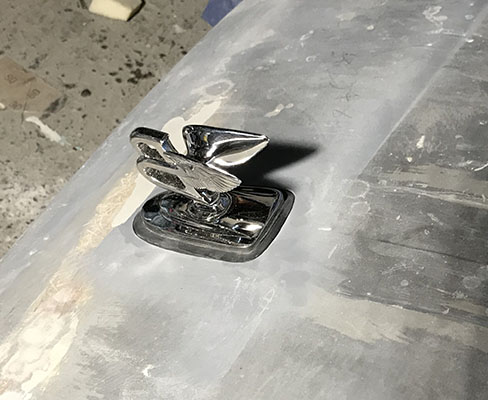
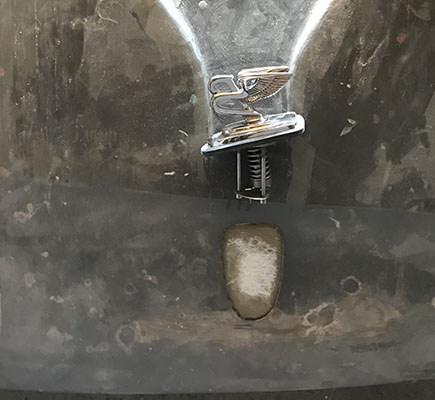
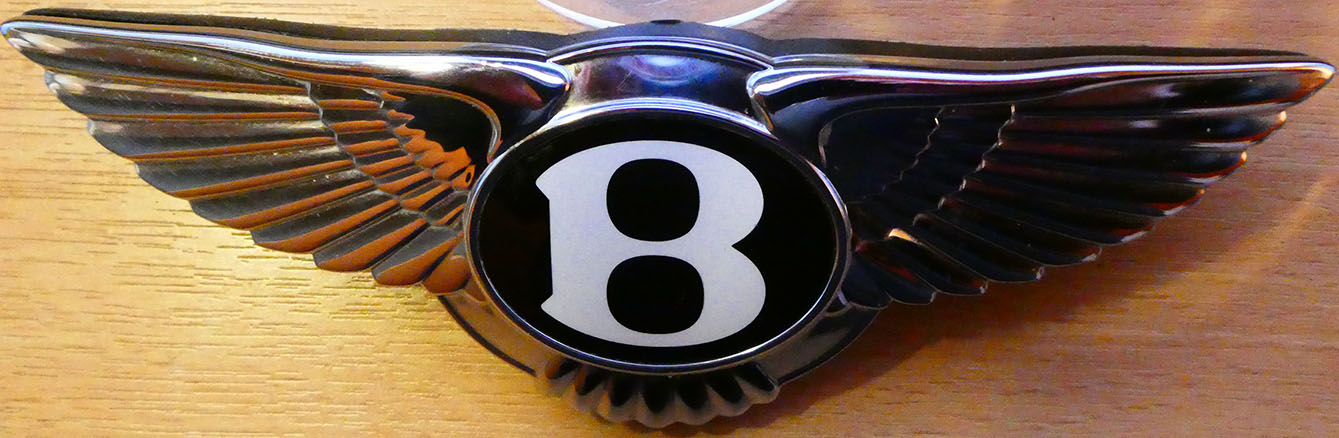
Bentley badge bonnet fitting completed
Headlamps repaired and detailed
Interior detailing
Front spoiler and light fittings repaired and strengthening
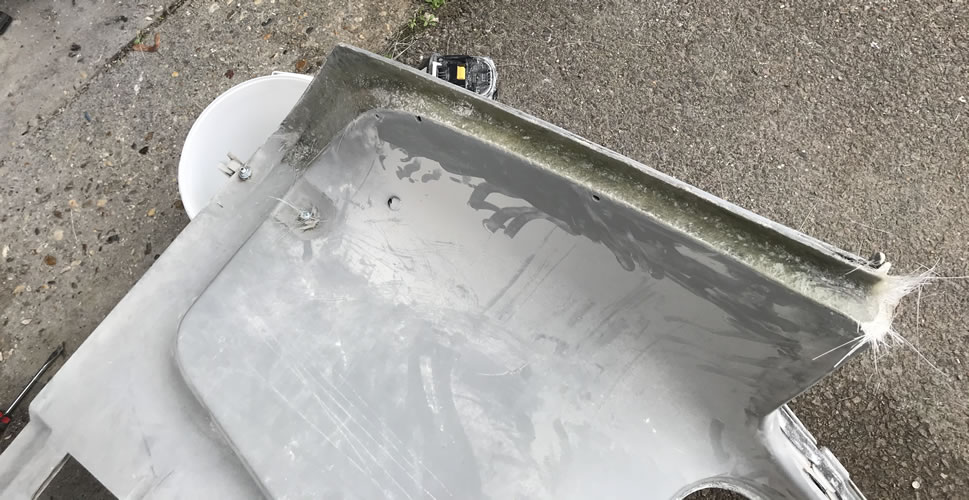
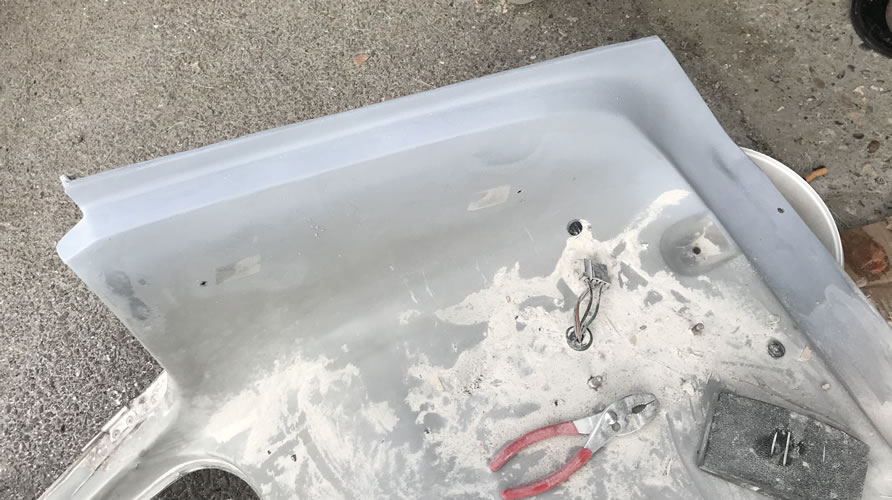
Body side skirts repaired and reinforced
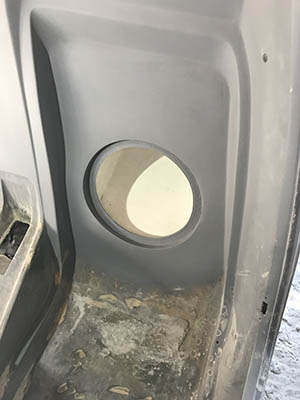
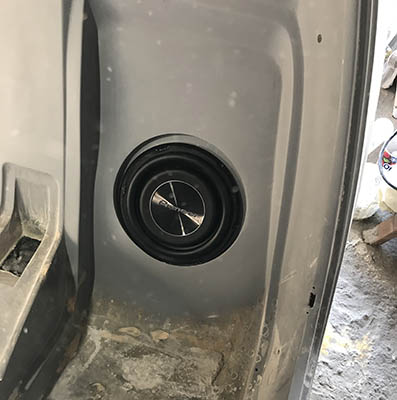
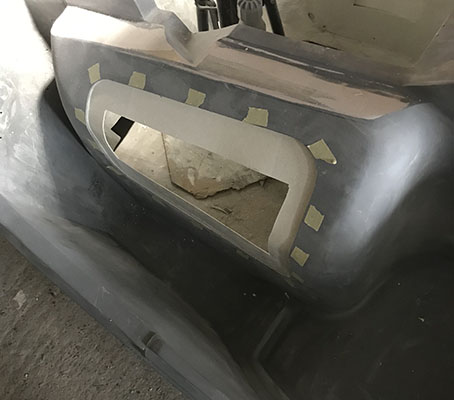
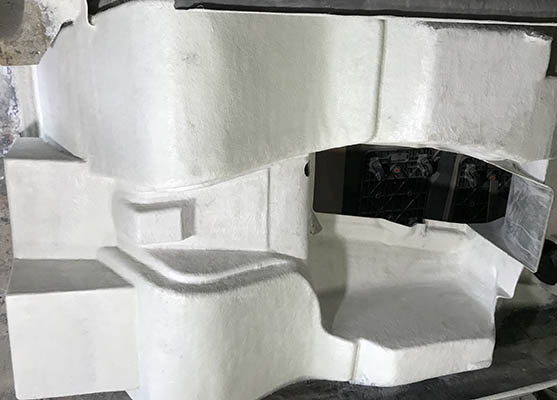
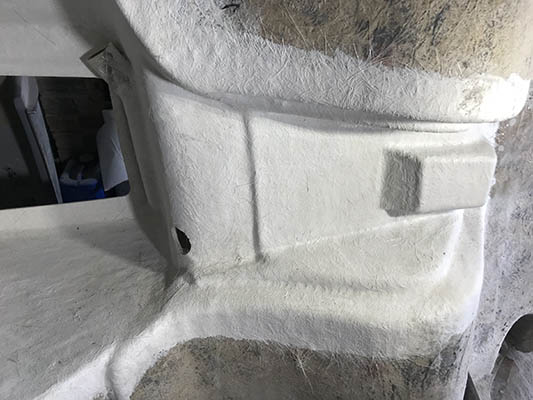
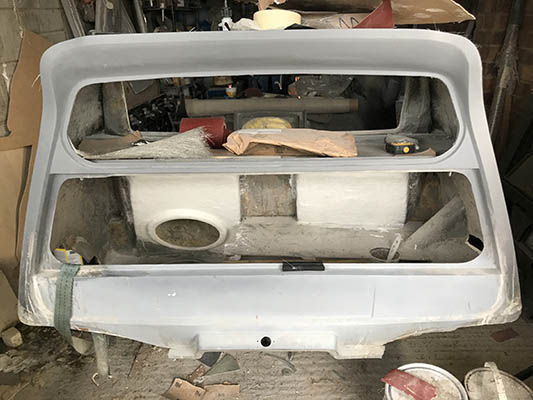
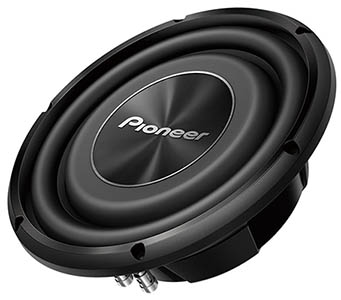
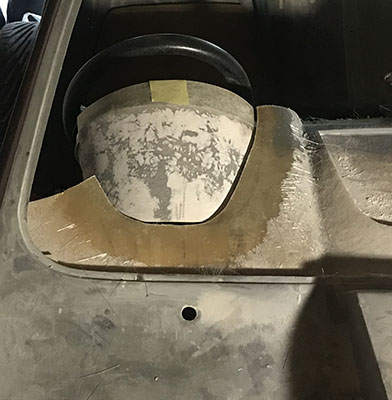
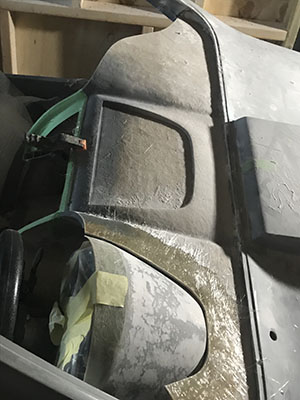
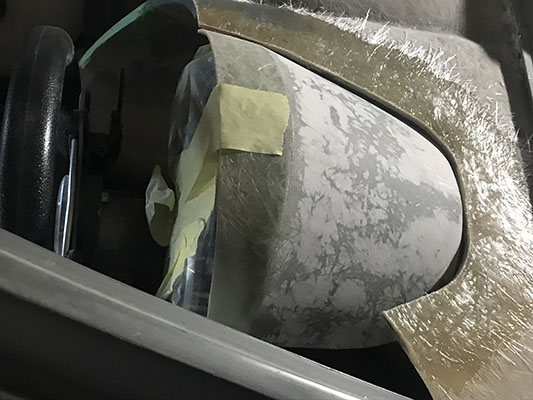
Sub woofer hole and speaker box fitted behind passenger seat finished - sub speaker loosely placed into hole
Correct cubic feet size for sub woofer box calculated for the tricky final shape
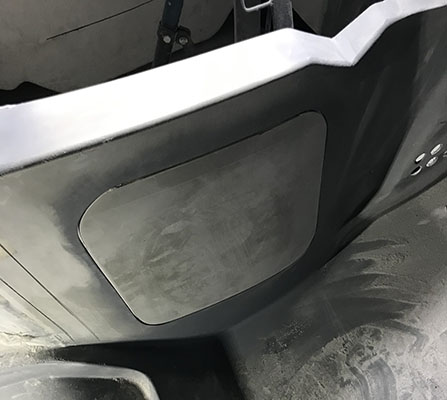
Original side speakers holes filled in

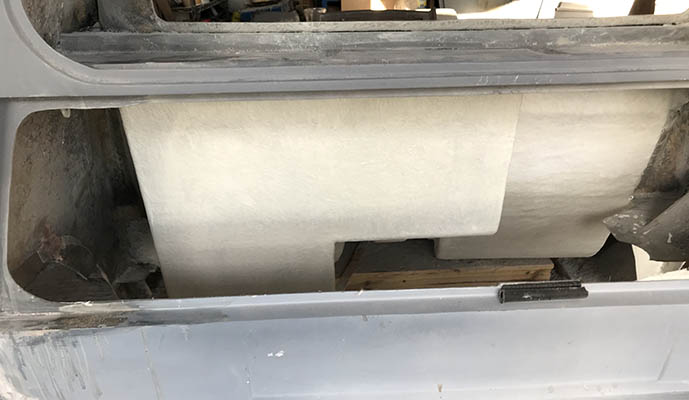
New sub woofer box now fibre glassed into place behind passenger seat
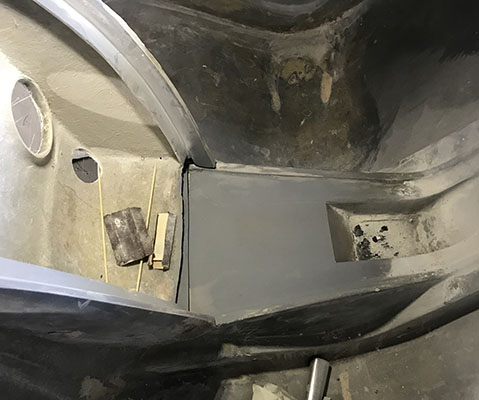
Under body work repairs and body edge strengthening
Bond badge mounting support completed
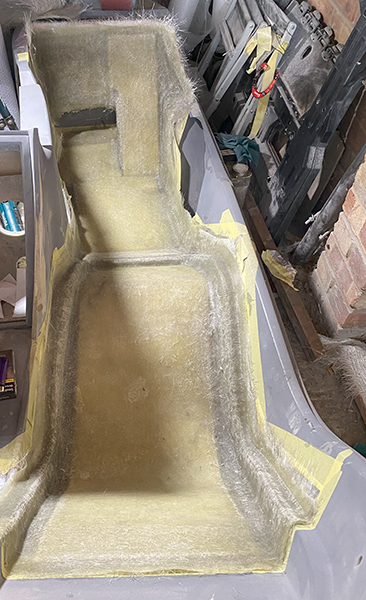
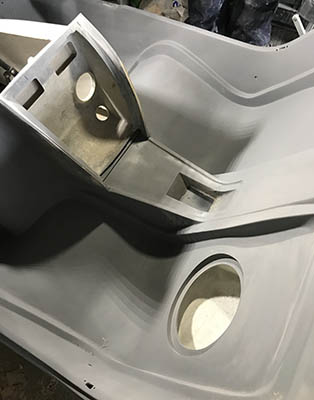
Under body strengthening and centre console/air con duct fitted
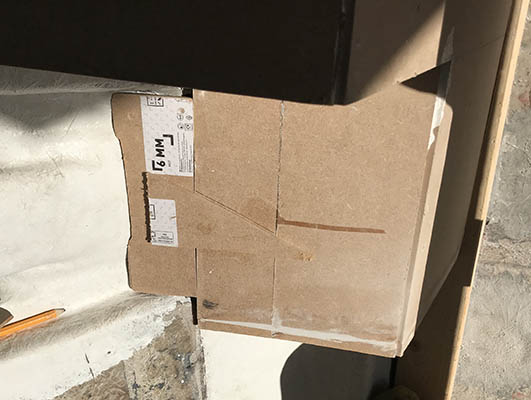
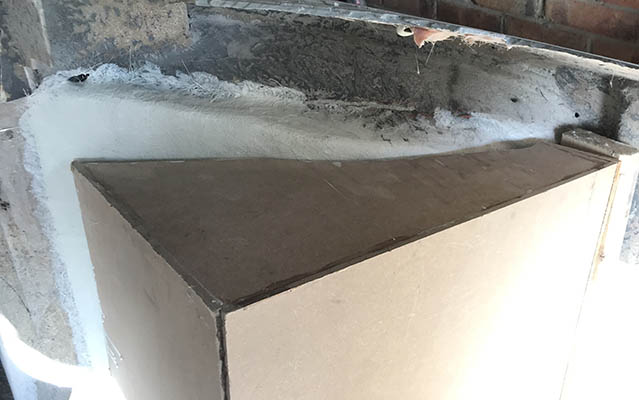
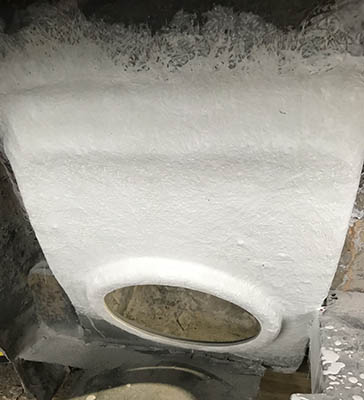
New sub woofer box ready for fiberglassing to boot area - excess to get the correct cubic area for the 10 inch sub woofer trimmed off - Note the thickness of the sub woofer box
Fibre glassing sub woofer box - added strengthening ribs
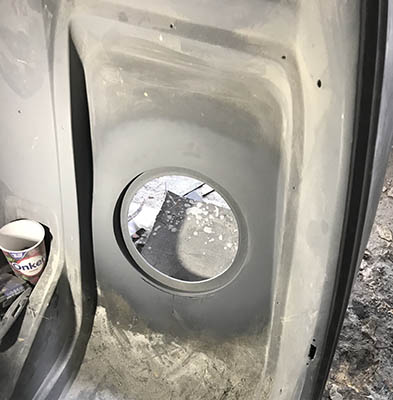
Sub woofer speaker mounting recessed into back of passenger seat. Seat backs are stiffened with 3 layers of fibre glass.
New MDF sub woofer box - correct cubic meter size for sub - ready for fibreglassing to make it more rigid - sub woofer speaker goes in recessed to the back of the passenger seat
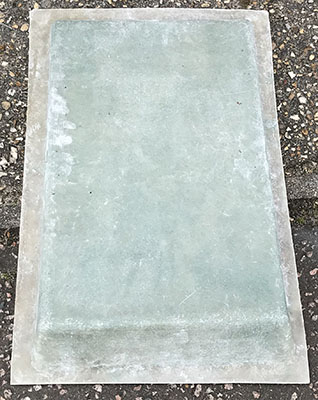
Spoiler now moulded to body work
Finished spoiler out of the mould - ready to attach to Bug
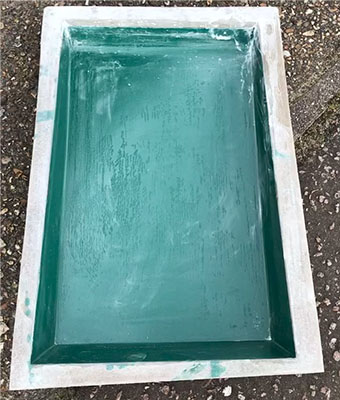
Spoiler mould made
Spoiler mock up ready for moulding
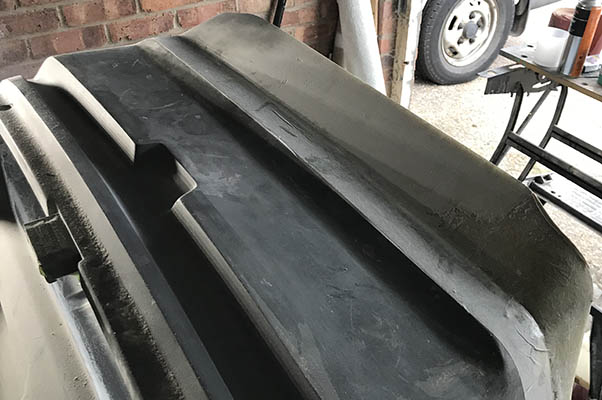
New rear spoiler being shaped ready for a mould to be taken
Previous repairs re- fibre glassed
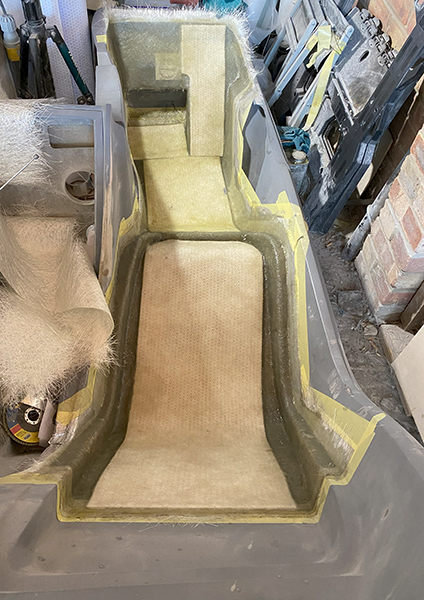
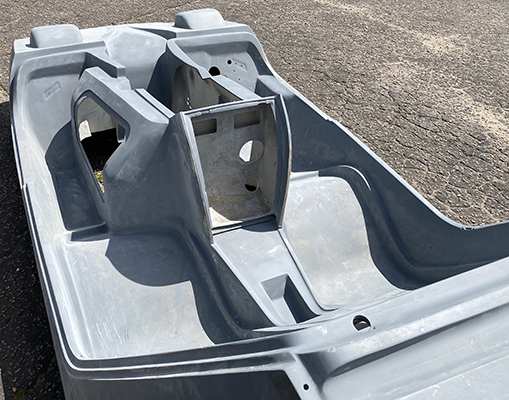
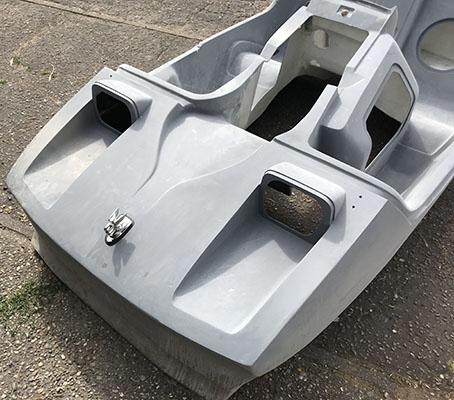
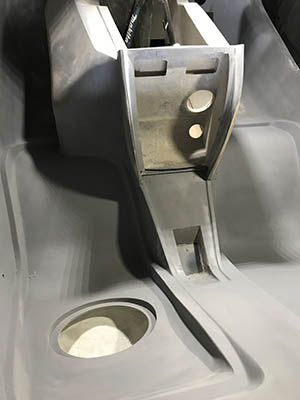
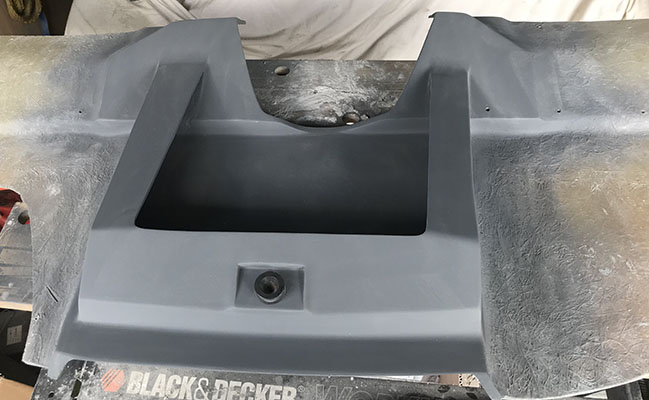
Underbody modifications - new centre console with no manual handbrake or seat belt fixings
Bonnet cut out made for Bond badge - under bonnet has been stiffened to prevent flexing and recess for badge - previous repair cracks properly fibre glassed in
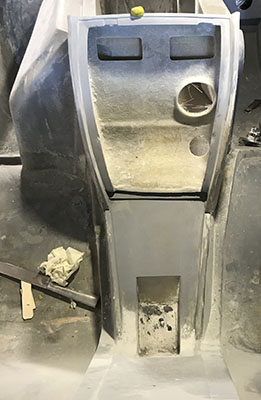
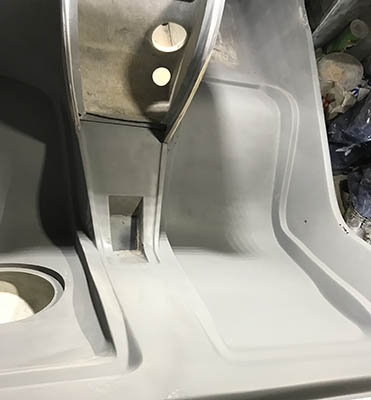
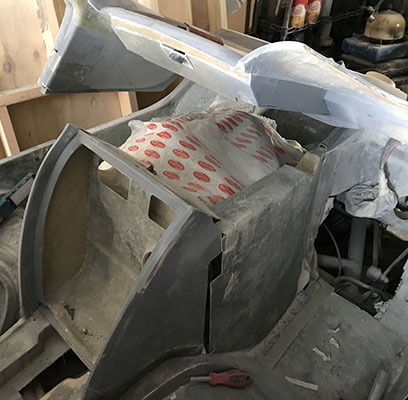
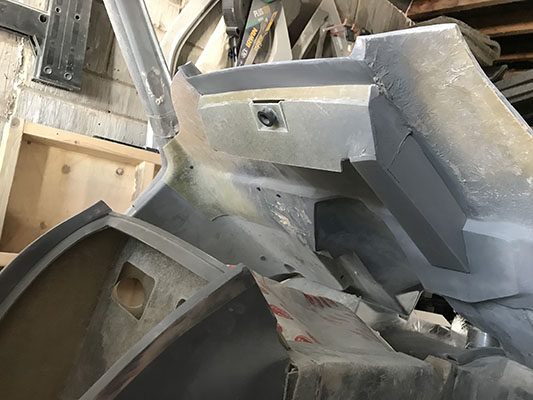
Engine bay mods and centre console

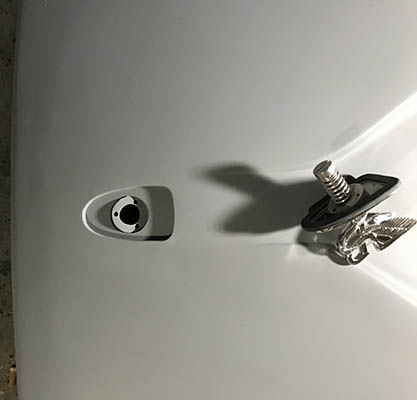
Canopy locator plug detailed into dash

Drivers engine side cover fibre glassed in

New pedal box fibre glassed in place
Passenger and driver side engine inner cover being fibre glassed in place
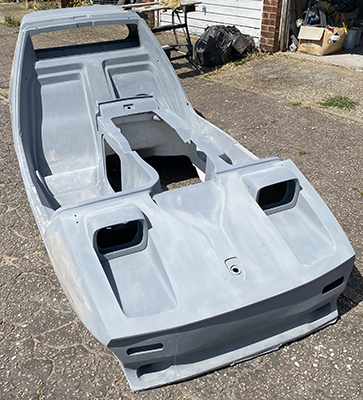
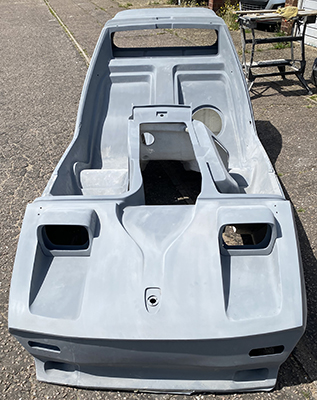
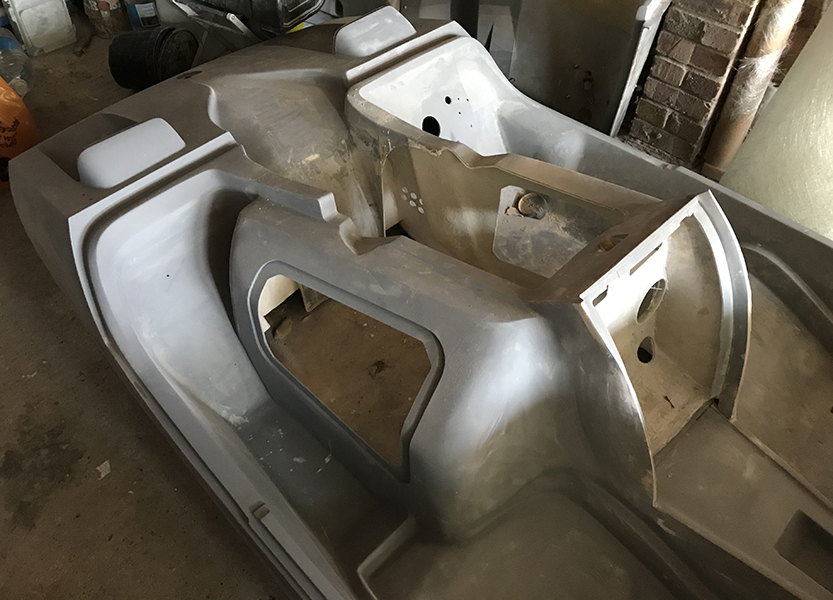
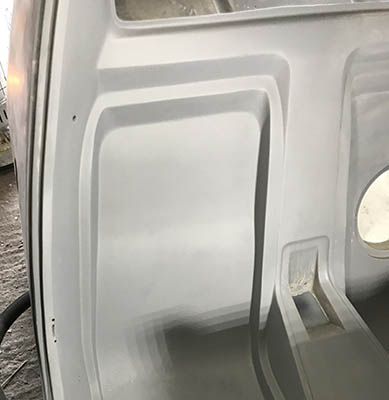
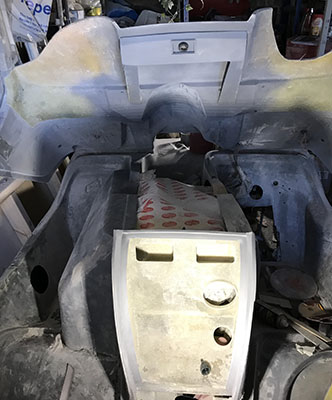
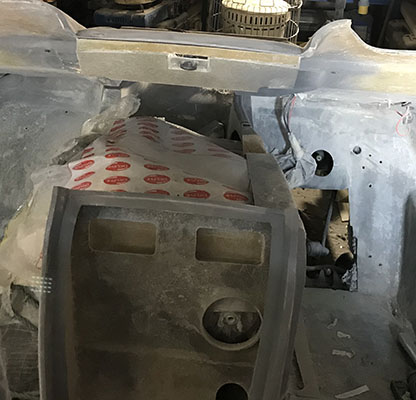
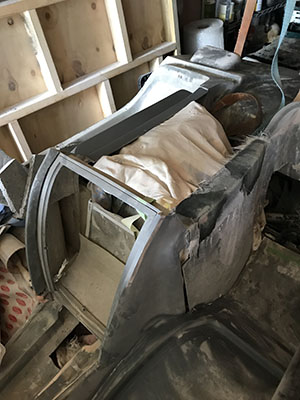
Body off the frame and fibreglassing all the new elements together
Mocking up reversing gear lever location in fibre glass
Hole filling and detailing

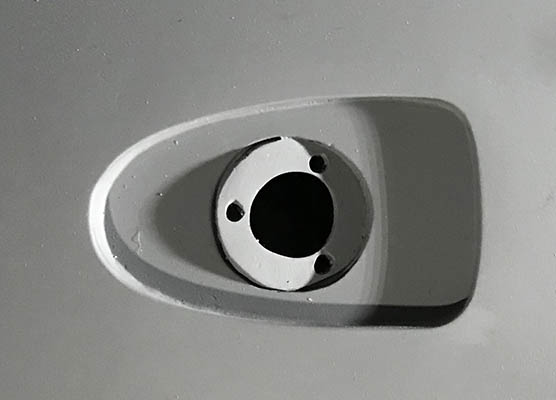
Canopy locator lug fitted - Under canopy finished
New pedal box fibre glassed in
Canopy locating lug mount finished - canopy rubber engine seal tested OK
Inner canopy locating lug fitted
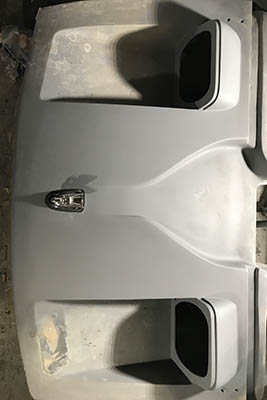
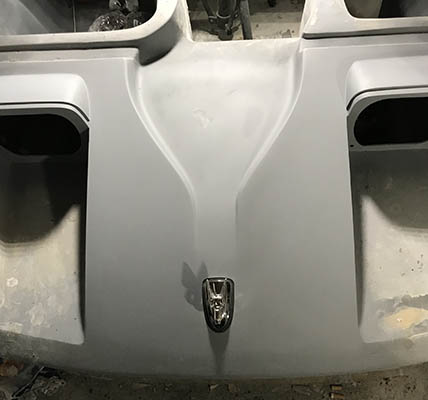
Inner dash finished
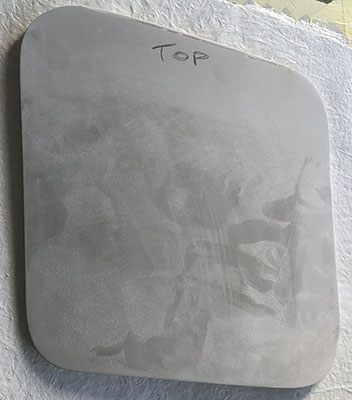
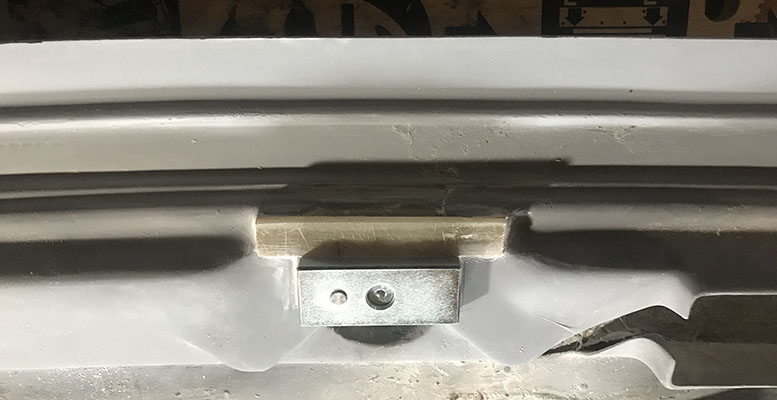
Added double sandwiched locator plate - top plate will be fitted to canopy
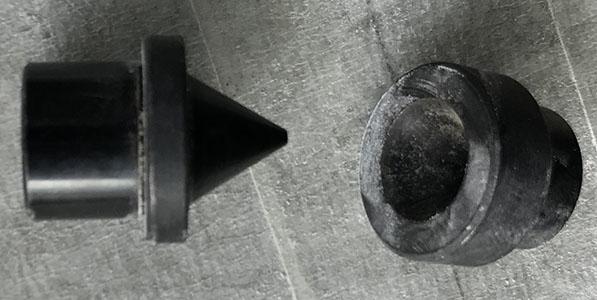
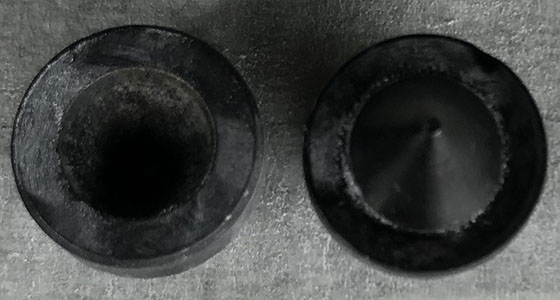
Locating lugs being fitted into central dash board unit and canopy so they mesh exactly when canopy is closed.
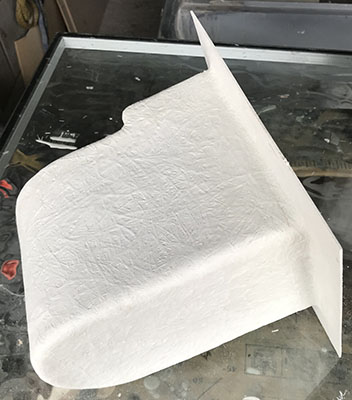
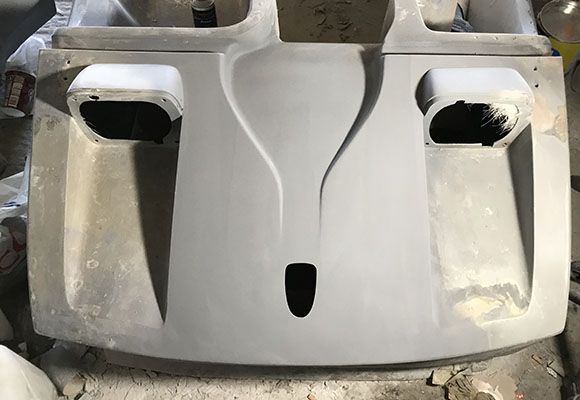
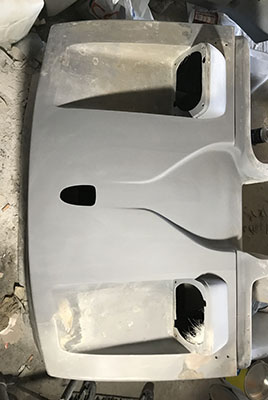
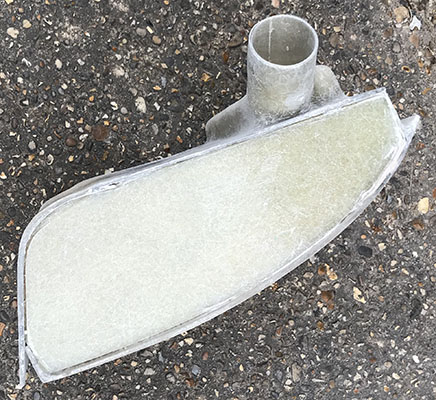
Inner canopy moulding
Inner canopy
New Air duct moulded inlet customised to fit the Bentley dashboard vents
Air intake rear ducts now moulded
Removable side engine covers being mocked up
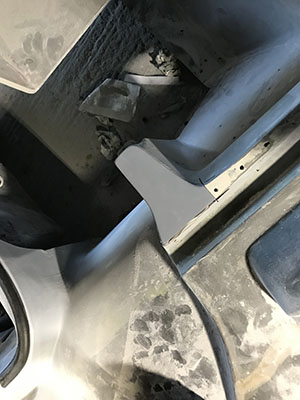
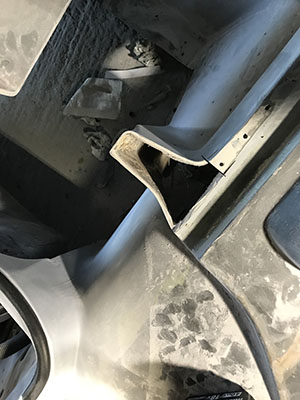
Engine passenger side cover extended to allow for rubber seal strip - Notched to mirror canopy closure profile
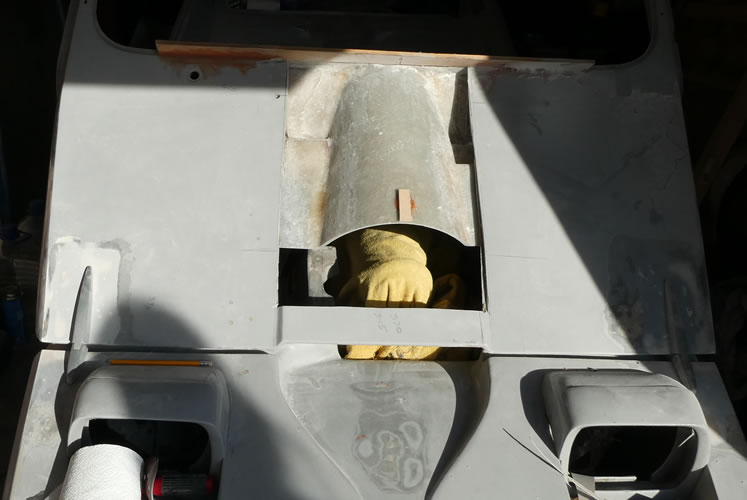
New central dash back plate - raised ring to accomodate alternator nut removal
Adding engine side cover top ready to take sealing rubber
Side dash now moulded around steering column support - removable engine side panel
Dashboard fibre glassed inner

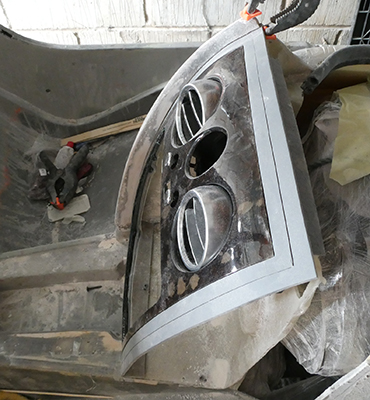
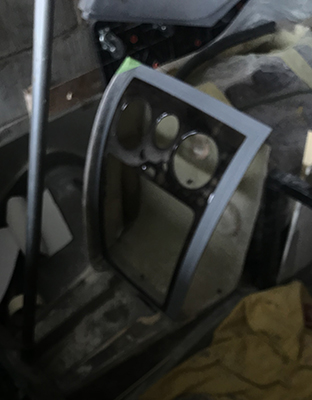
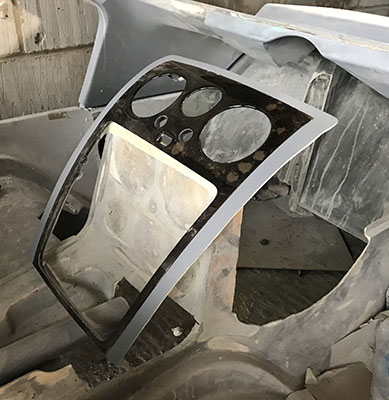
Bentley Centre console now mocked up - lip added to dial cowling
Dial pod now loosly fitted
Both dash side wings now joined to centre console
Dash radius wing moulded

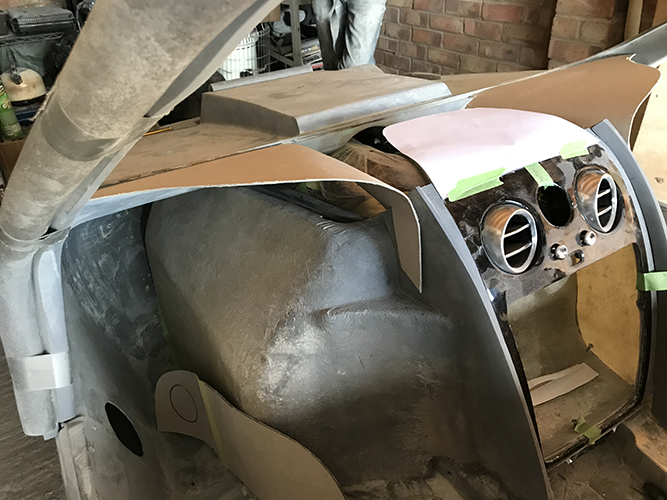
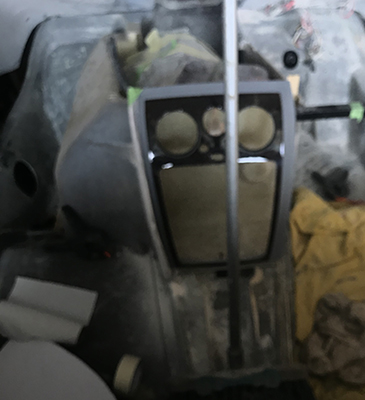
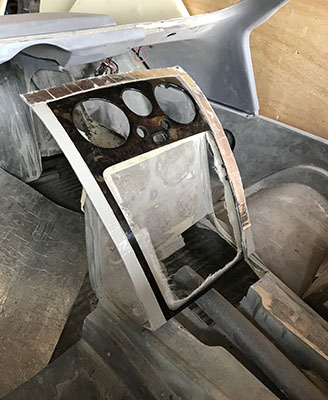
Bentley central grill now recessed into dash - dial cowling now loosly placed into position

Centre console section now joined with bendy ply and fibre glas - Kawasaki gauge unit now cut out of the top
Kawasaki dial cover mocked up in card board
New dash top panels being formed in bendy plywood and fibreglass. Bentley top air grill being inserted.
Mocking up dial cowling in card board
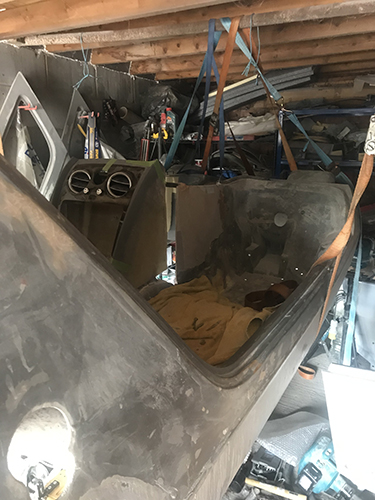
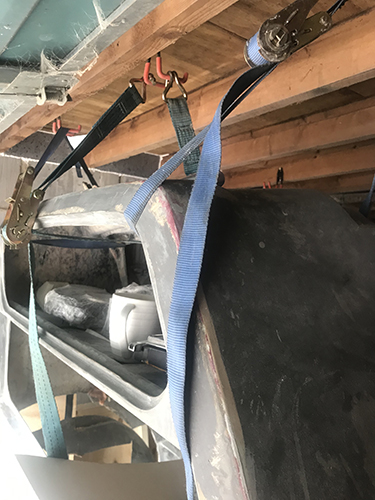
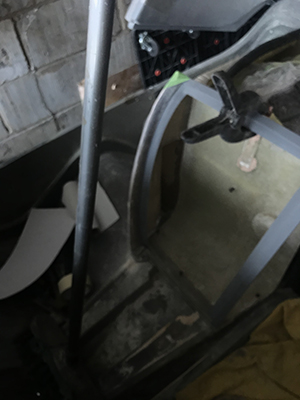
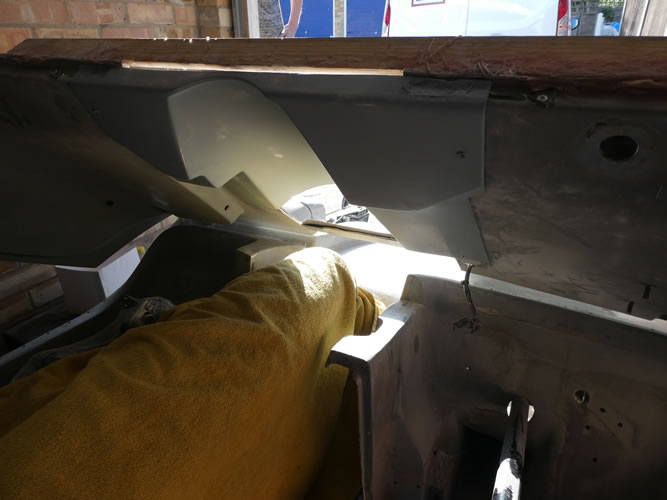
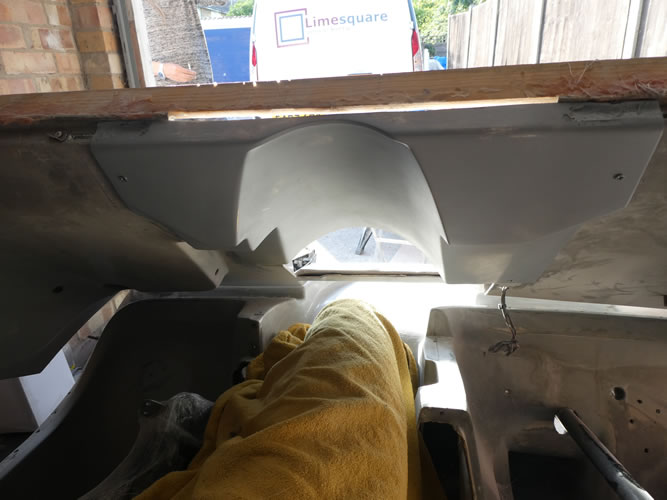
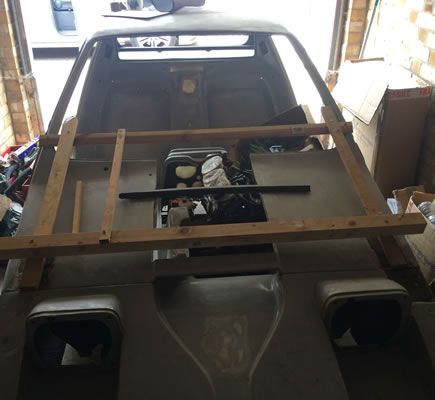
Body strapped to garage beams so it can be raised and lowered to trim body work and to get clearance around the 170amp external alternator
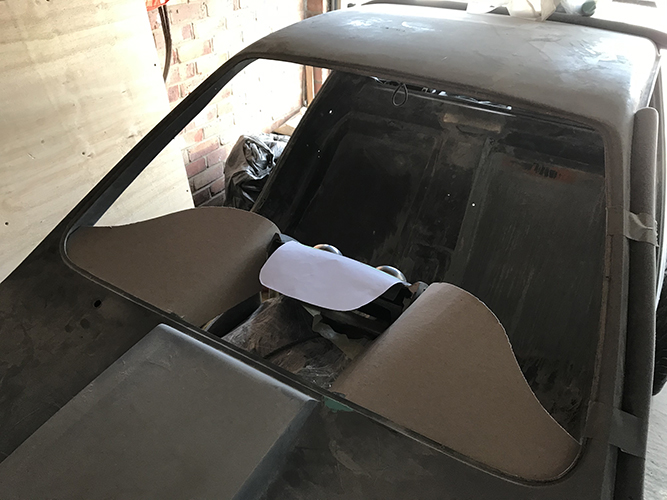
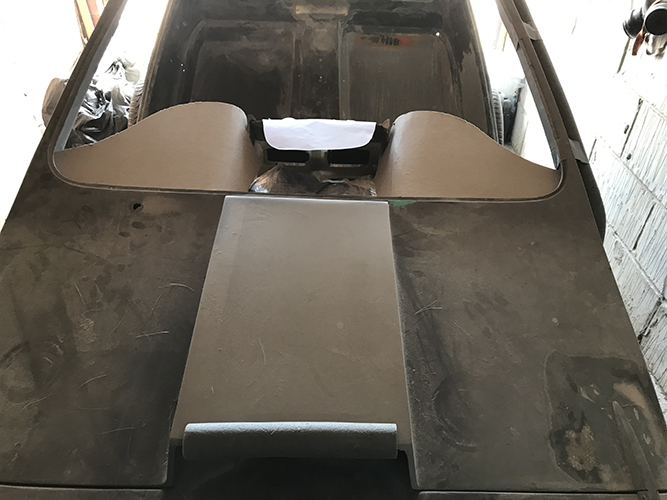
Mocking up dash board top in card board. The top dash is attached to the canopy and lifts up with it. Engine cover is split to allow access to engine.

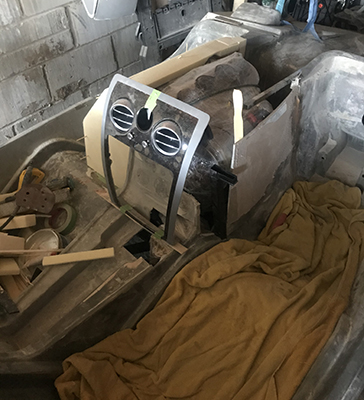
Mocking up right hand side of console in foam
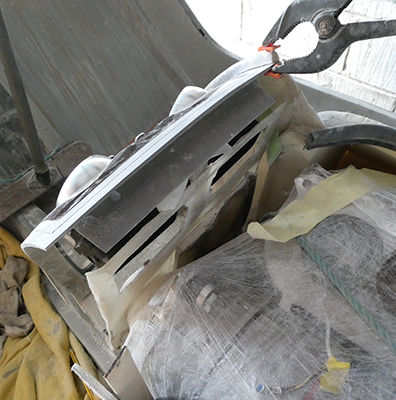
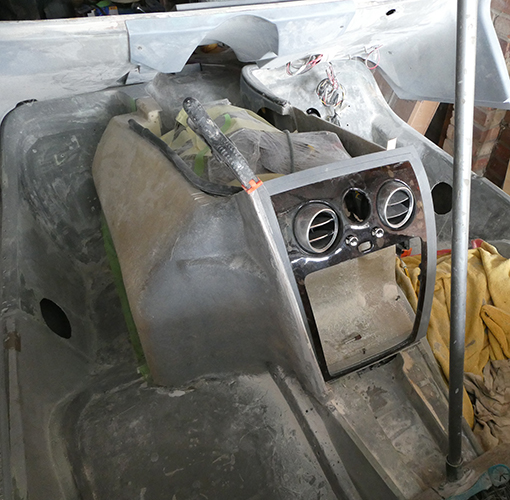
Centre console with now modified Bentley rear air intakes. The Bentley air ducts connect to a custom heater unit. The top of the Bentley console has another air duct grill to be modified from picture.
Bentley upper dash
Console backing
Console centre framework
Mocking up engine surround and dash in foam then fibre glass
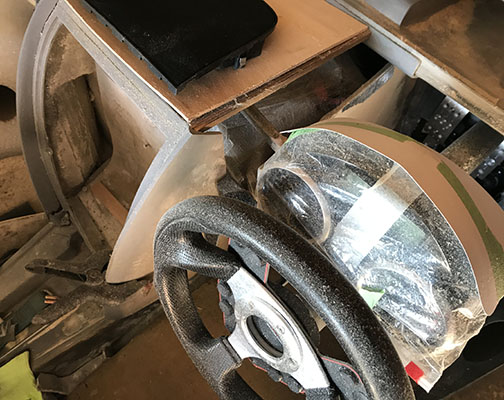
Positioning new steering column ready to make up its fixings in relation to centre console.
Left hand side engine casing now made in fibreglass
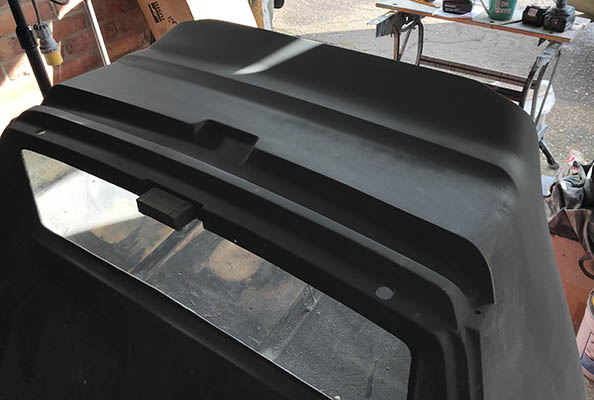
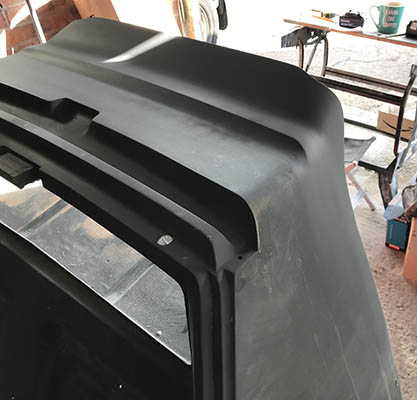
Roof lock filled in and reliants bad filling on canopy top detailed.
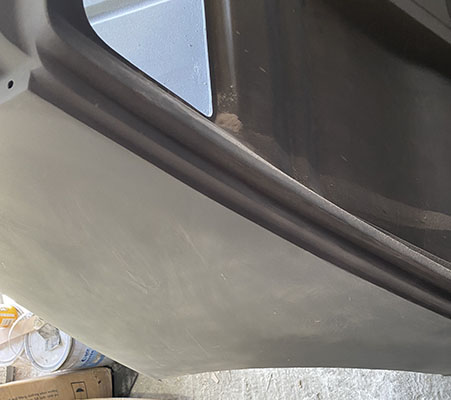
All drainage channel on side of canopy fixed

Mocking up Bentley centre console fibreglass recess mount
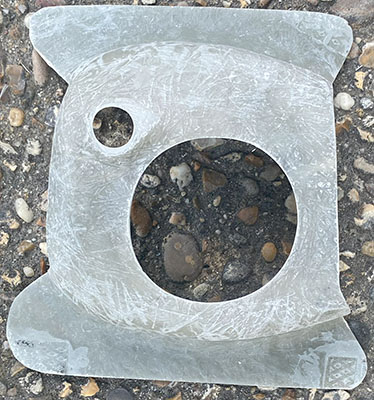
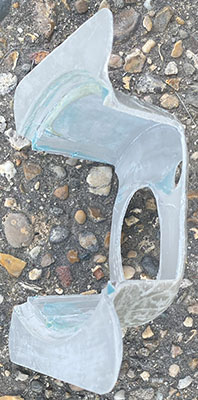
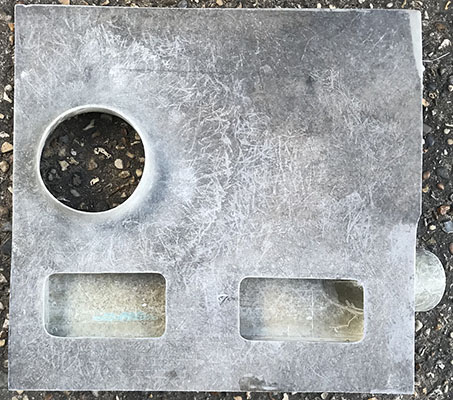
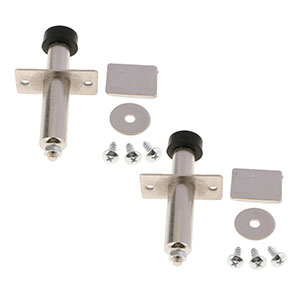
New canopy side door hinge mounting plates finished


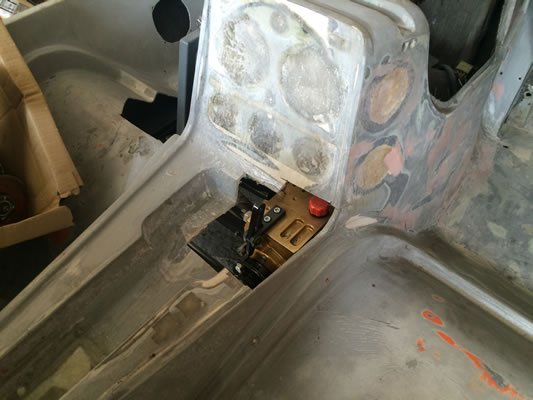
Working on replacing existing canopy latch fitting to covert to electro- magnetic catch. Lock now boxed in.
Detail work on canopy edges continues
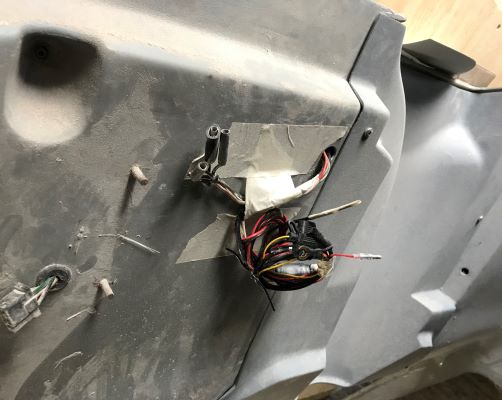
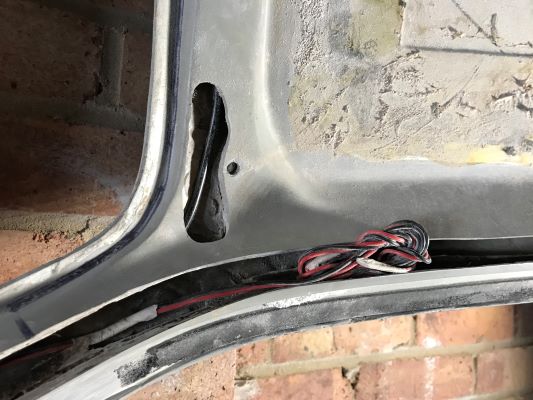
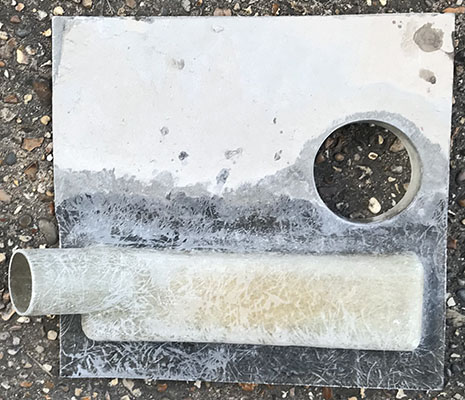
New canopy wiring for electronic rear view mirror and fibre optic ceiling lights being routed to hide them. Old side metal tubes cut out and new tubes and hinge mounting plates glasses in.
Added a 5th cable for conversion to two speed wiper motor.
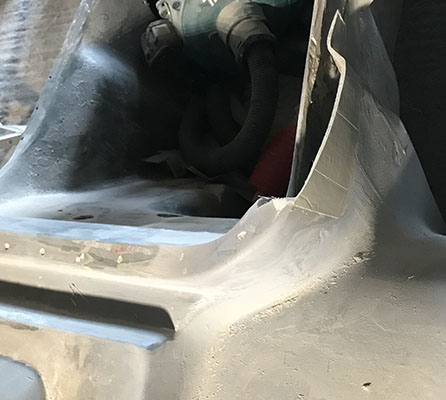
Rusty Canopy side tubes and hinge mounting plates cut out and replaced with new metal and re-fibre glassed back in
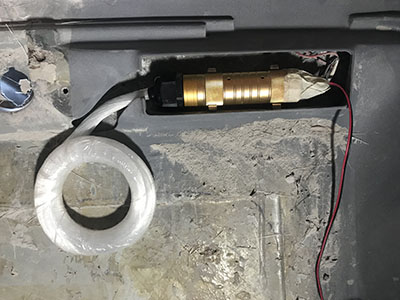
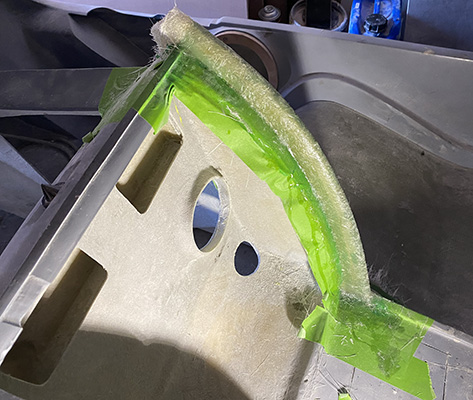
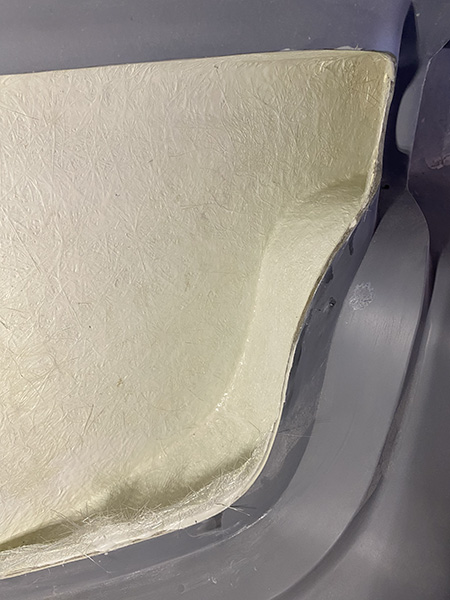
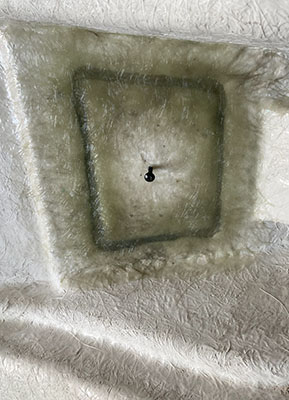
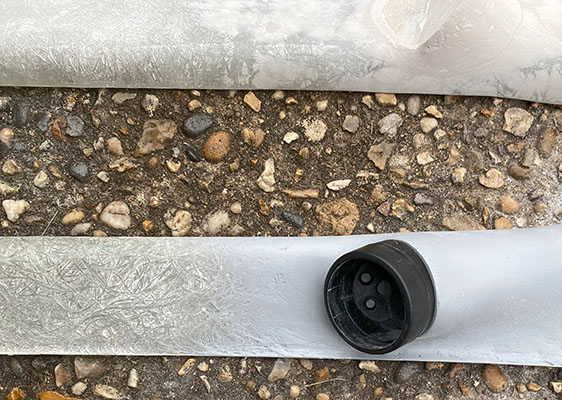
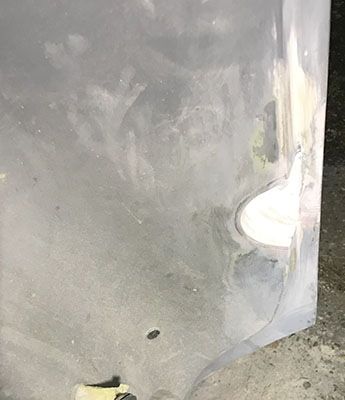
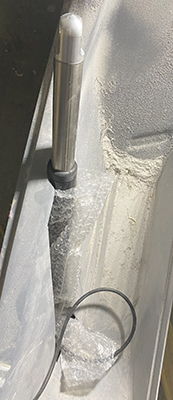
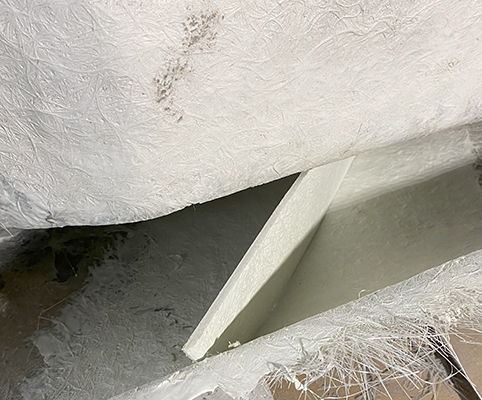
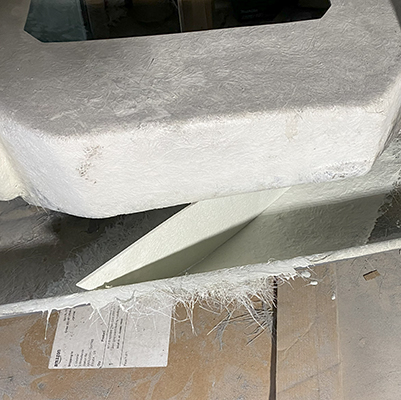
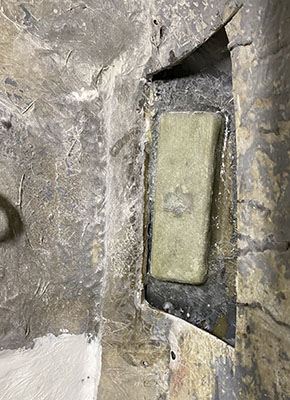
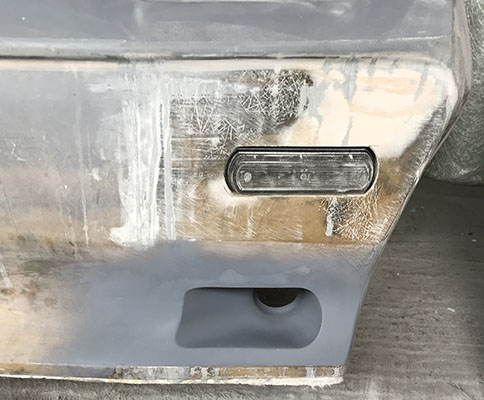
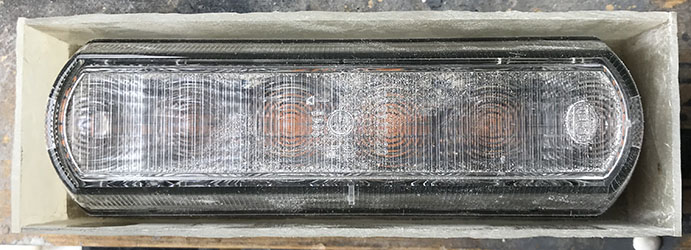
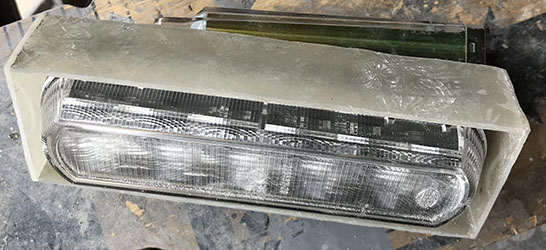
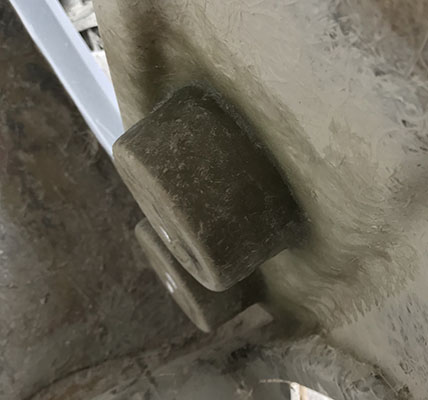
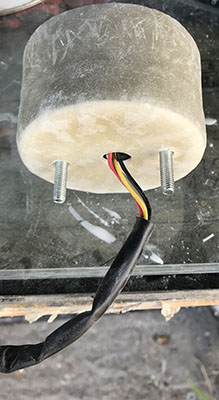
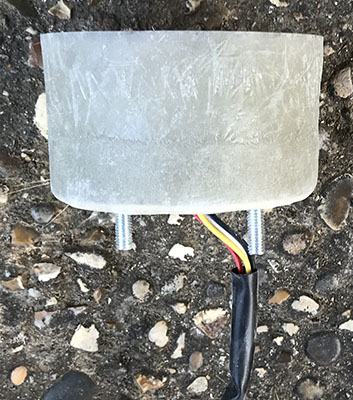
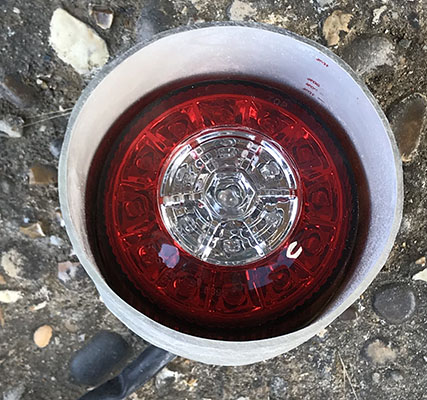
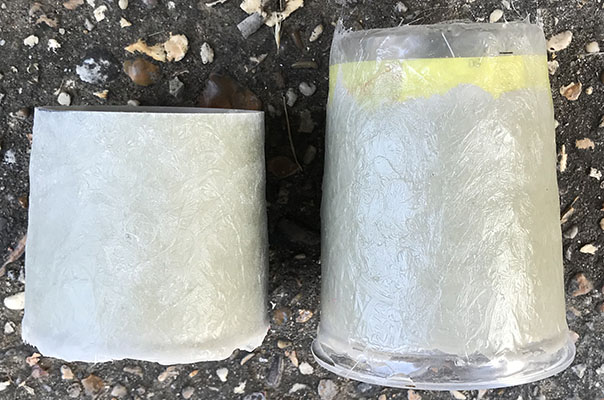
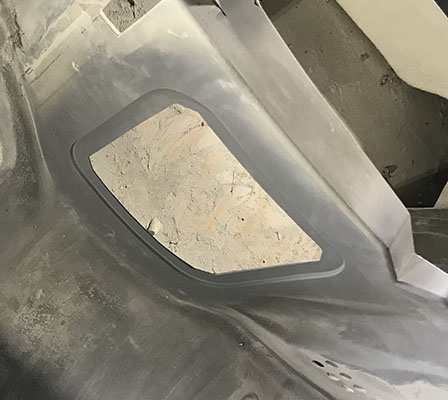
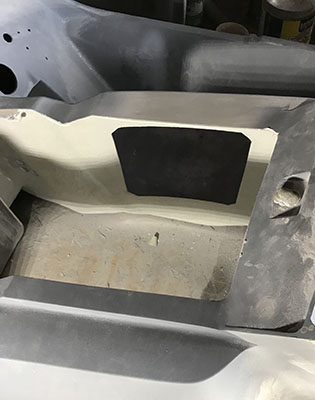
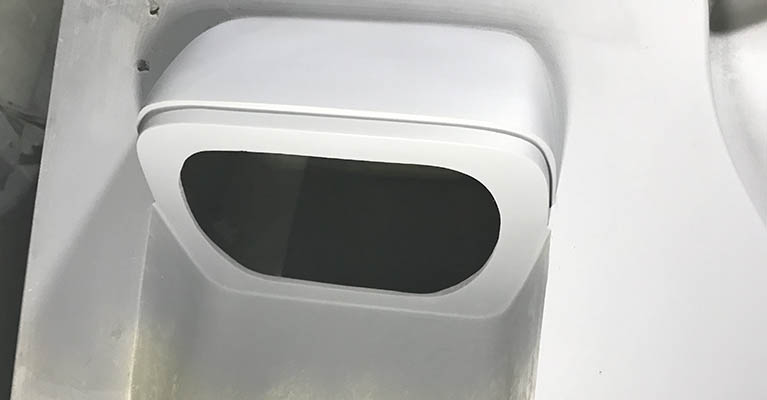
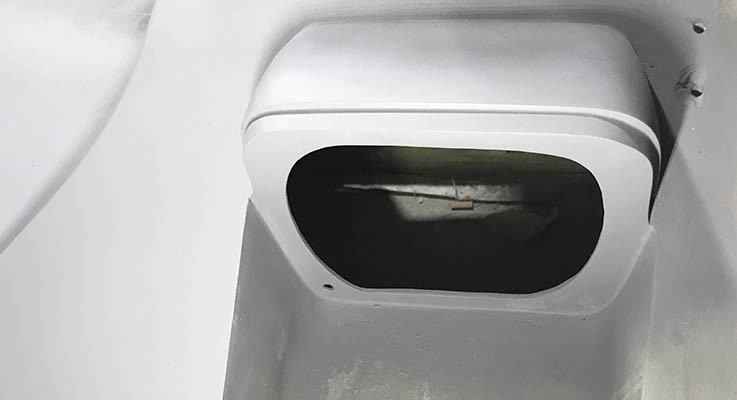
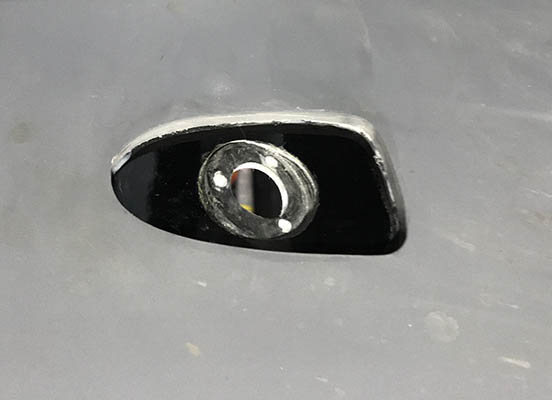
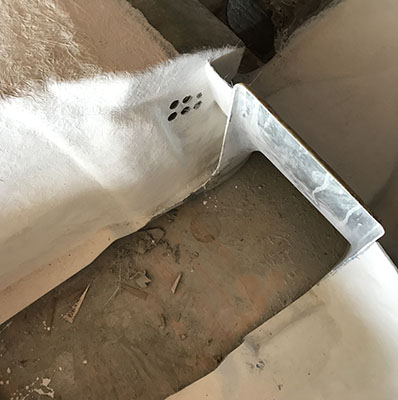
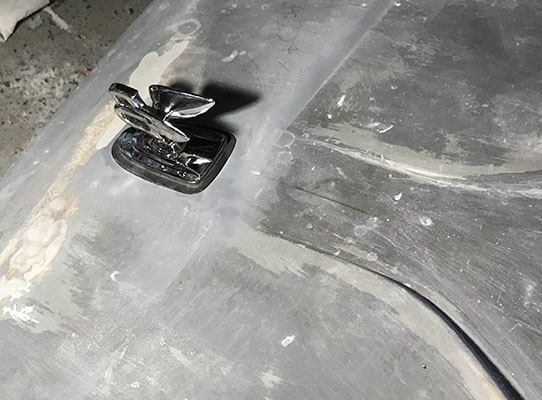
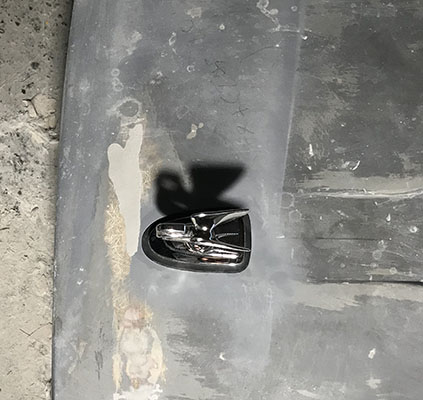
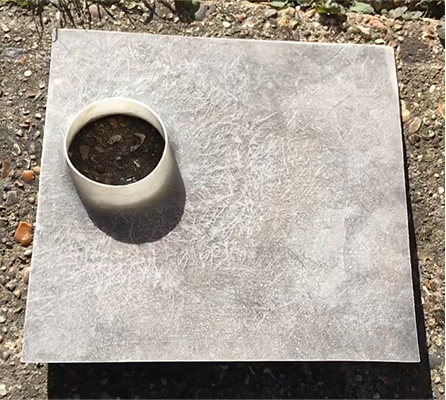
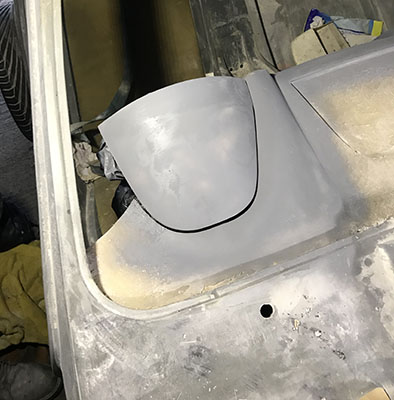
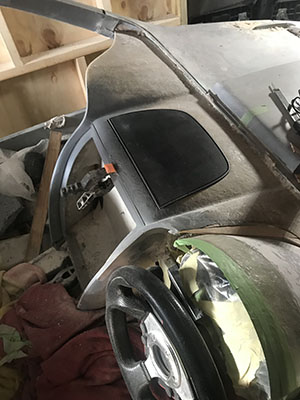
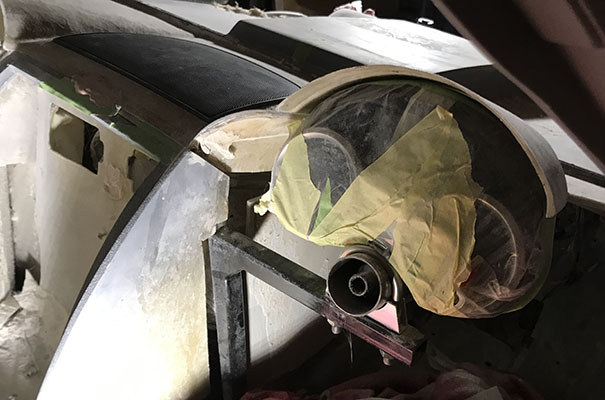
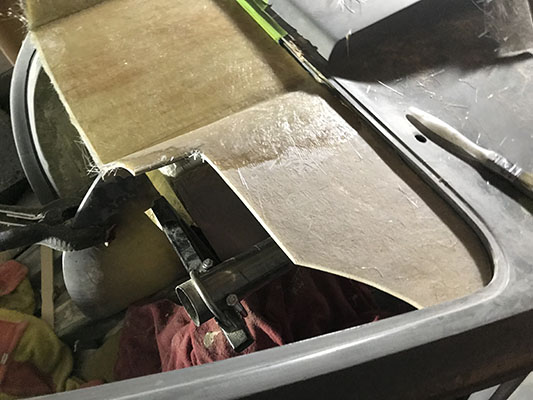
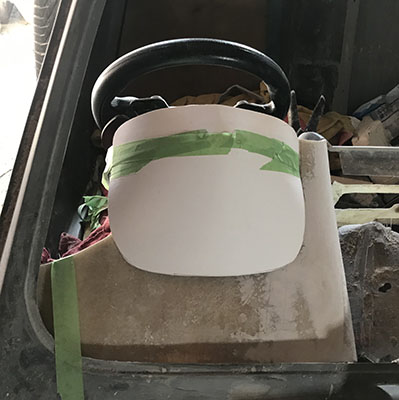
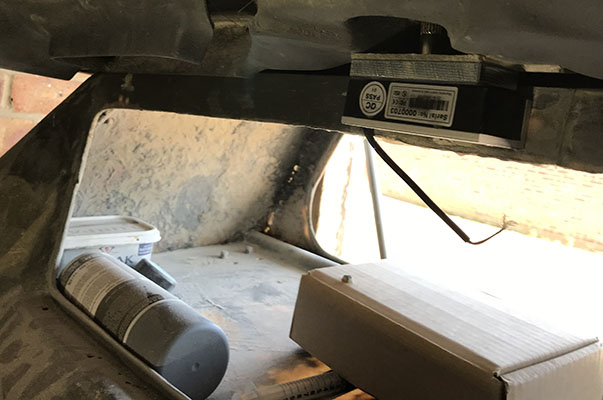
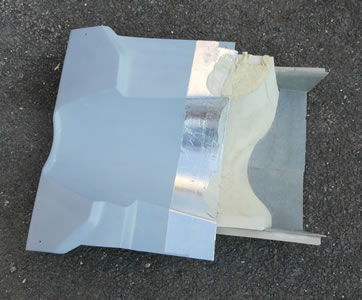
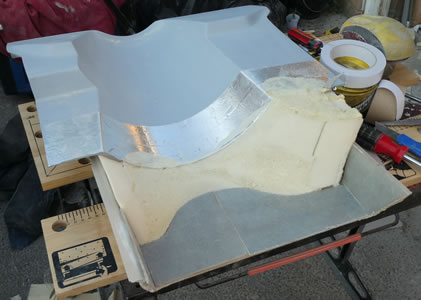
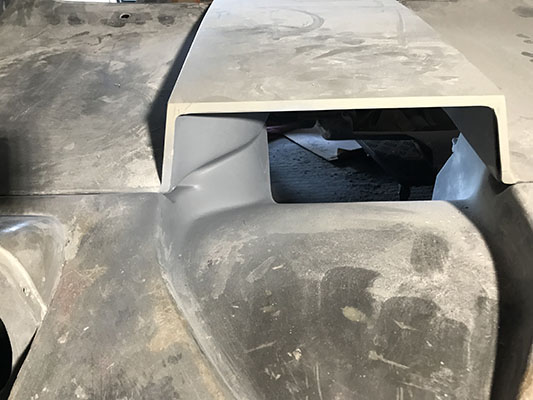
Fibre optic light unit recessed into canopy and secured by using Terry clips for easy removal. The hole is a lot larger than the unit and will be vented to allow for heat generated to escape.
The fibre optic light unit is only 7W but measuring its temperature output when fully lit it measured 33C so it needs this extra ventilation.
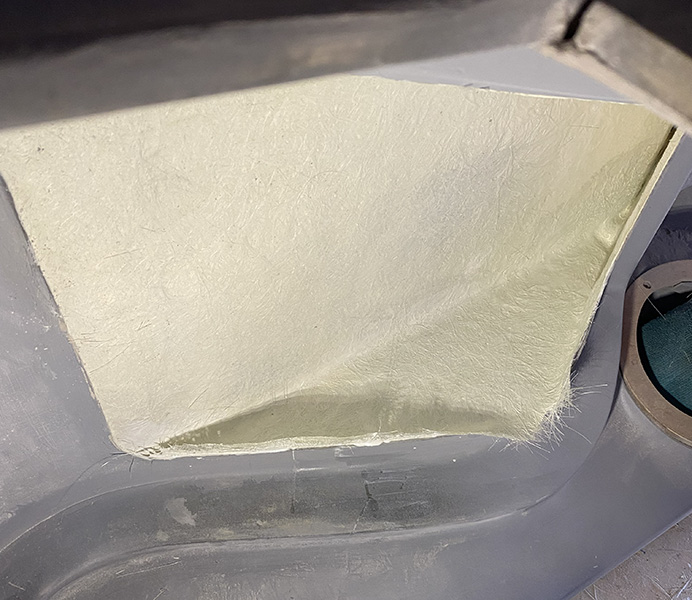
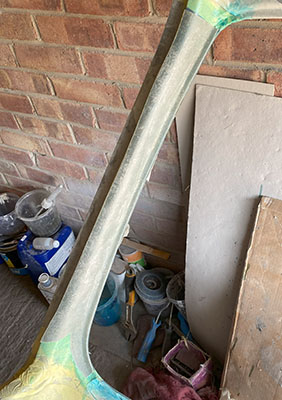
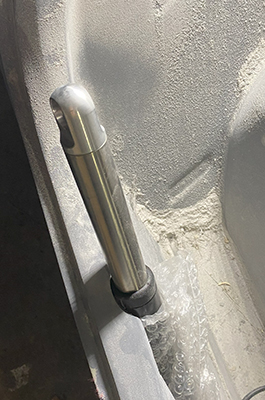
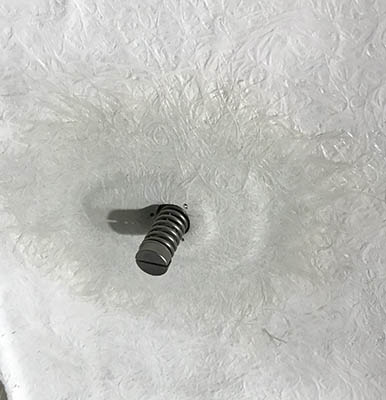
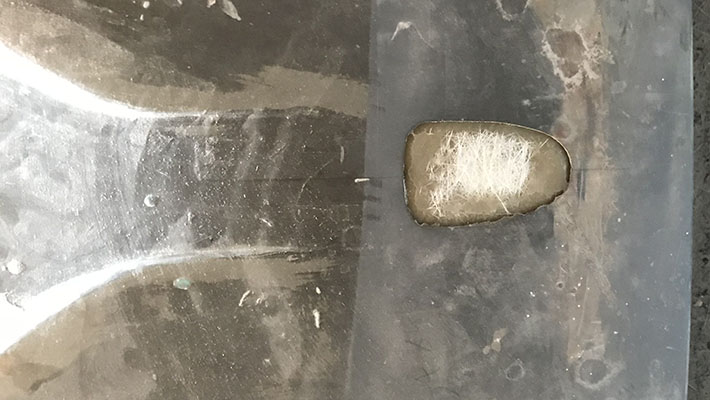
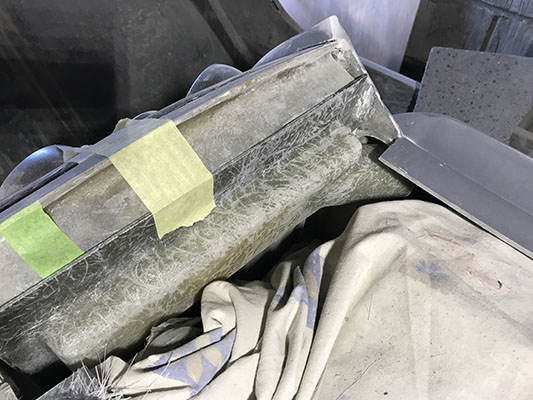
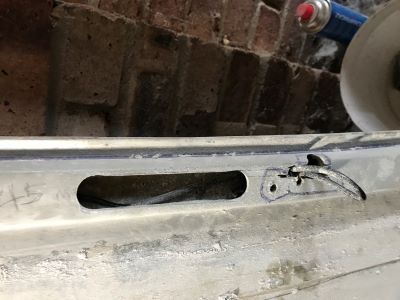
New 15mm rod inserts now fibre glassed into canopy side.
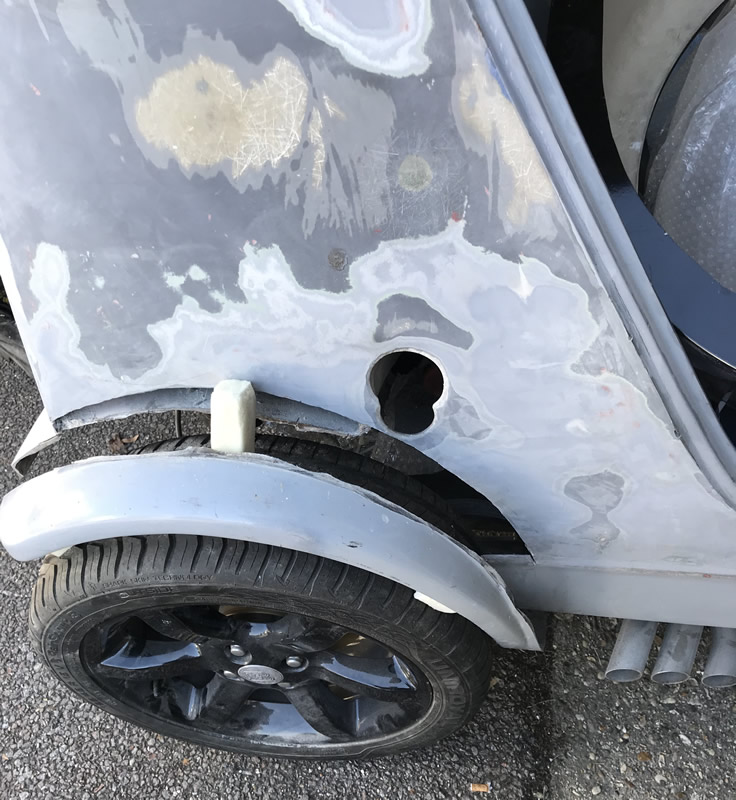
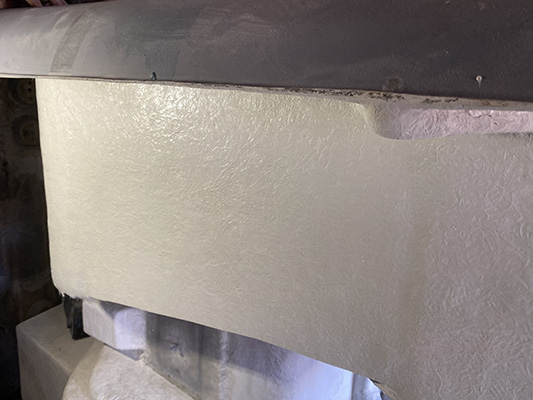
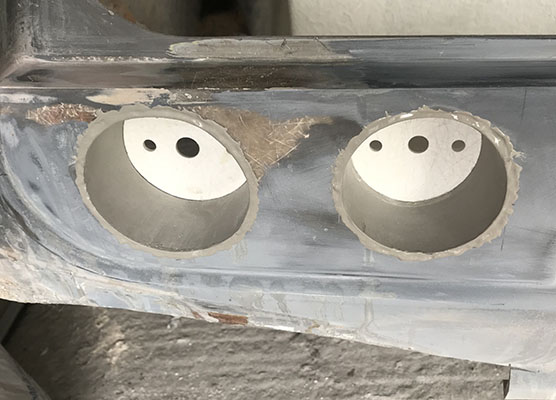
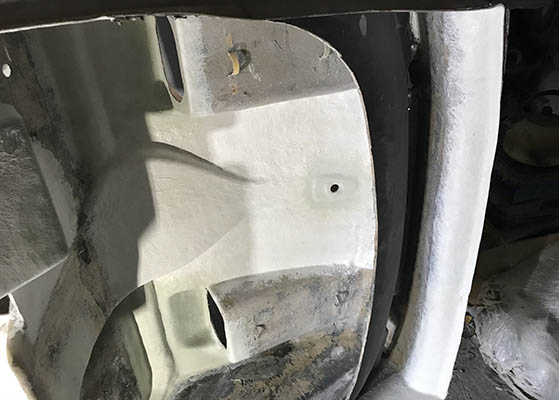
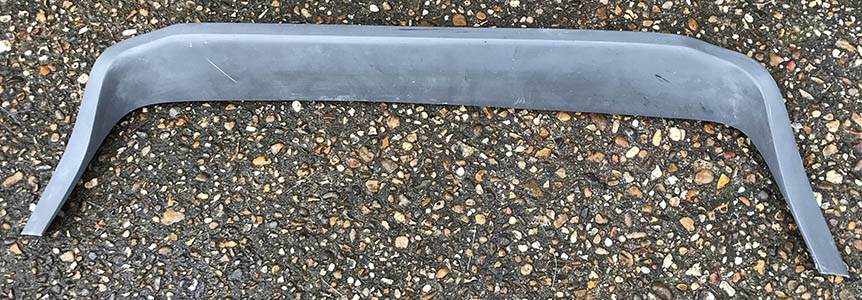
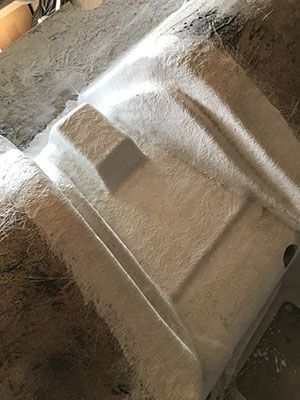
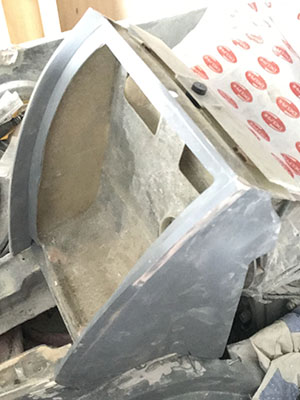
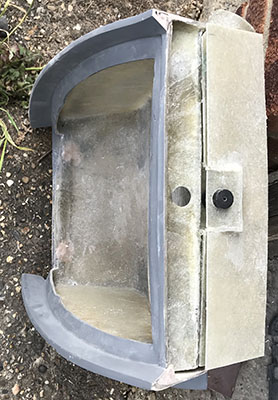
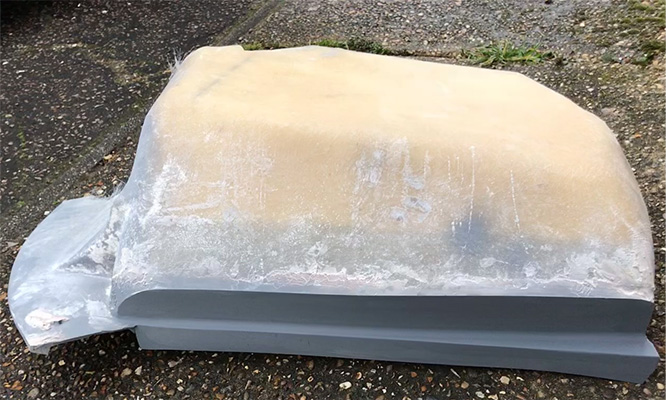
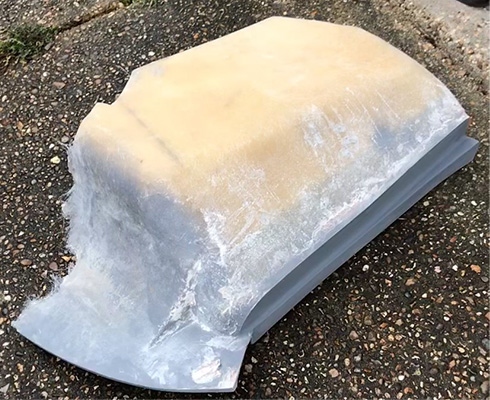
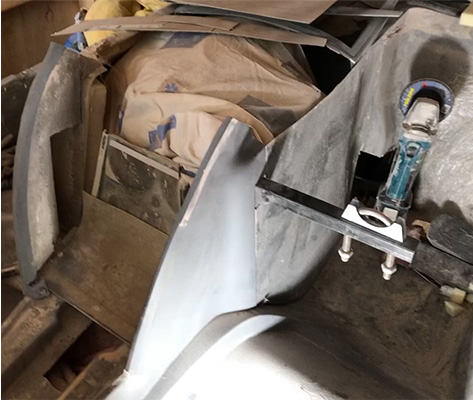
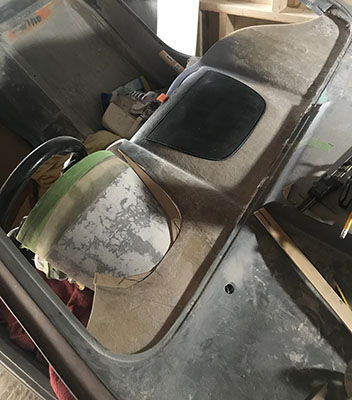
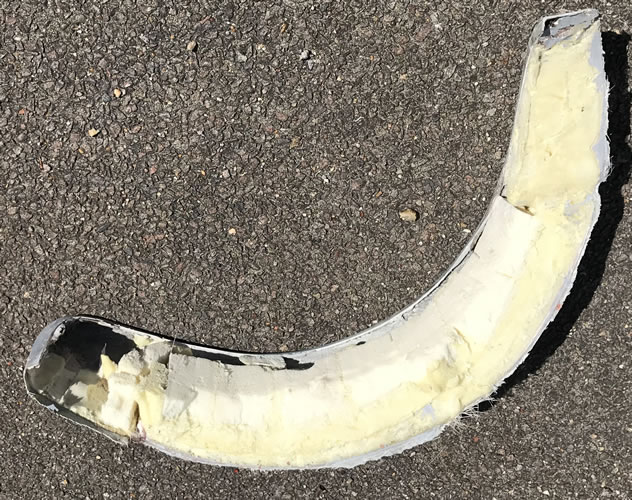
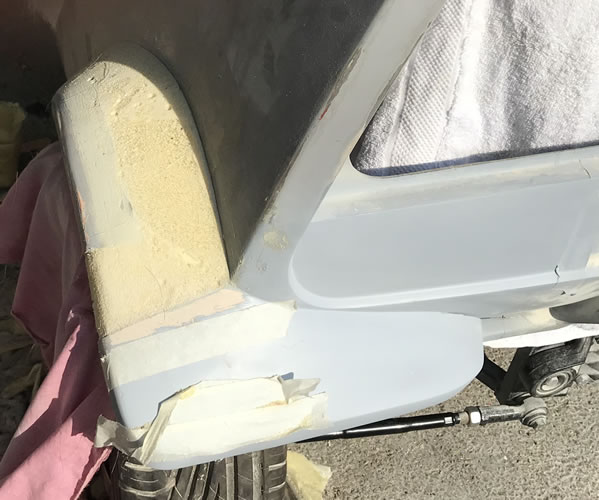
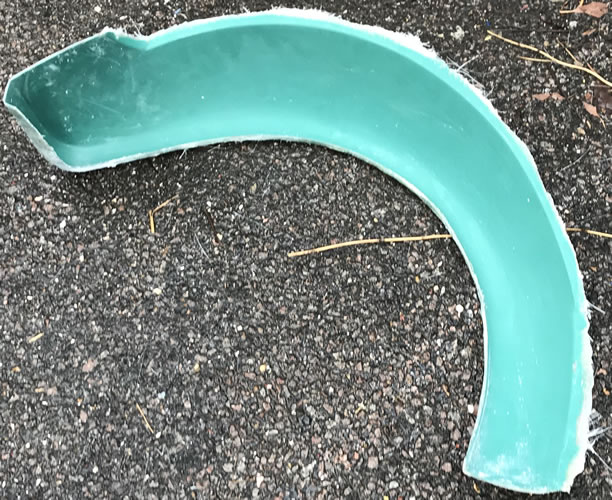
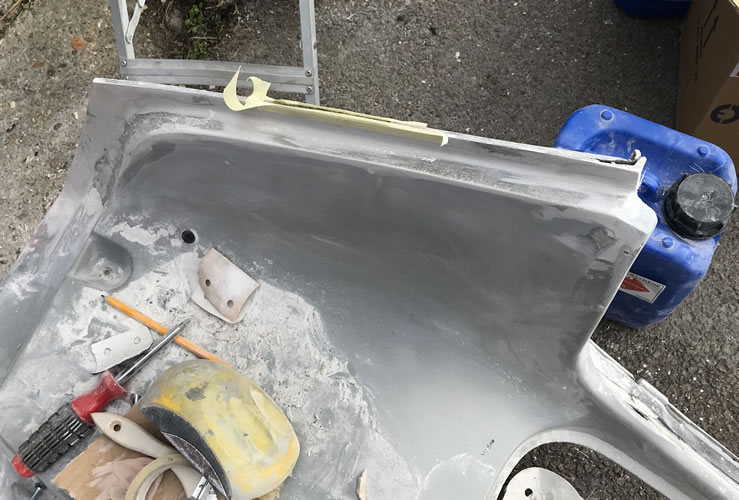
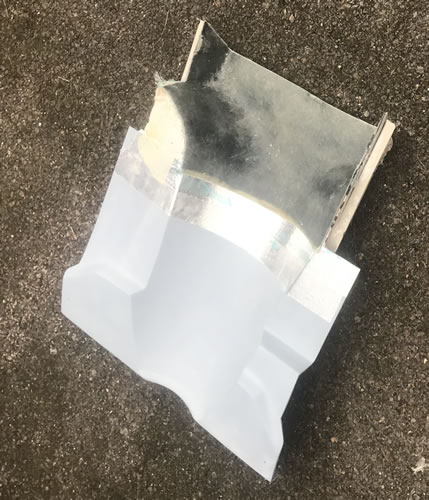
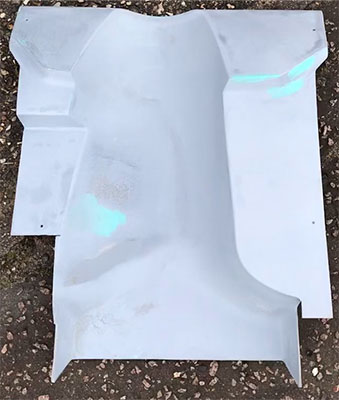
Existing wheel arches now cut off and foam moulding used to produce the template to take a fibre glass mould.
The old arches are the correct radius of the new wheels.
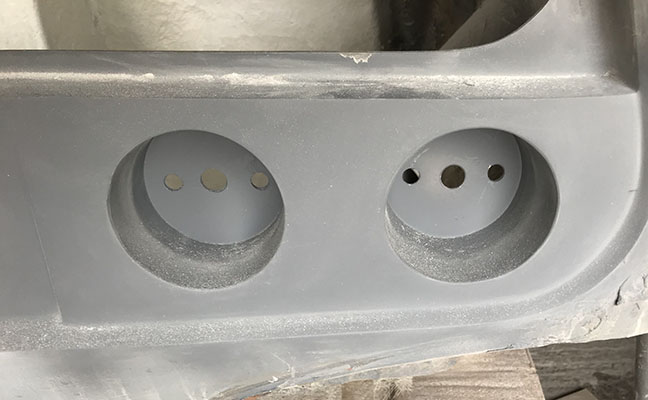
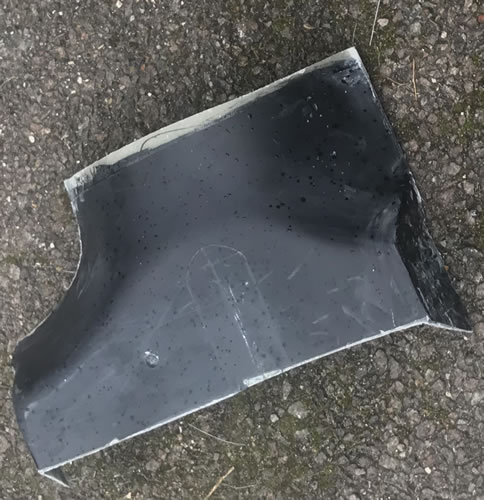
Tooling Gelcoat applied ready to be fibreglassed to produce mould
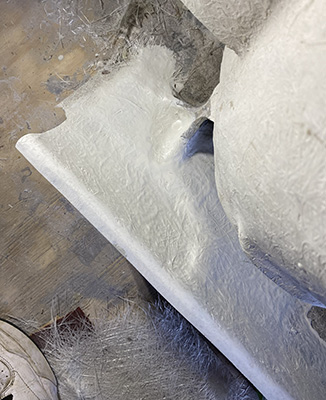
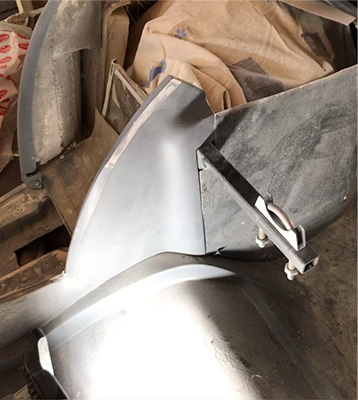
Arch mould preparation
Arch mould proforma and mould ready for final fibre glassing
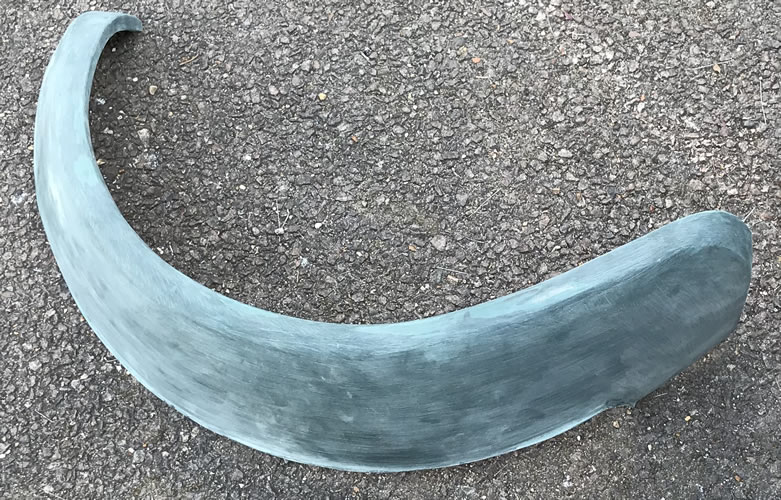
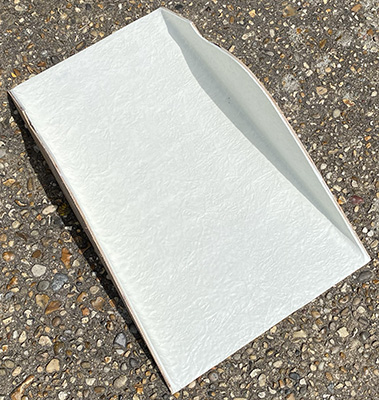
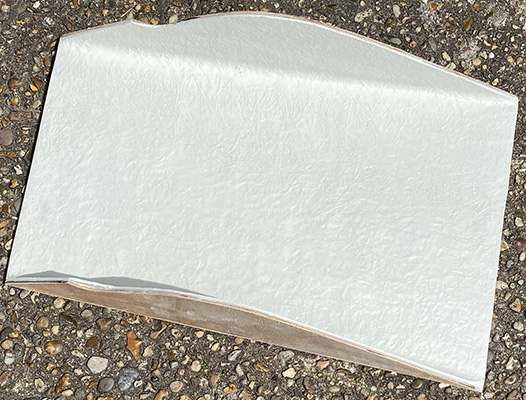
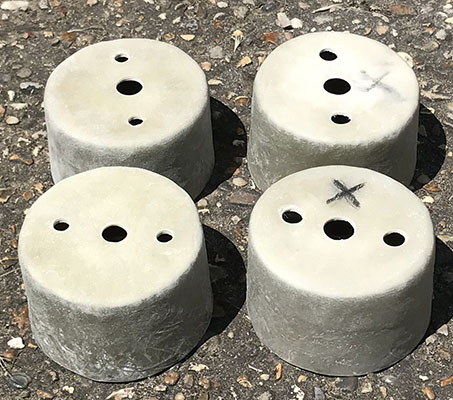
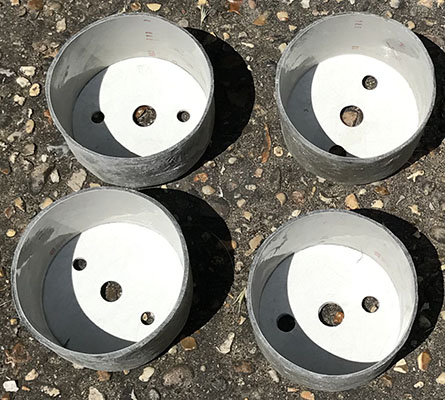
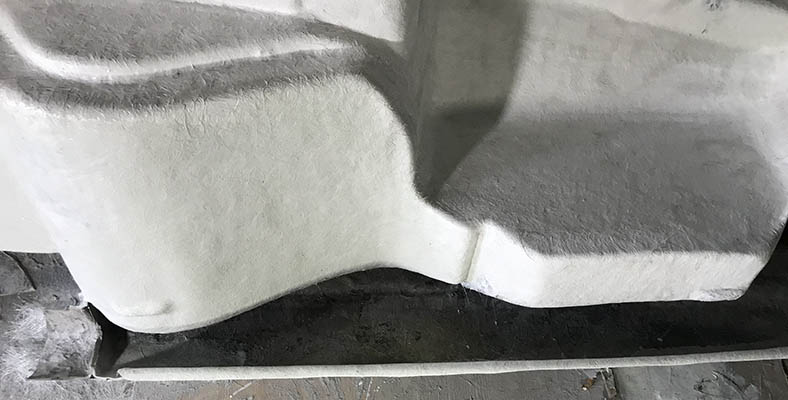
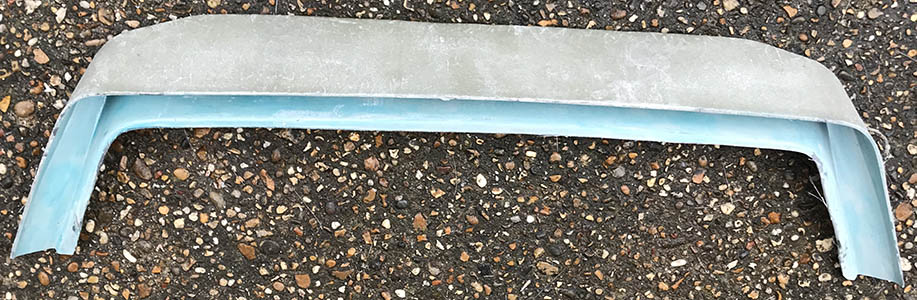
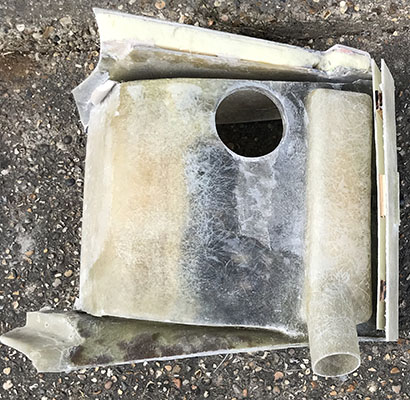
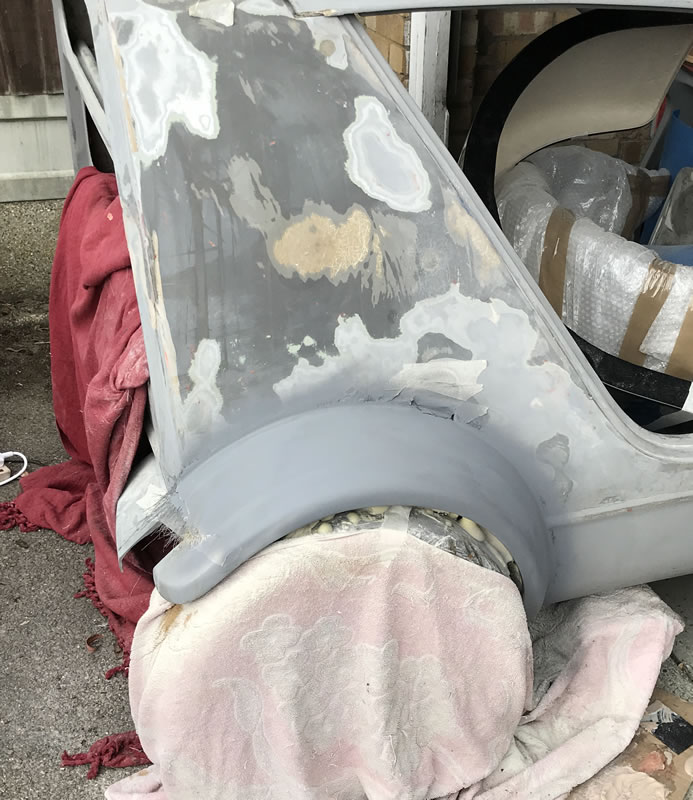
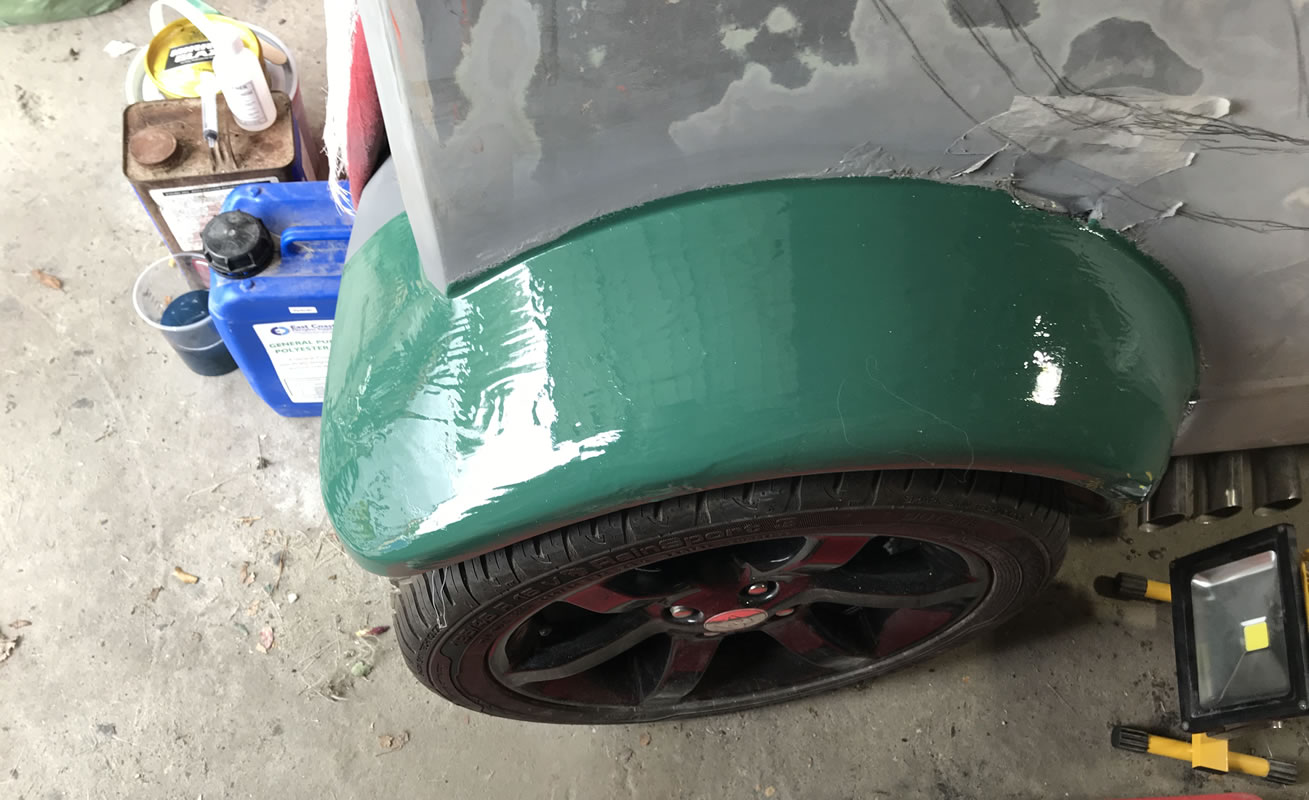
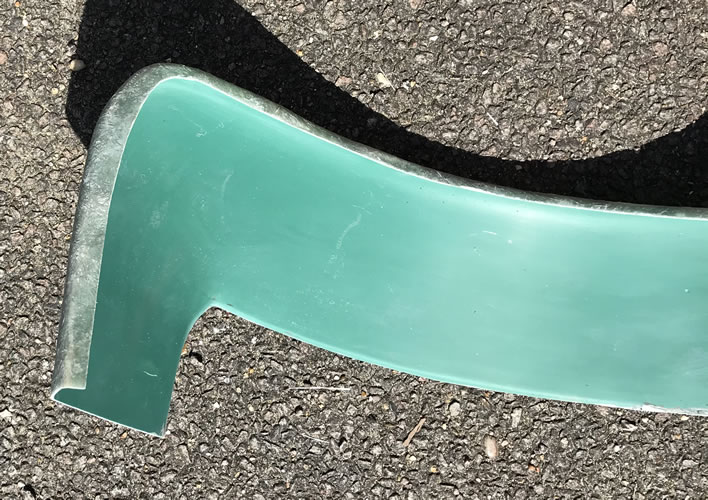
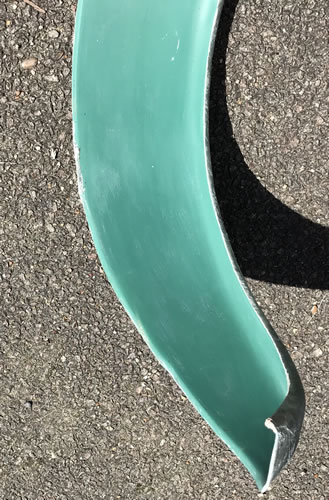
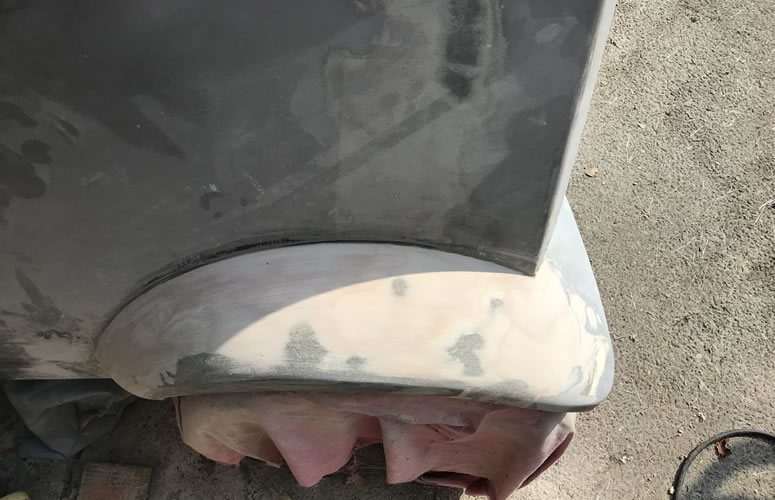
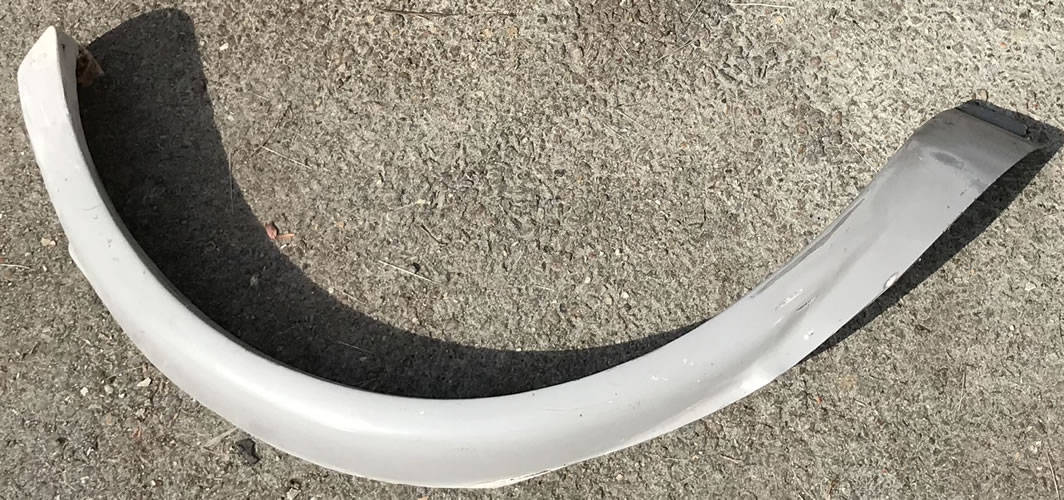
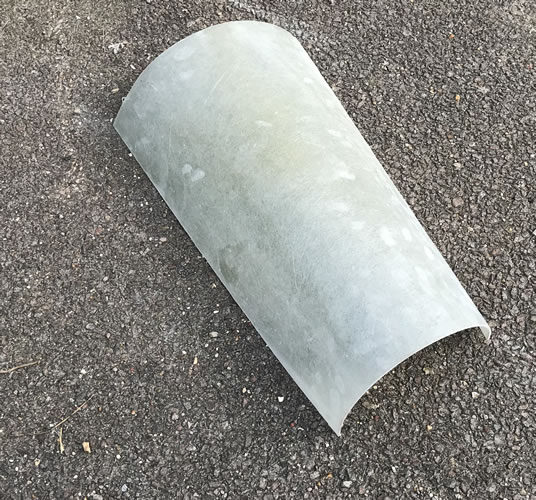
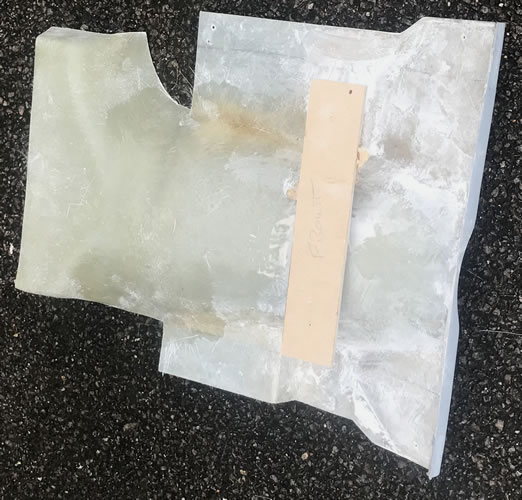
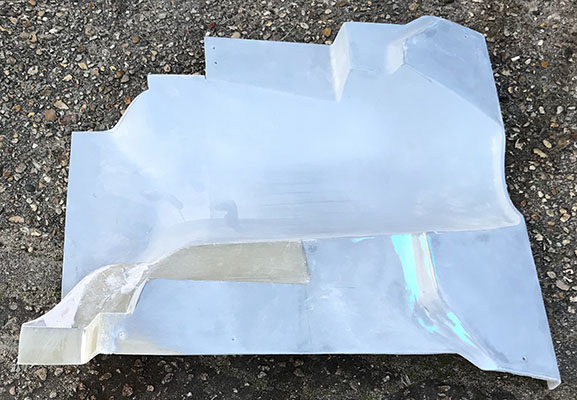
Formed arch out of the mould

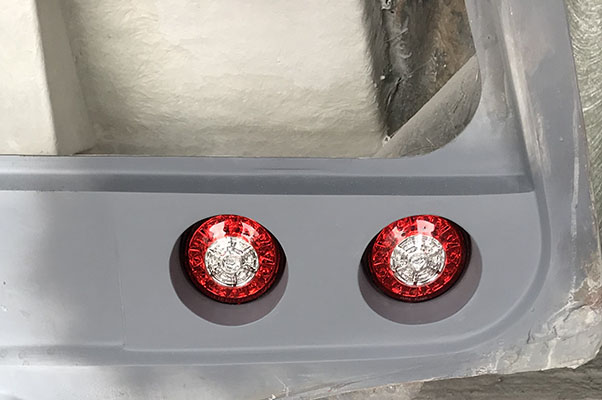
Finished light original holes blocked in
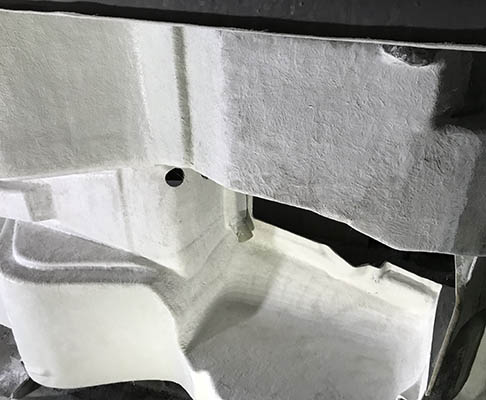
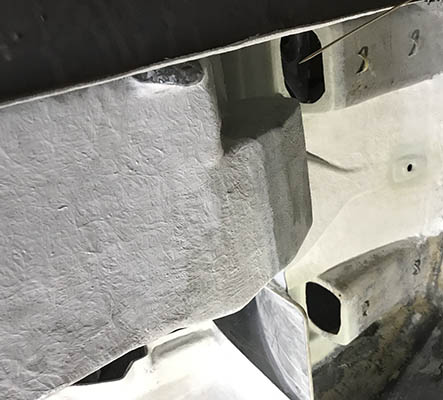
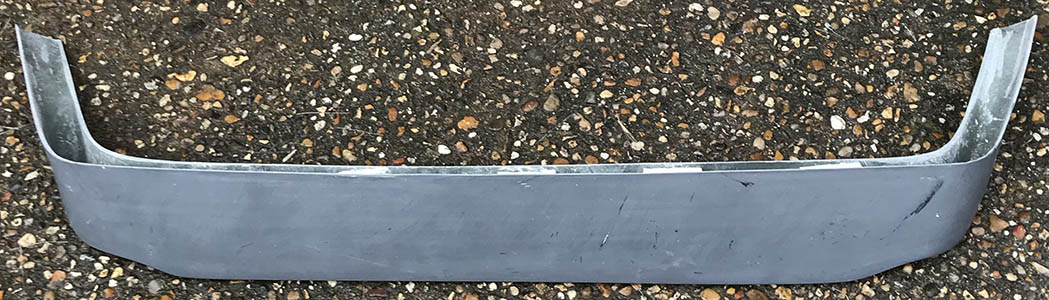
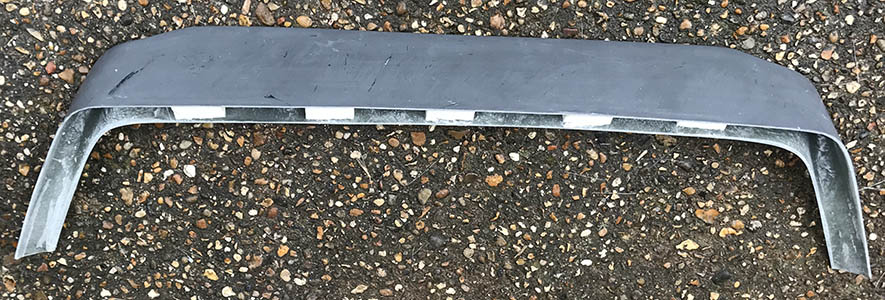
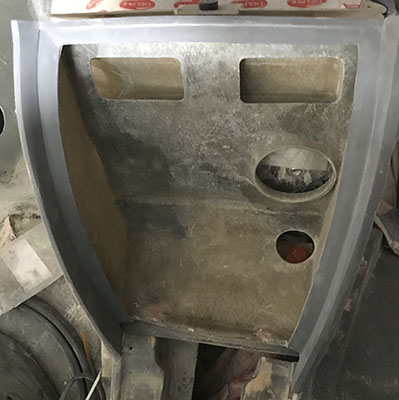
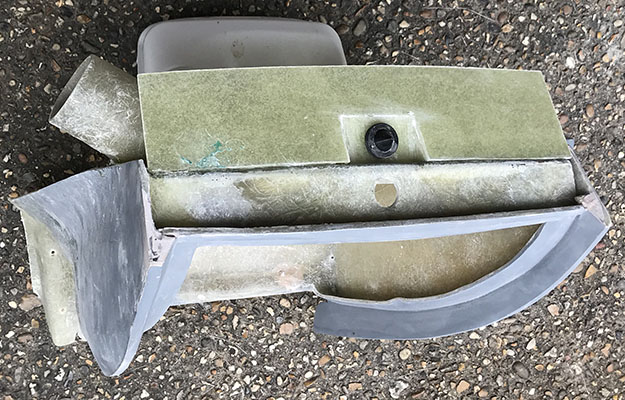
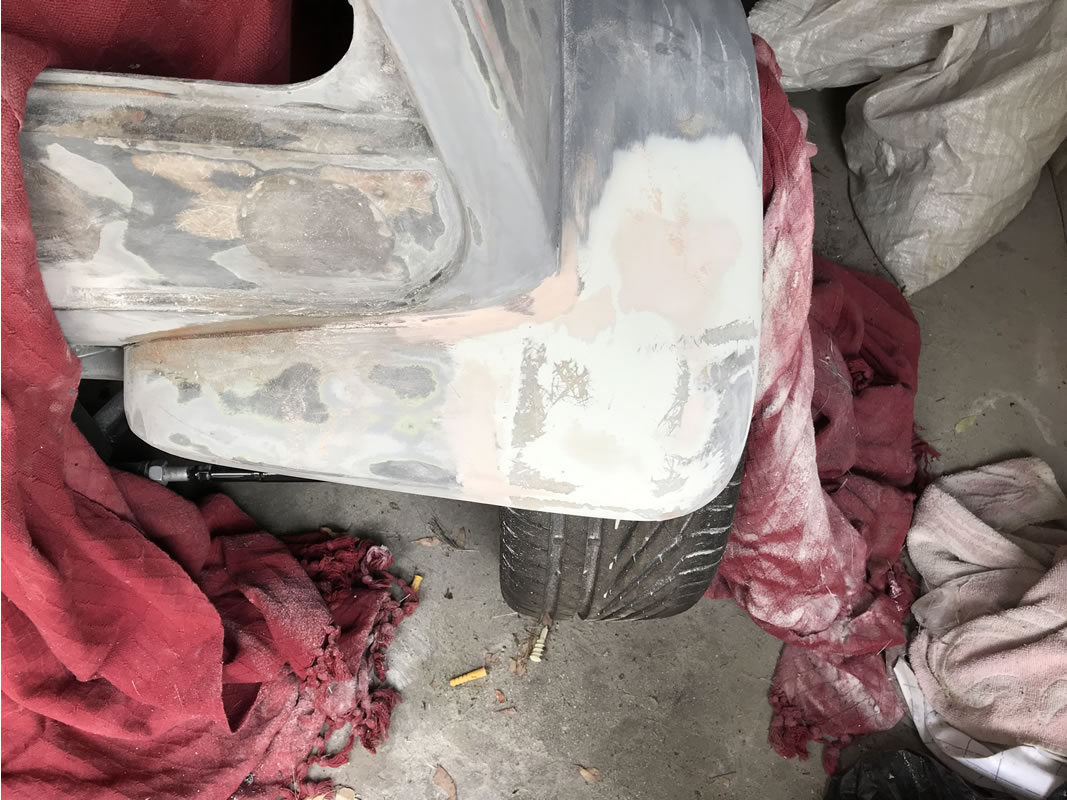
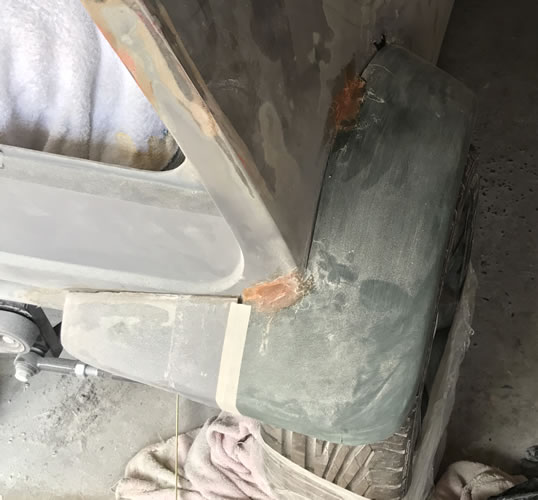
Left rear arch cut off ready for new mould production - foam being used to make new wider arches, the shape nearly ready to take mould
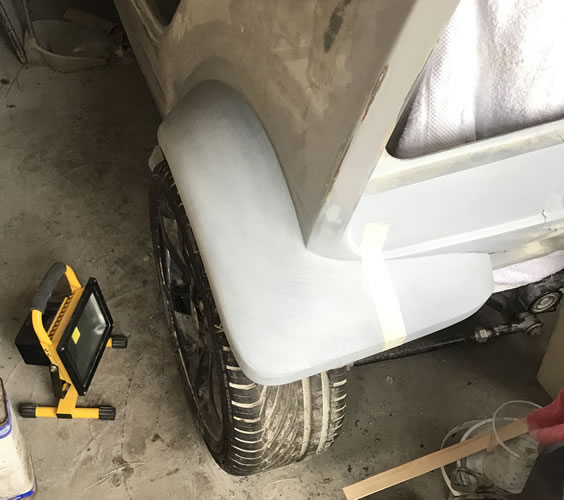
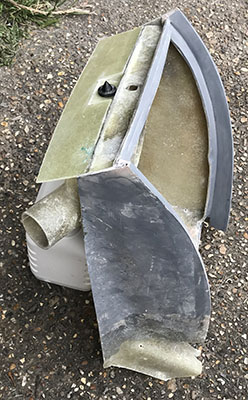
Left wheel arch finish ready to take mould
New right arch tacked on ready to joined to body

Left wheel arch mould and finished item
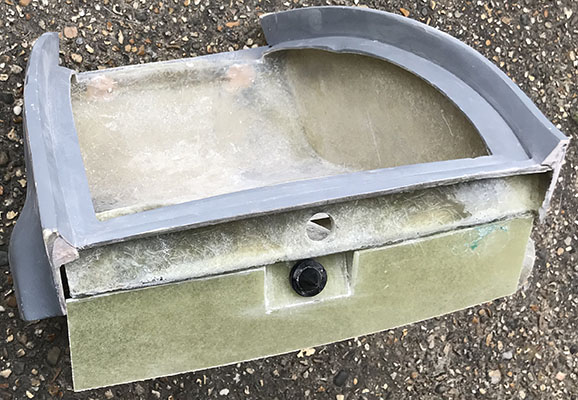
Left wheel arch to use to make mould
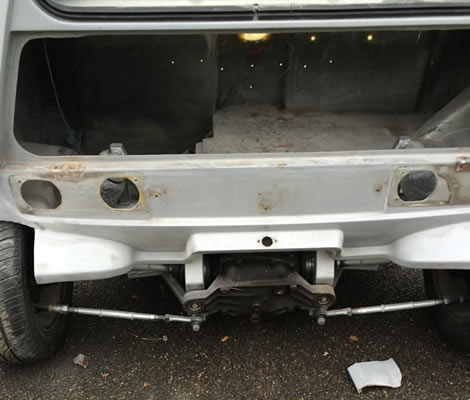
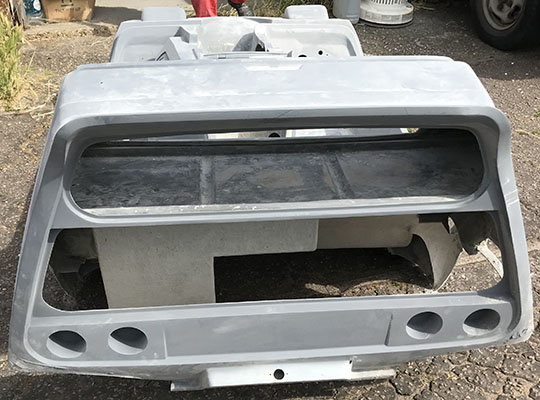
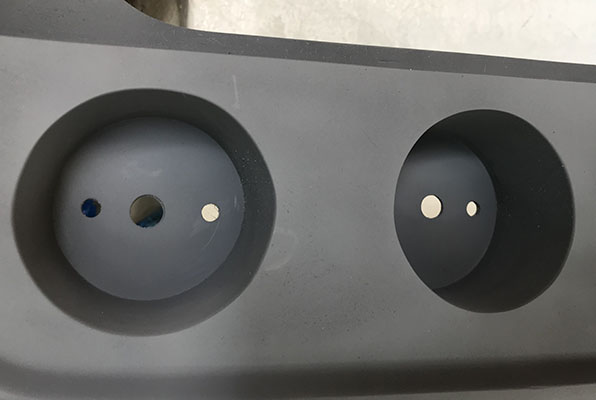
Original lighting holes
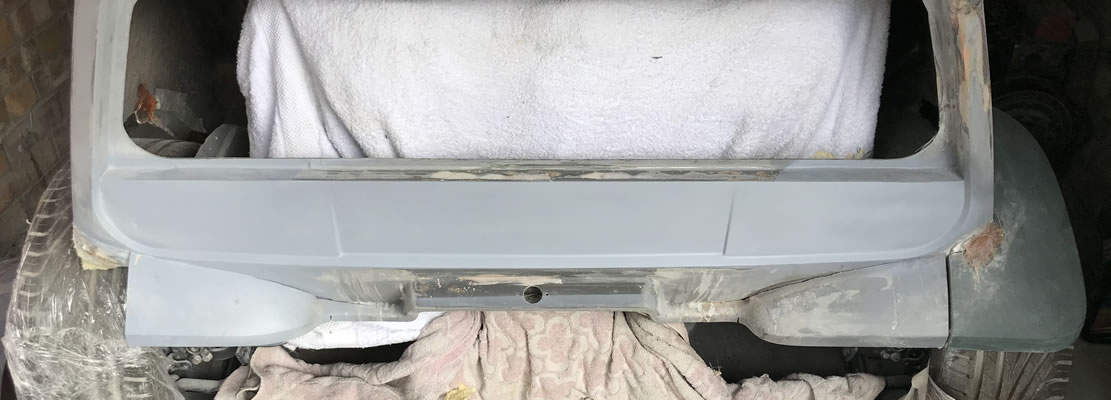
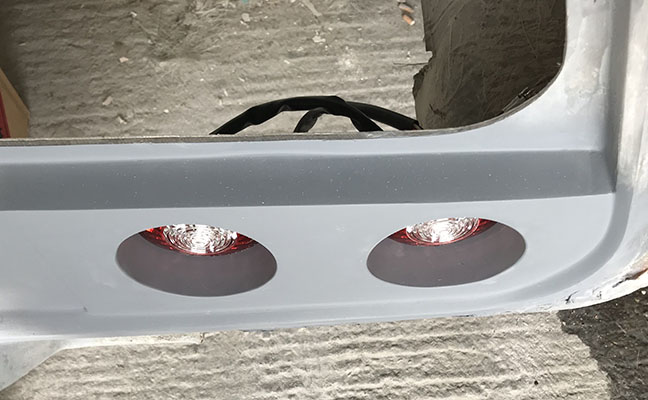
Number plate and lights detailed
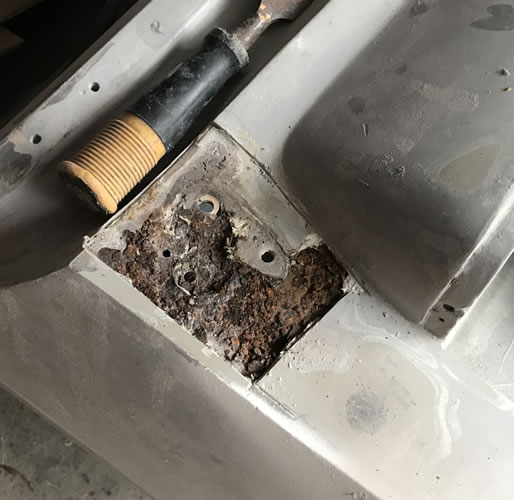
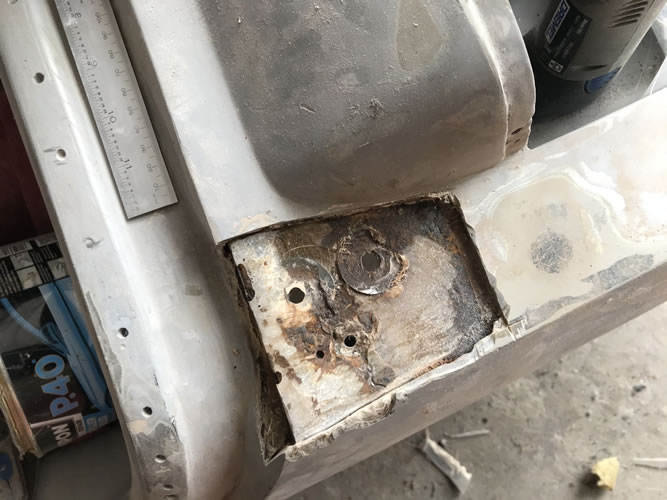

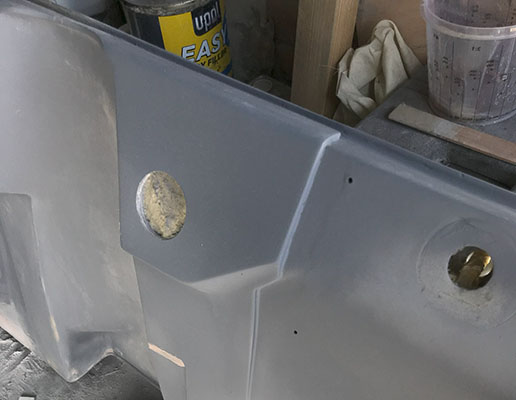
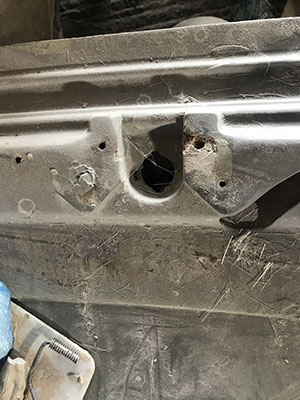
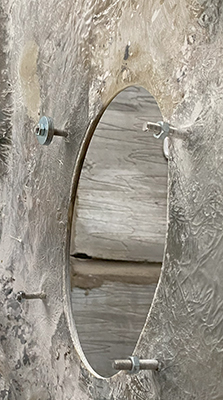
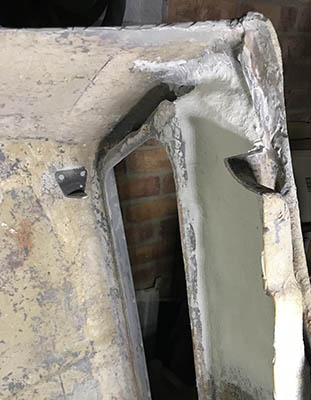
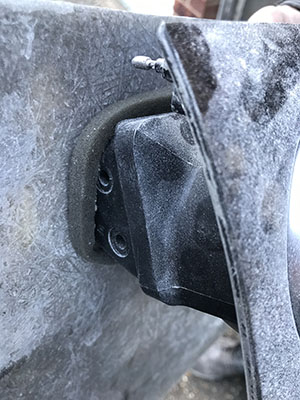
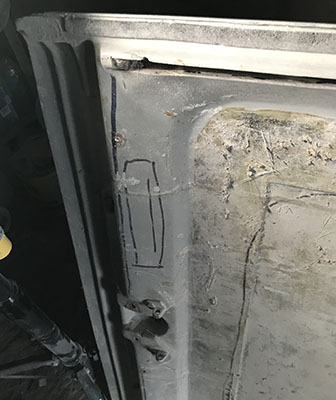
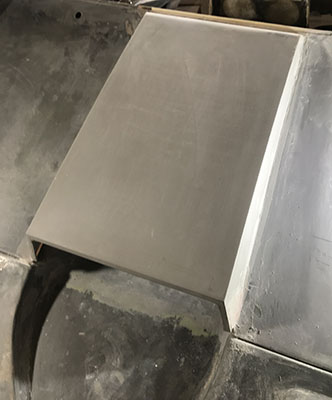
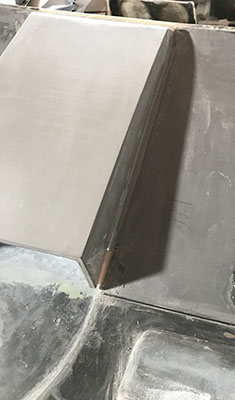
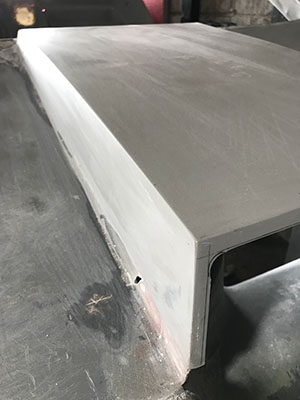
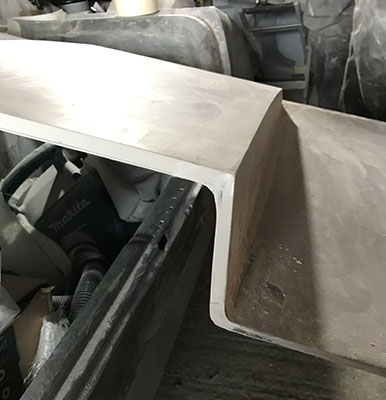
Body work and canopy hinge mounting steel plates corroded and cut out. New stainless steel insets re-fibre glassed.
New aluminum hinge positioned in new stainless steel inserts

Canopy - new stainless steel hinge mounting plates fitted - new aluminum hinges fitted
New canopy hinges fitted- fettling needed to adjust shut lines.
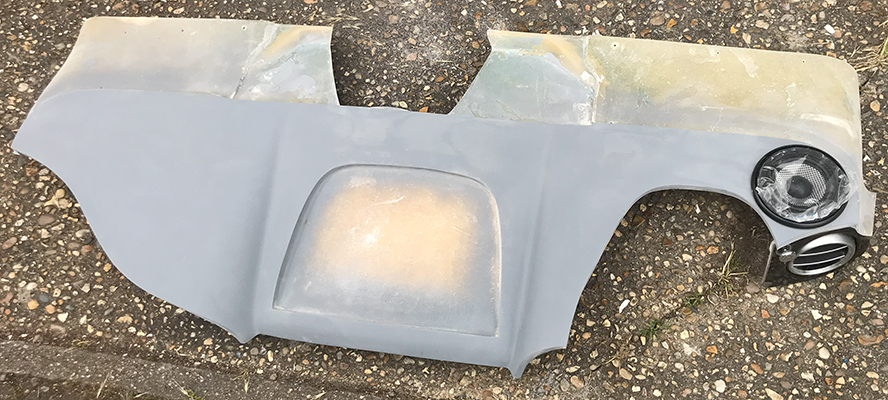
Spoiler ready for new indicator lights and number plate
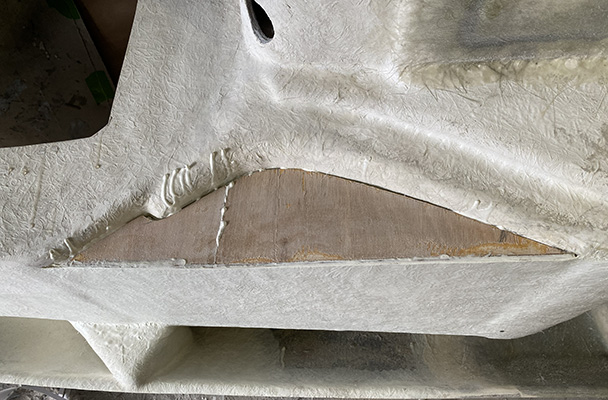
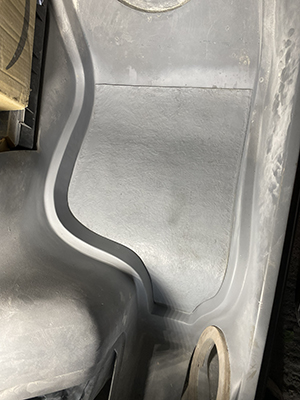
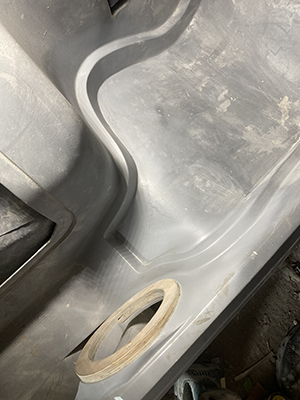
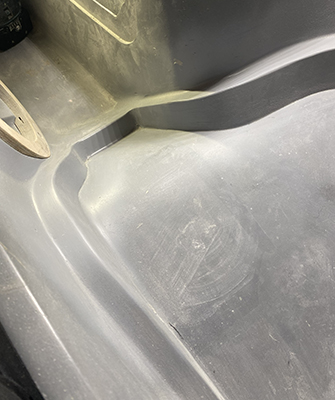
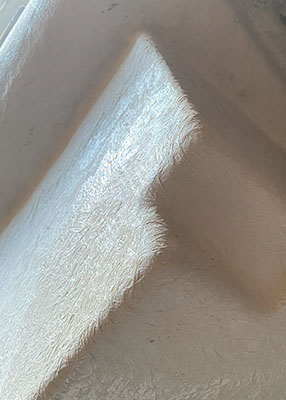
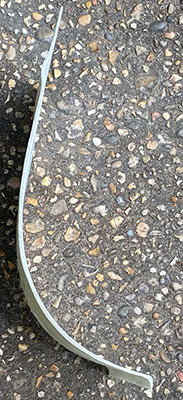
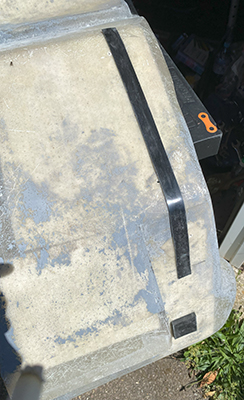
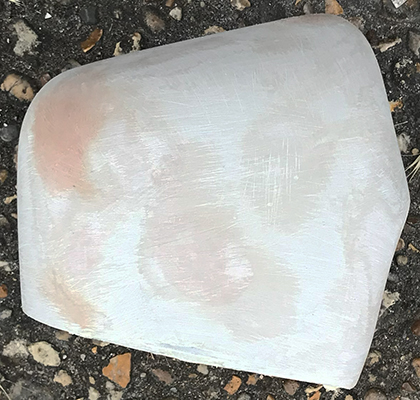
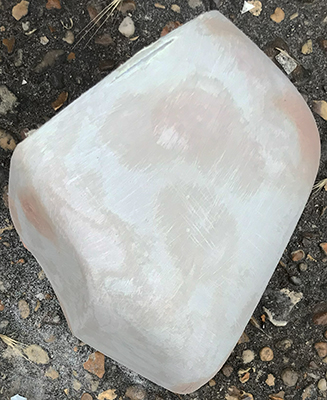
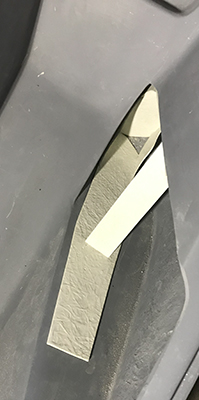
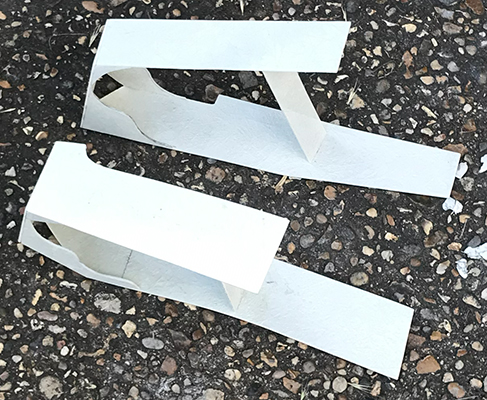
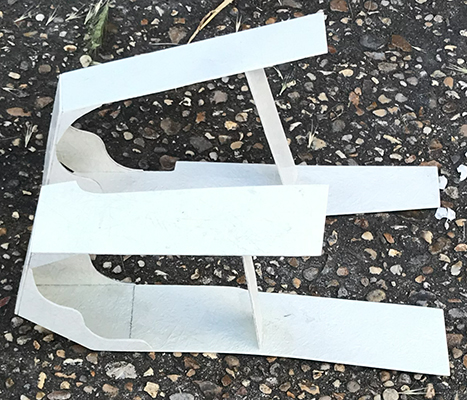
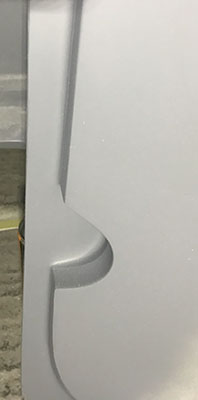
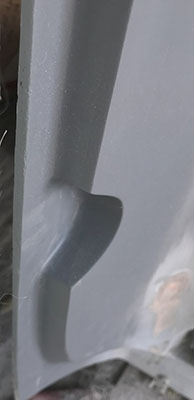
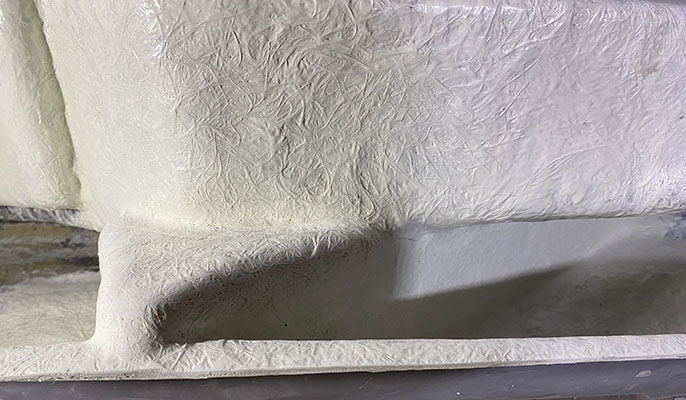
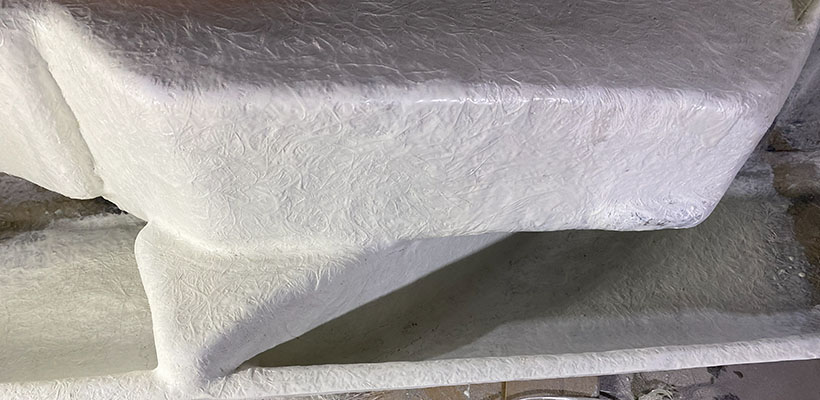
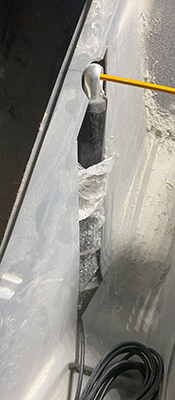
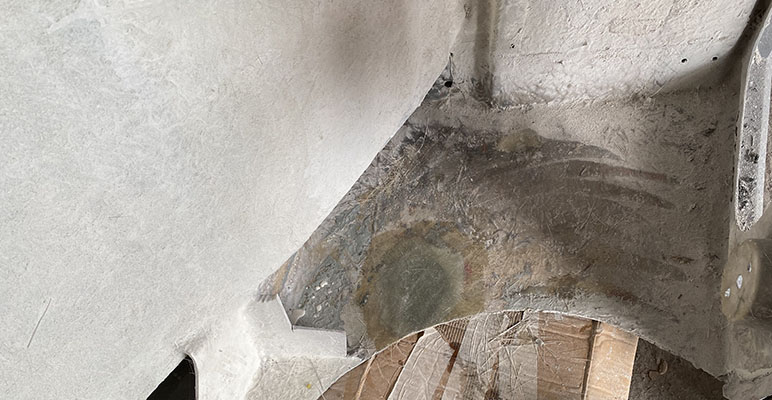
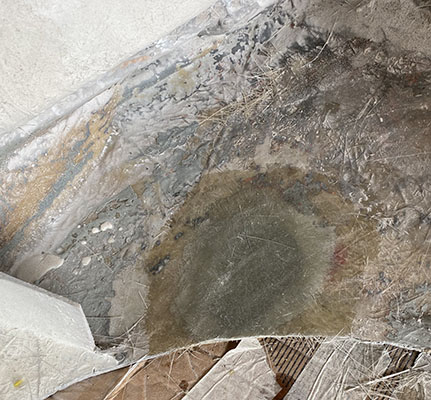
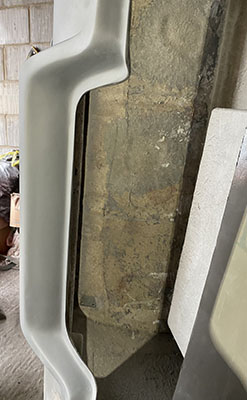
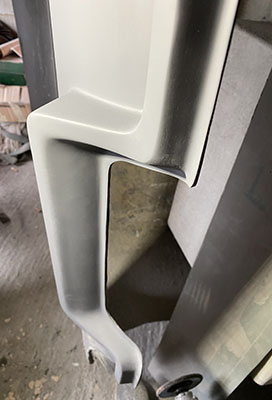
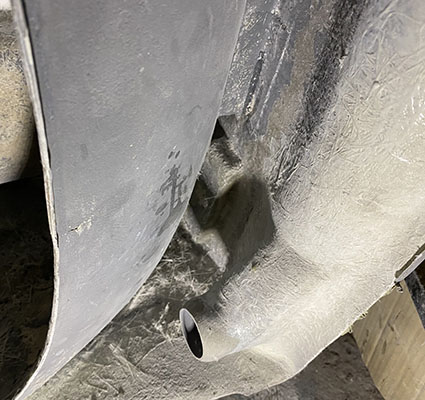
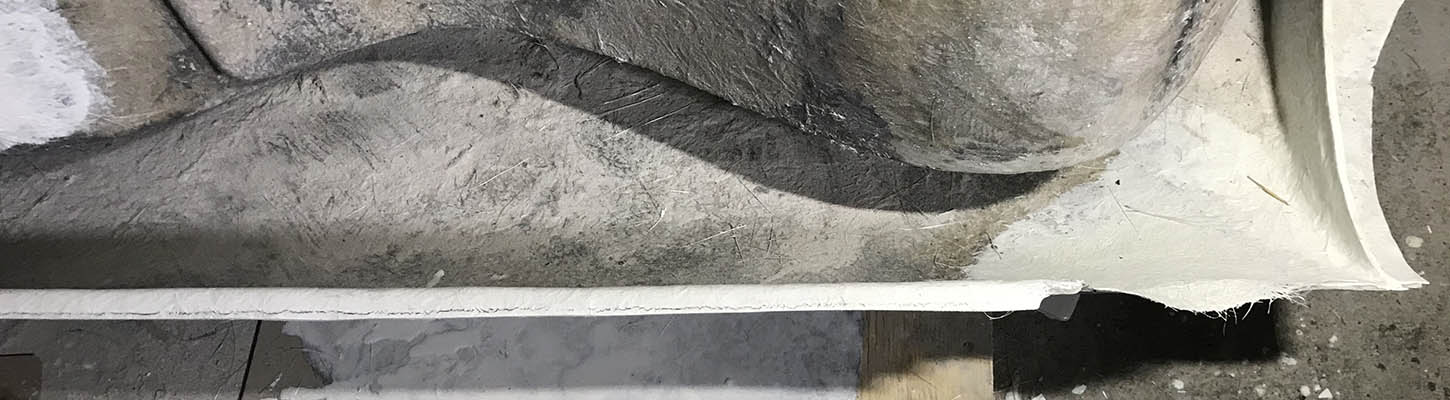
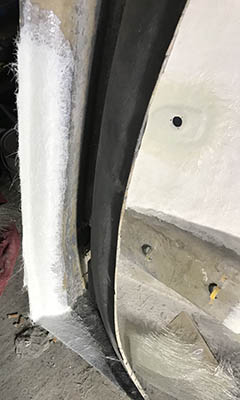
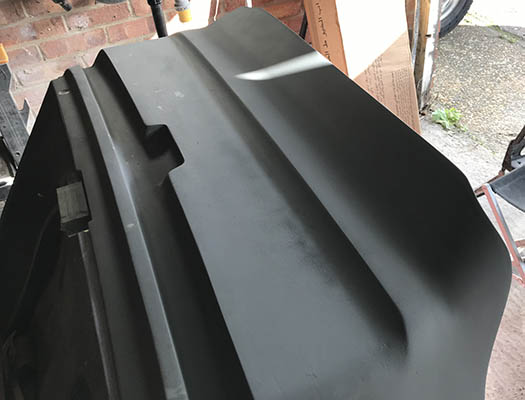
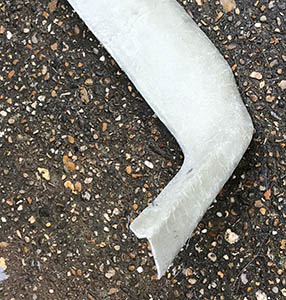
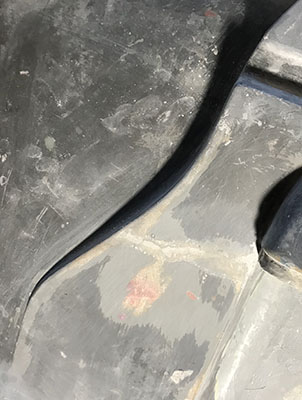
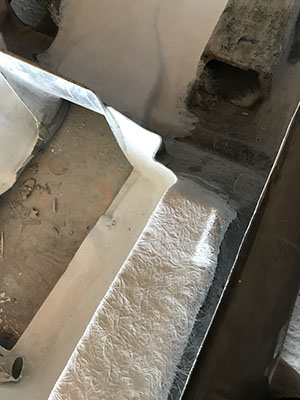
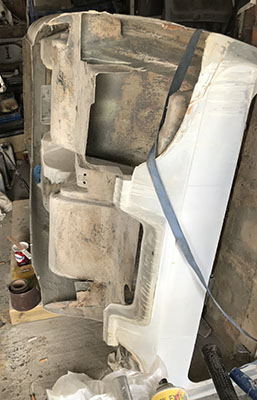
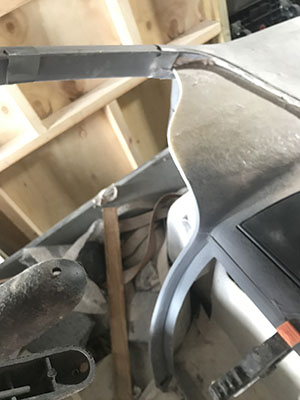
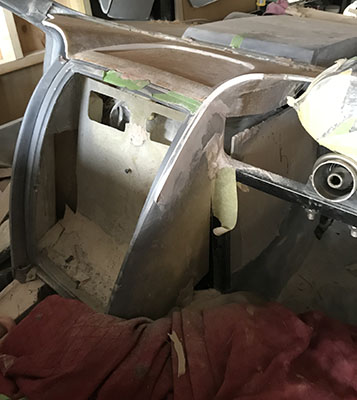
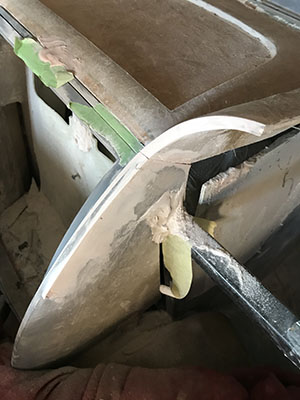
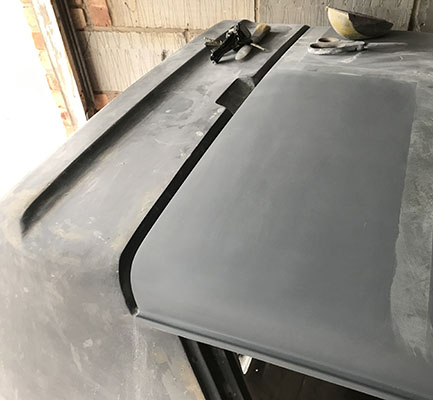
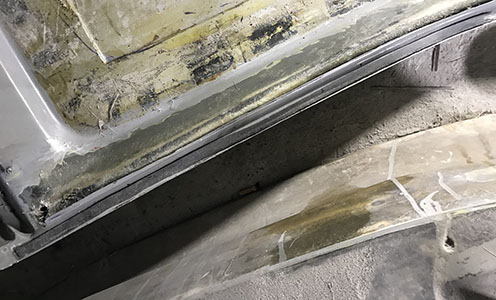
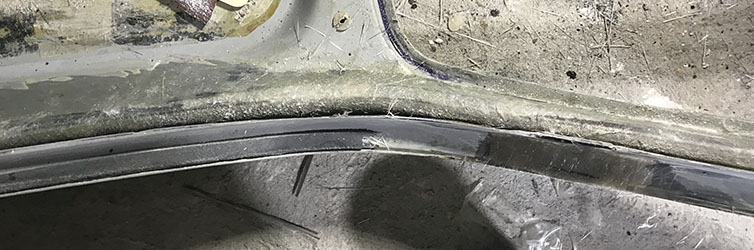
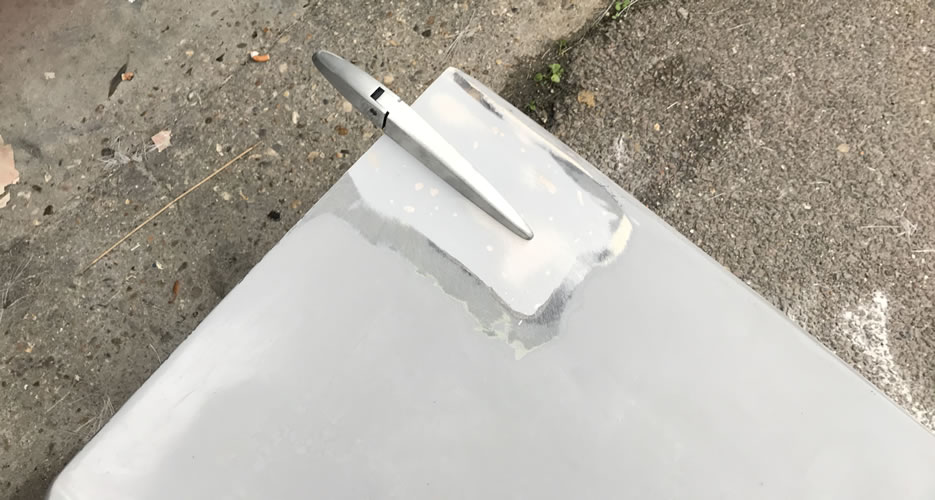
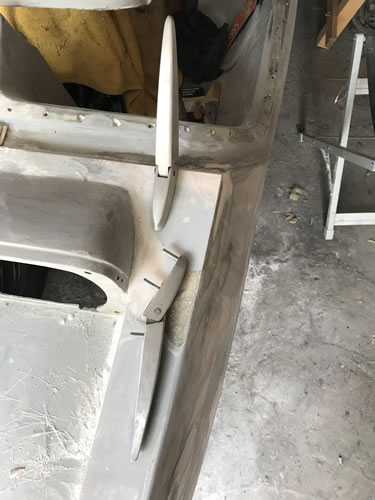
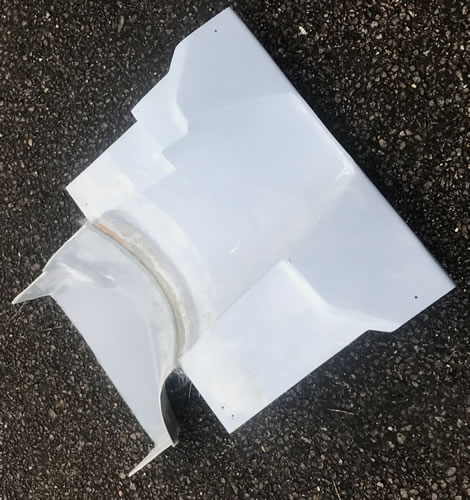
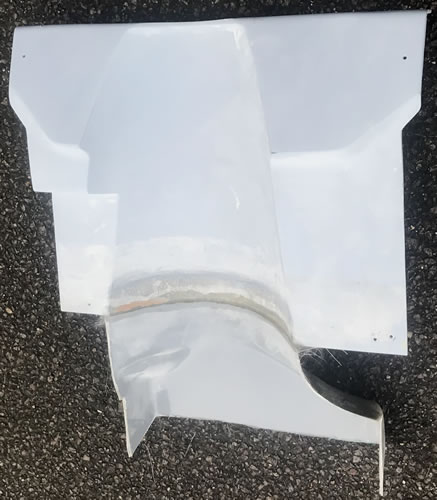
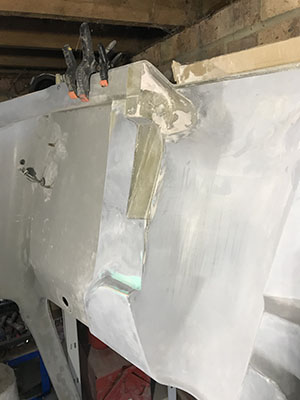
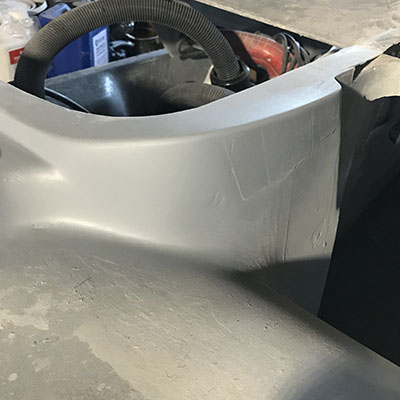
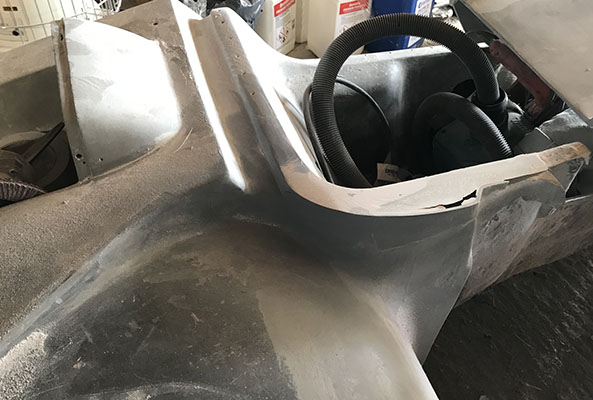
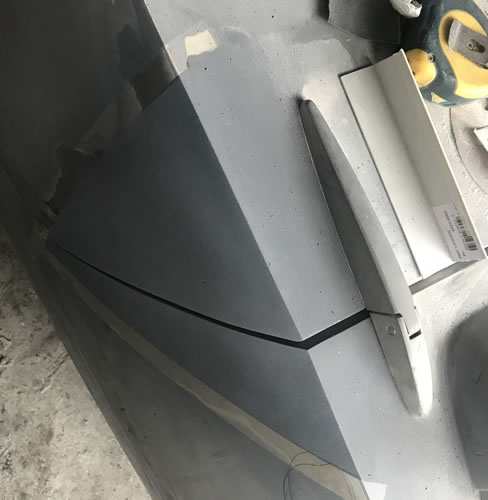
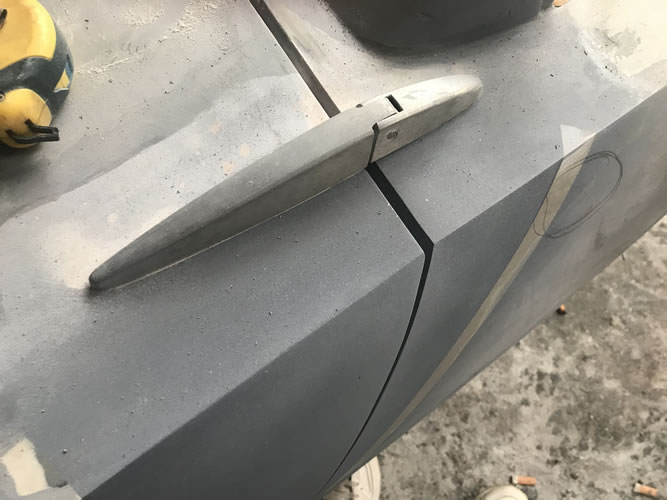
Over time both of the canopy sides had bowed out and are no longer flush with the bodywork.
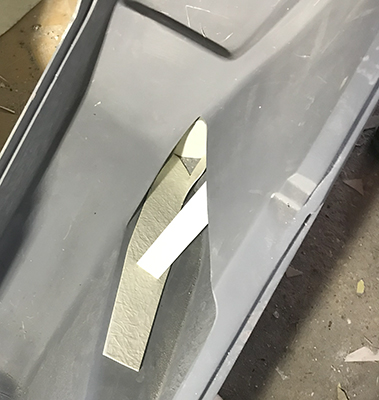
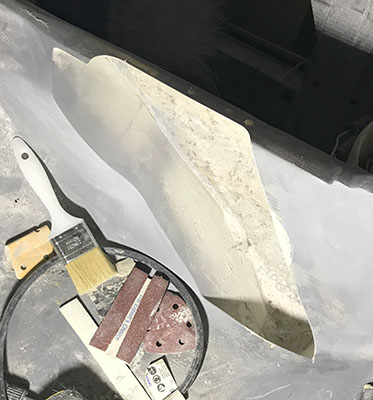
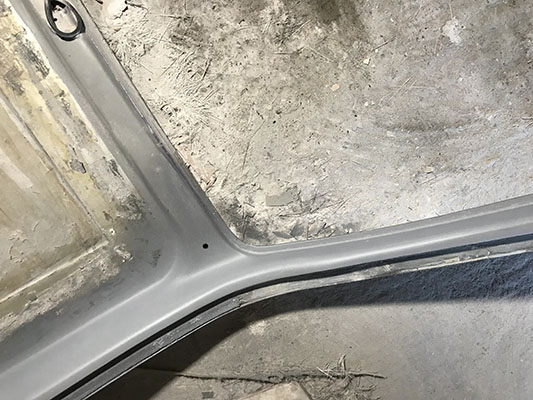
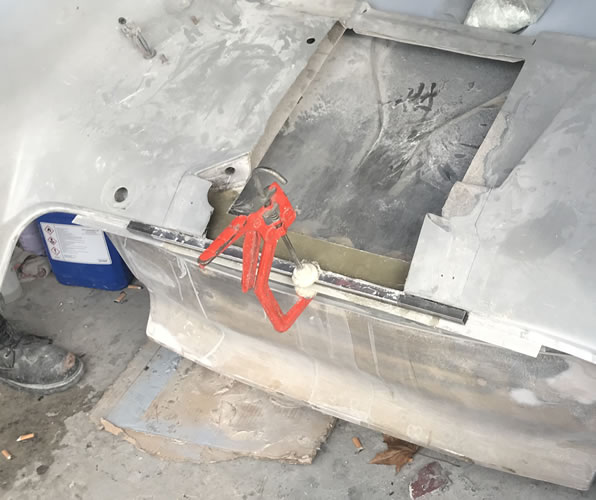
Thin slices of fibre glass were cut out each side of the canopy to pull in the sides. The slots were re-fibre glassed to set them in new positions perfectly.
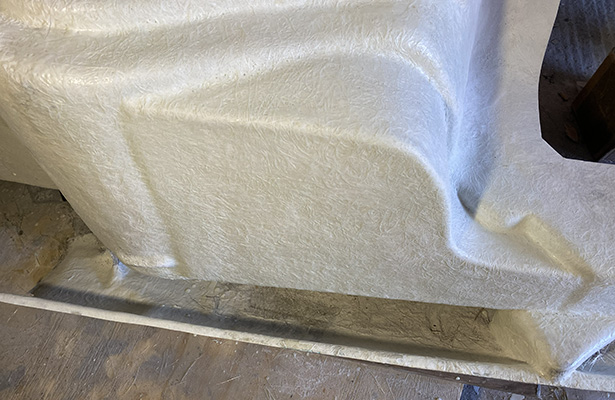
The canopy sides and body work are now perfectly flush.
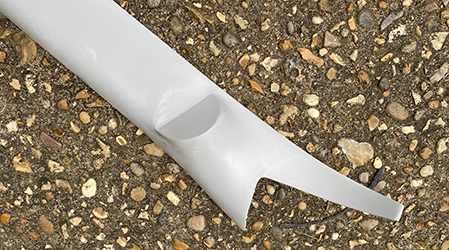
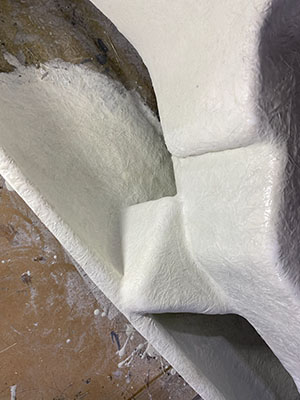
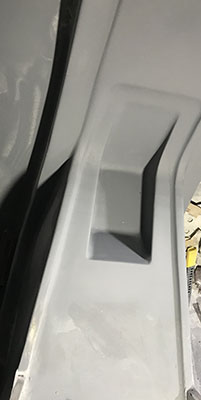
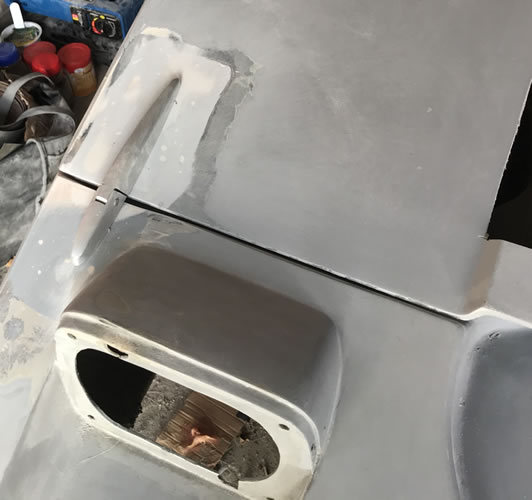
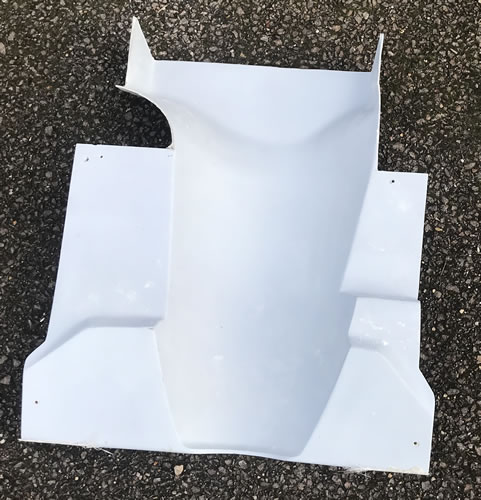
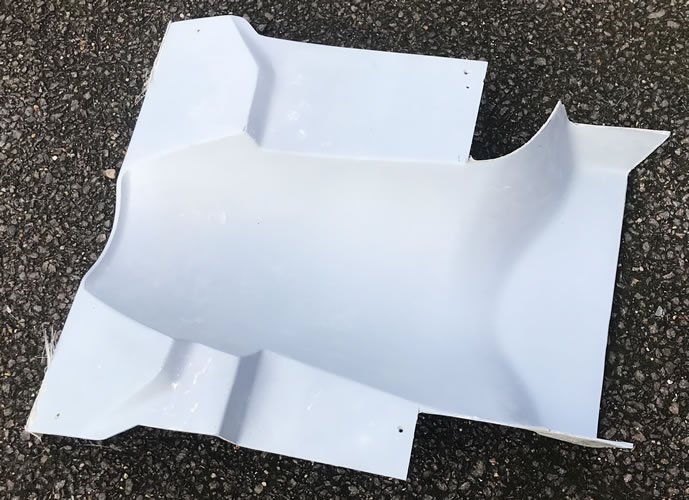
Finishing off the canopy bottom


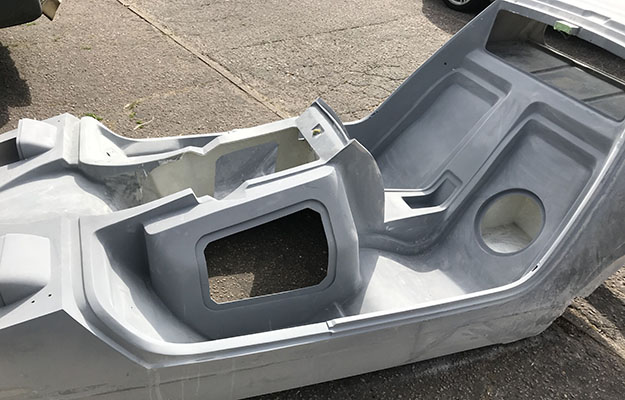
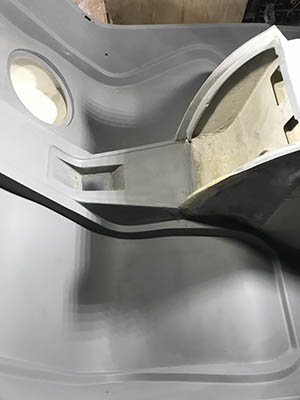
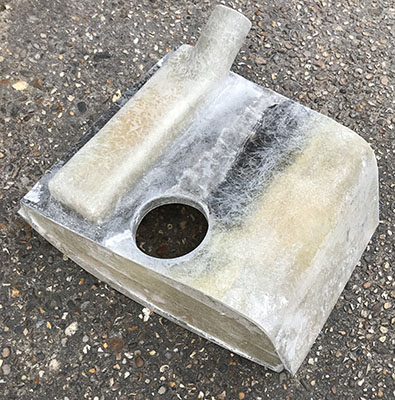
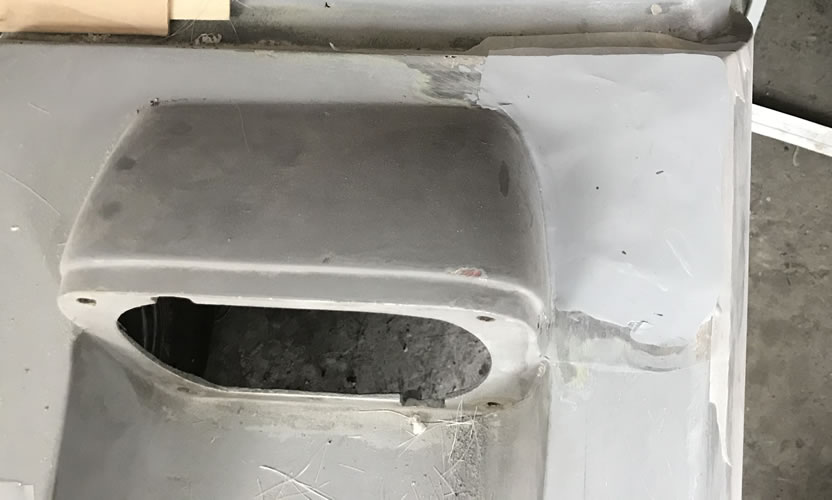
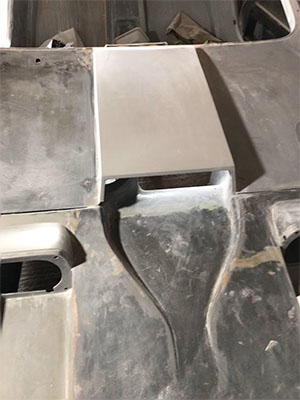
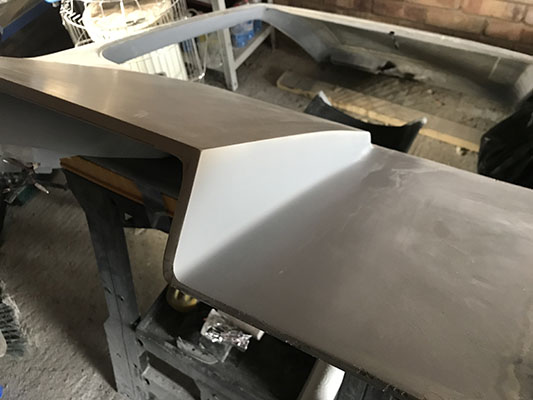
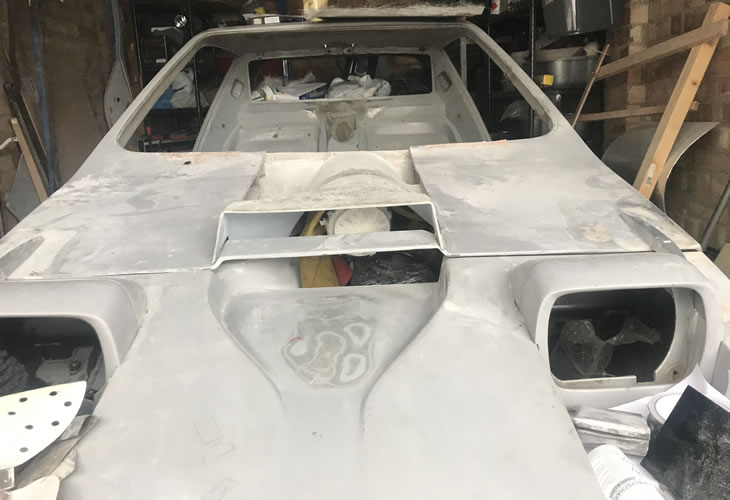
Starting the scoop construction on the canopy
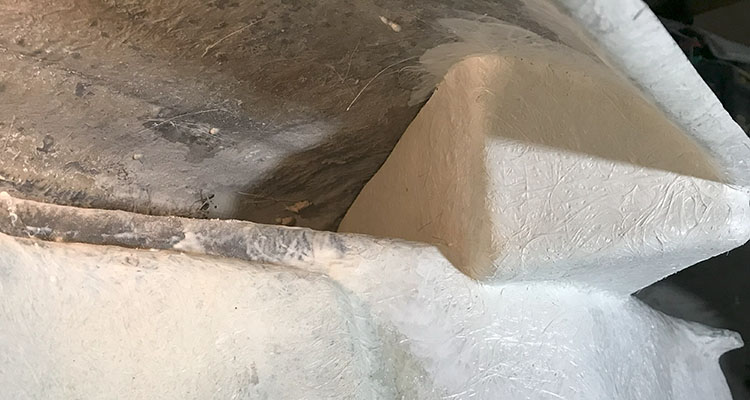
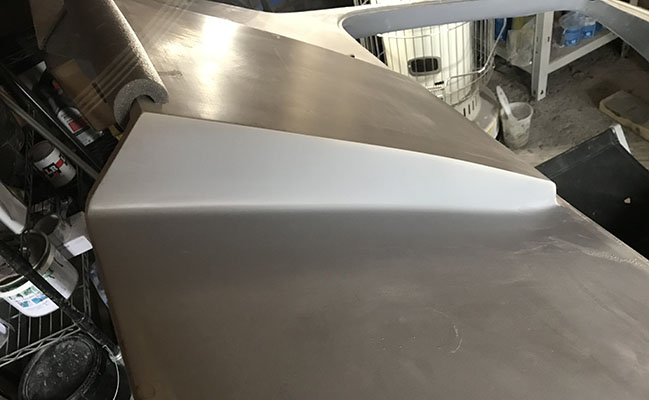
Modeled central air-box cover scoop in fibre glass
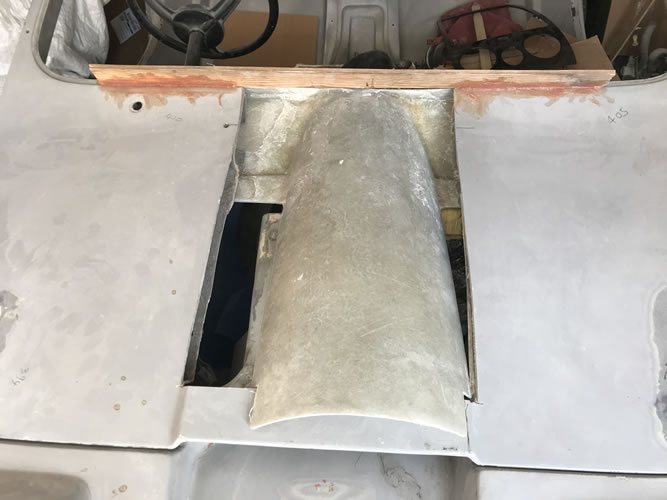
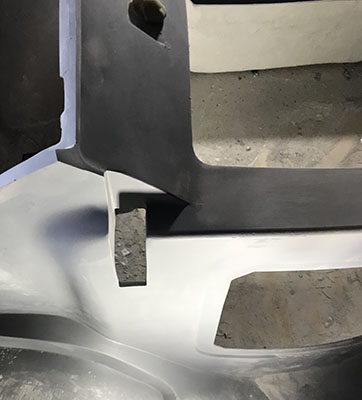
Inner canopy scoop
Inner canopy scoop formed to clear air box
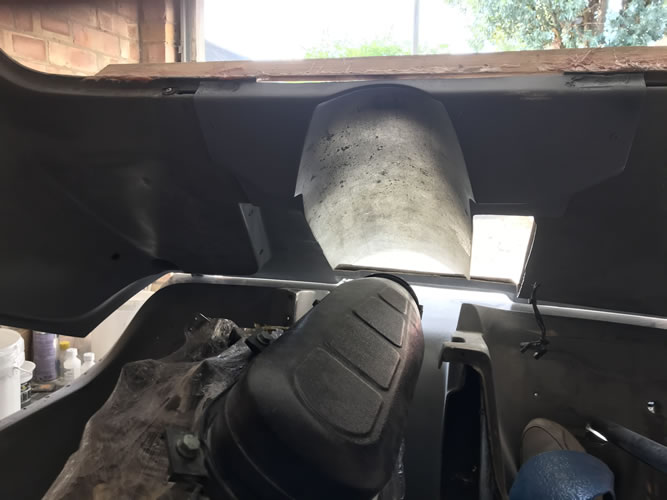
Canopy inner scoop loosely fitted
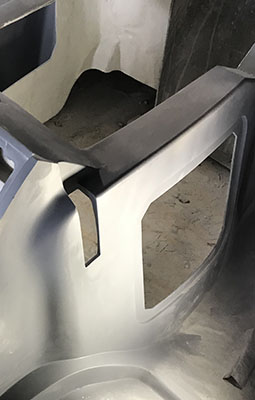
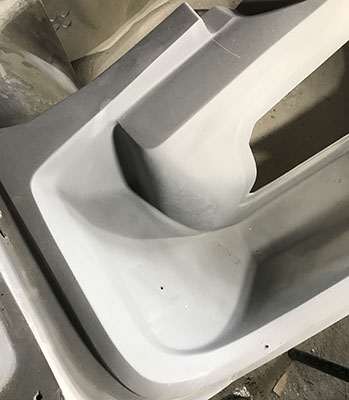
Finished first part of inner scoop moulding
2nd part of inner scoop being moulded in foam
2nd half of air scoop mould made.
2nd part of air scoop joined
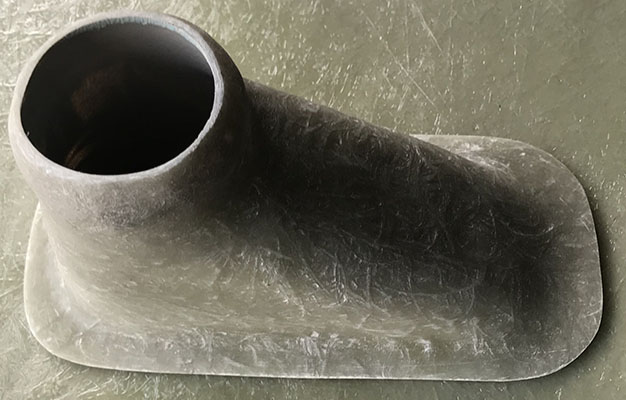
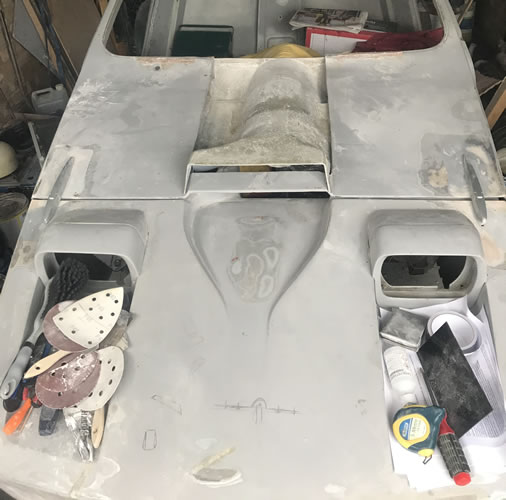
Nearly finished air intake
This flow directs fresh cold air directly from outside into carburetter air box to improve perforamance. Almost ram air.
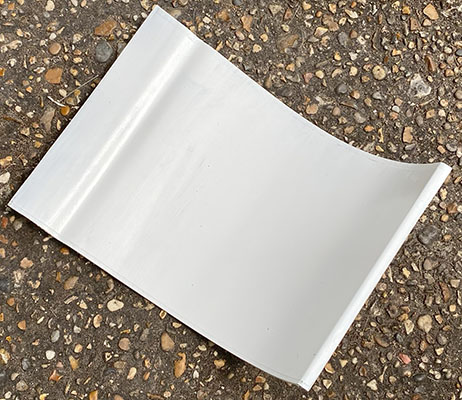
Clear fibre glass sheet made up to add more more trim to internal scoop
More inner scoop being shaping to accomodate the canopy rubber seal location
New outer scoop template mocked up using MDF

External canopy scoop mould made and internal duct offered up for sizing and fit.
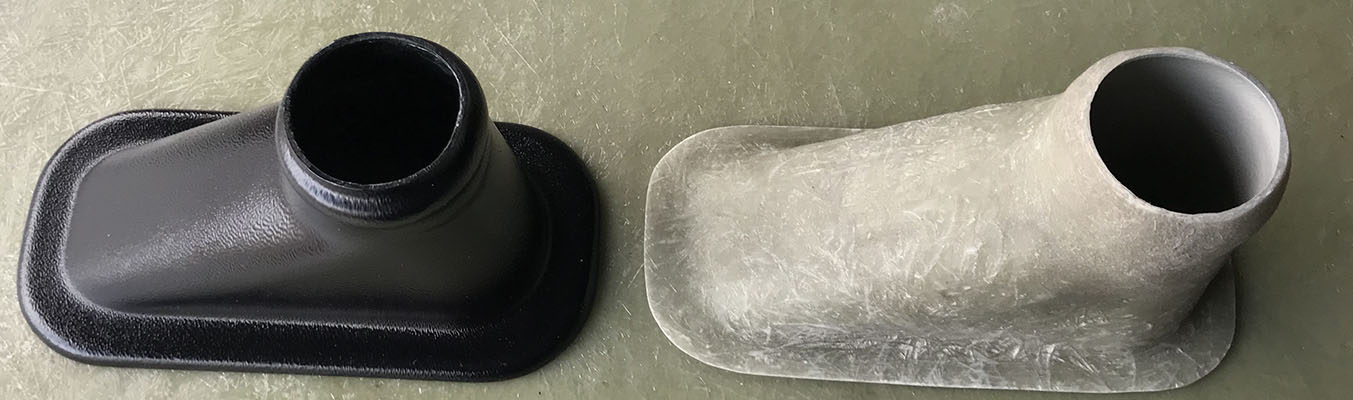
Getting scoop out of its mould

Scoop out of the mould ready for trimming - this is super strong to keep canopy stiff
Finished scoop being glassed in to its final position - inner scoop fitted temporarily
New scoop being glassed in place
Scoop edges blended to the canopy

Outer scoop radius added to match altered body inner radius - this allows for a body rubber sealant strip to be fitted to seal cabin
Spoiler now bonded to canopy top
Additional moulding to body air inlet
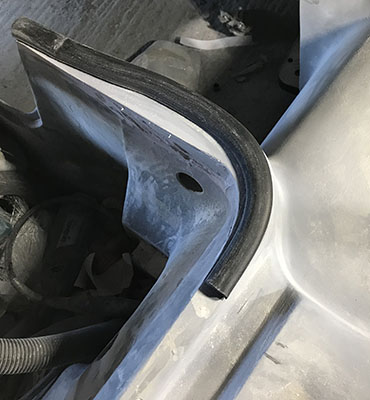
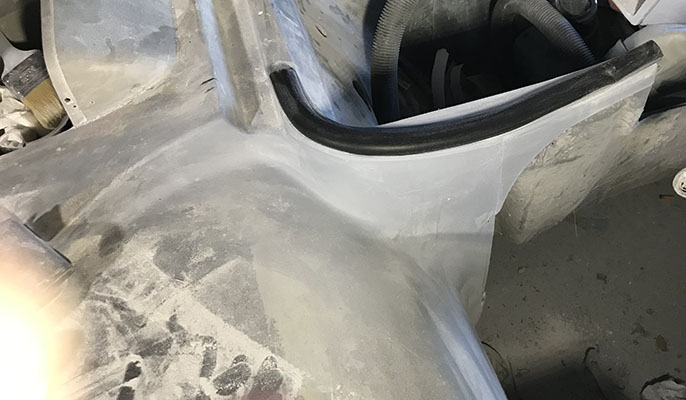
Test body seal rubber in place- using a special D shaped rubber profile that forms a great water tight seal between body and canopy.
Sponge D-profile 21x15mm with adhesive black
Shaping other side of the body air intake to suit new seal
Inner canopy moulding temporarily fitted
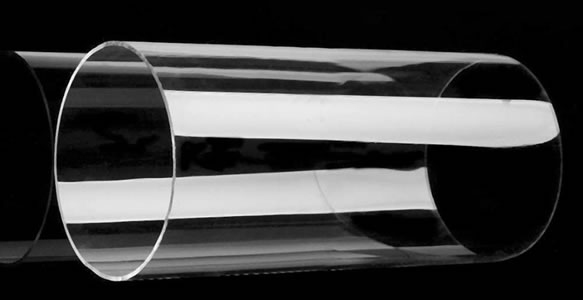

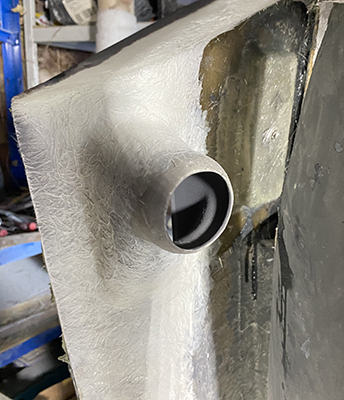
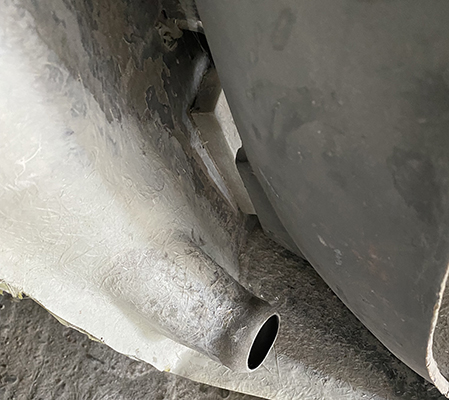
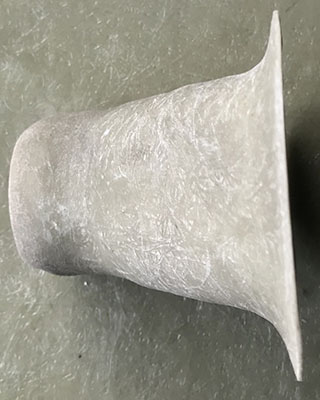
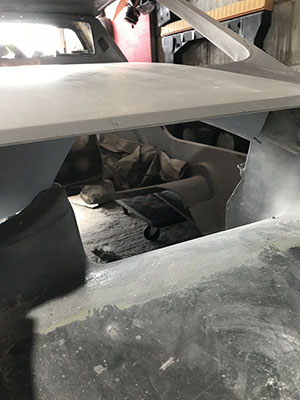
100mm dia OD pipe being used as a proforma for air box extension into scoop
Inner scoop loosely in place - not removing the original scoop cross member until new central canopy is reinforced.
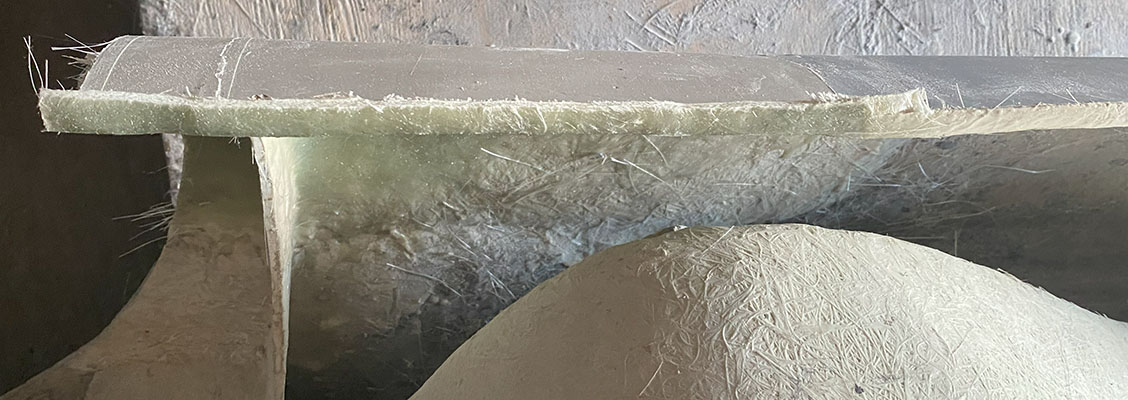
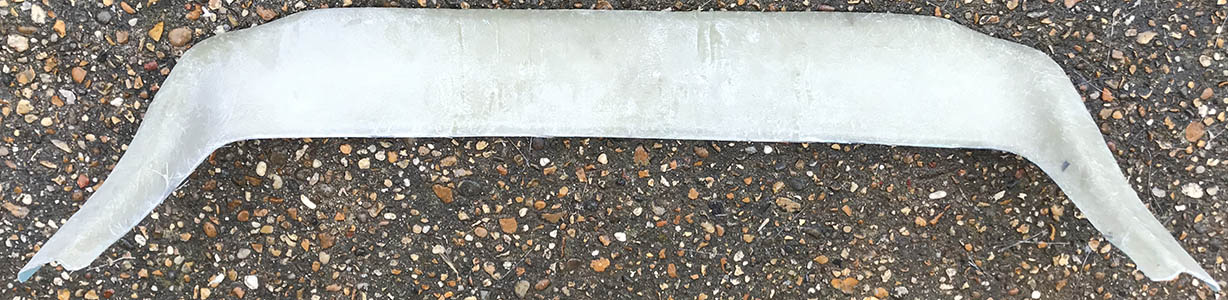
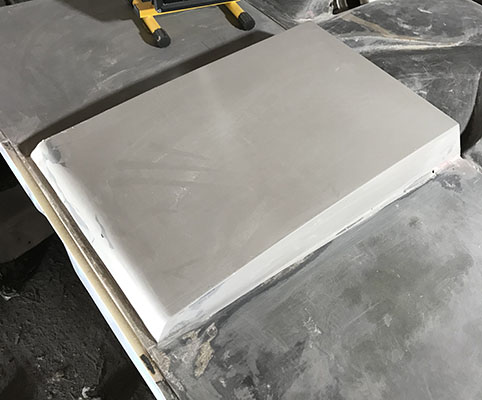
New reinforcing canopy strip and window edge made
Nice mega strong fibre glass cross member and window edge formed
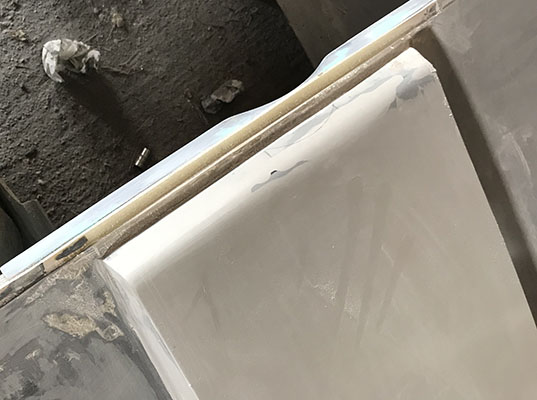
Internal canopy scoop laid in loosely
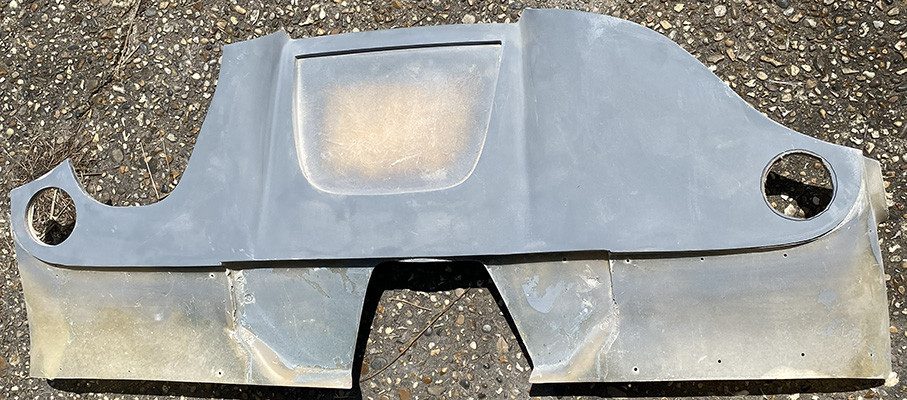
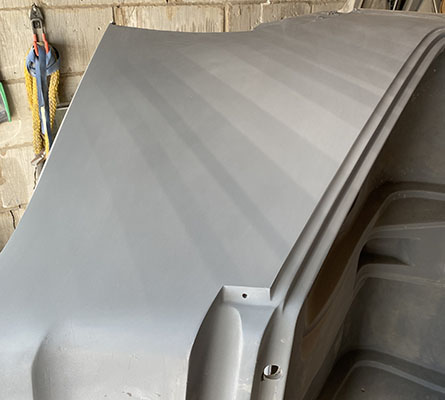
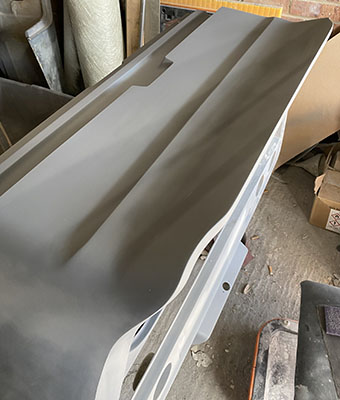
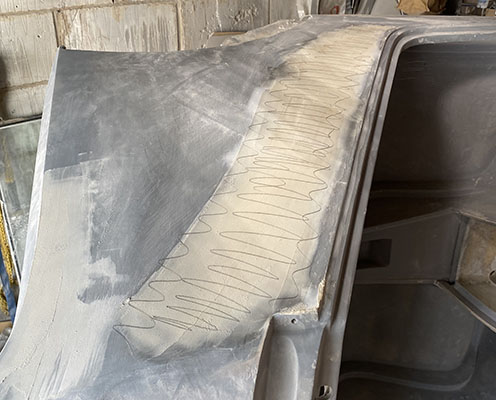
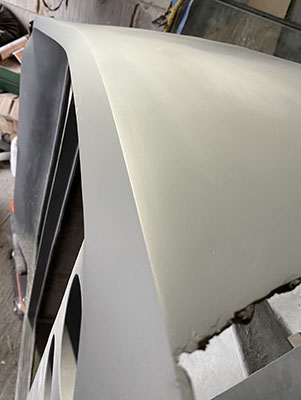
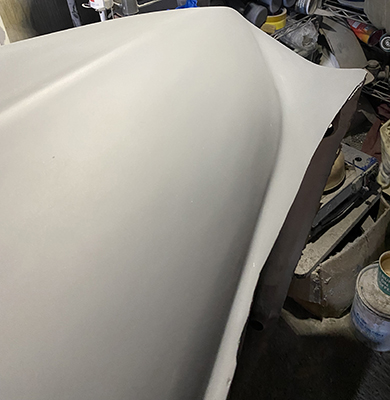
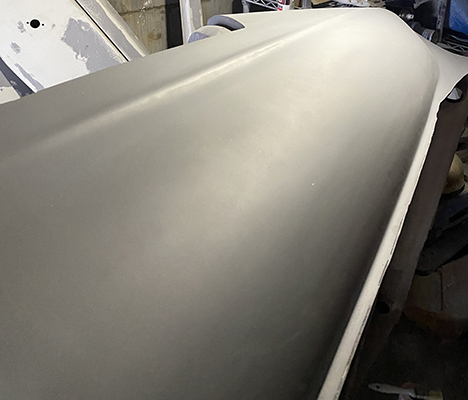
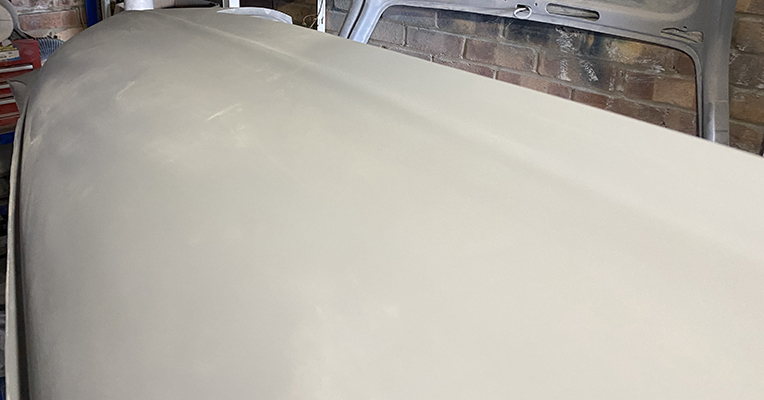
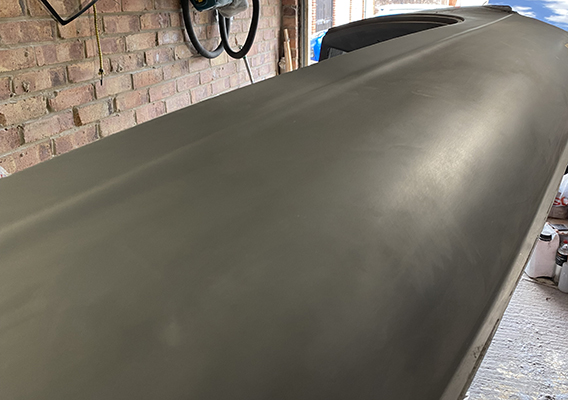
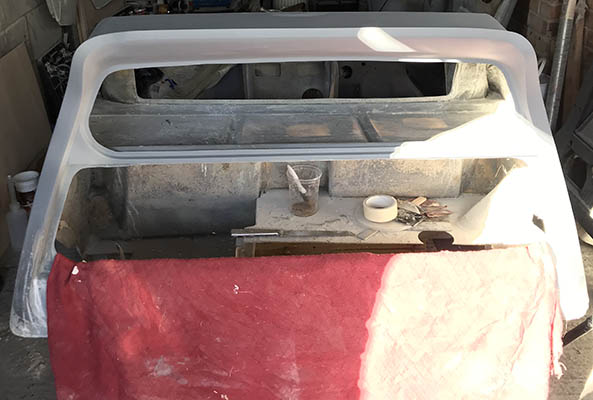
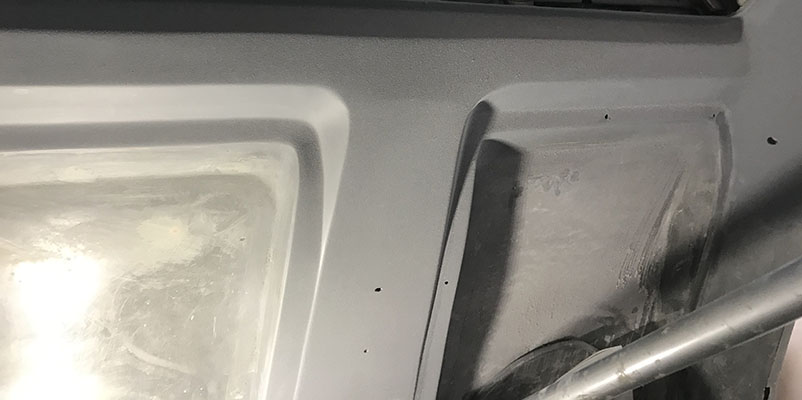
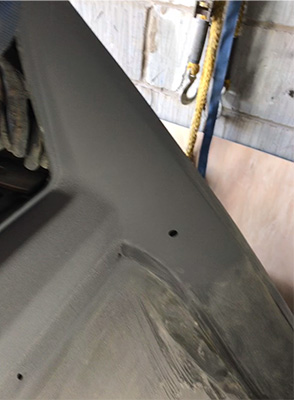
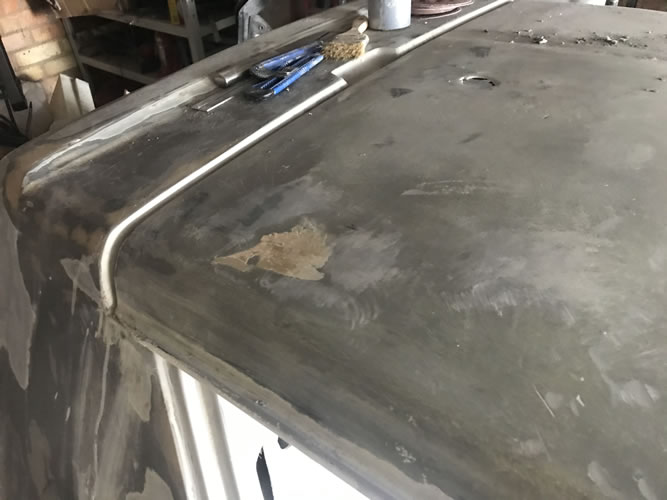
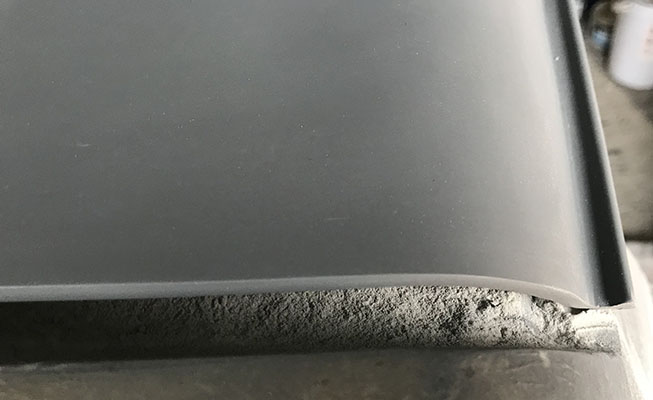
Body prepping- Roof shows Reliant's bad filler from the factory to a dip in the roof
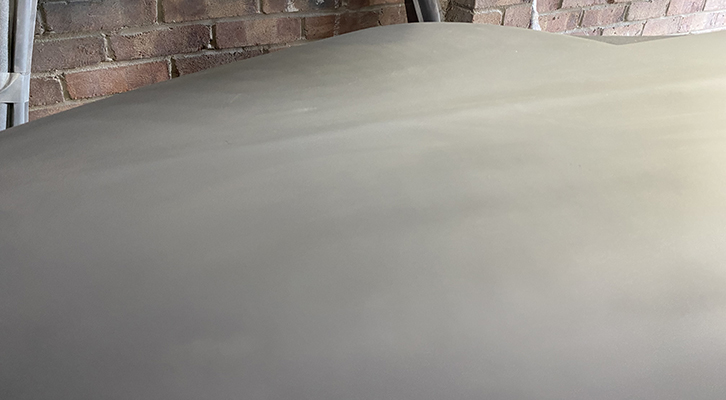
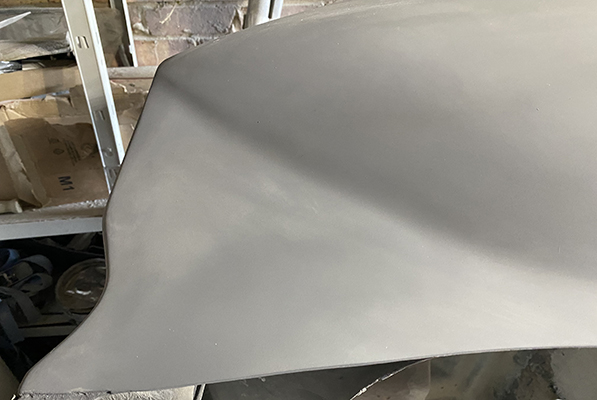
Detailing work

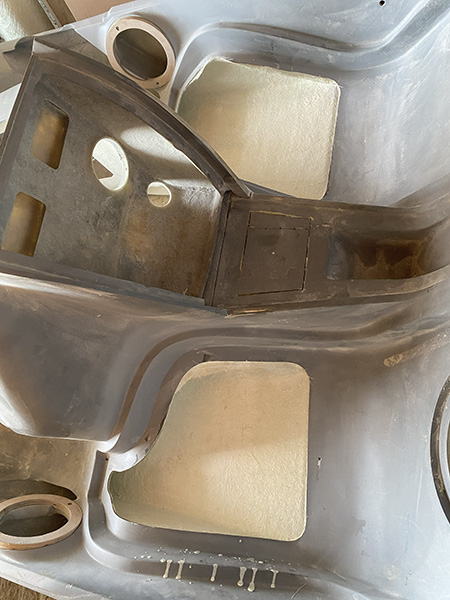
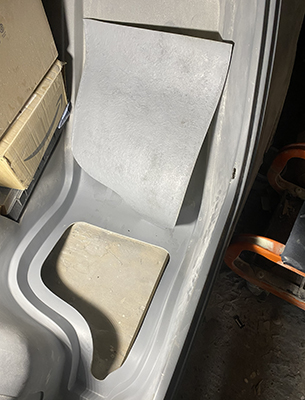
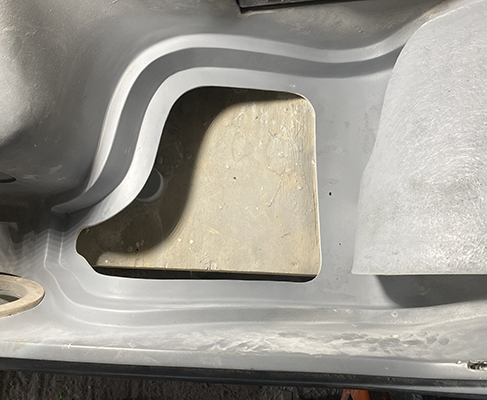
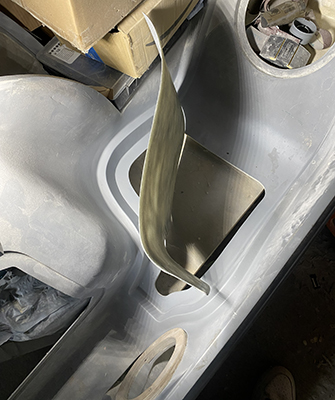
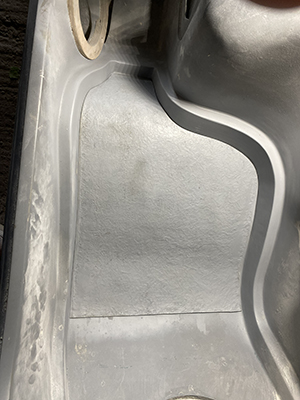
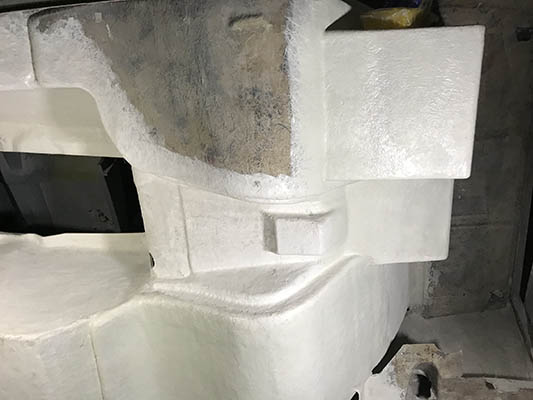
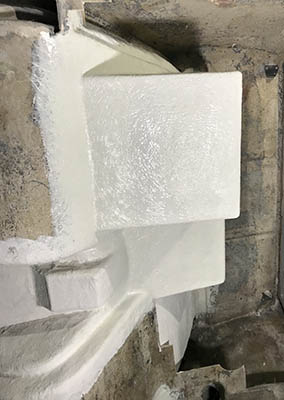
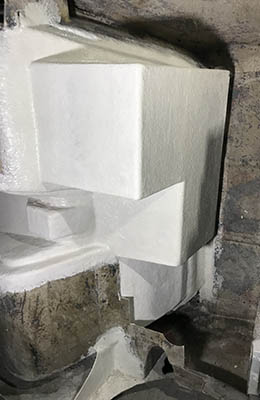
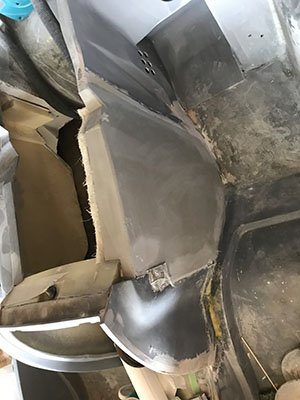
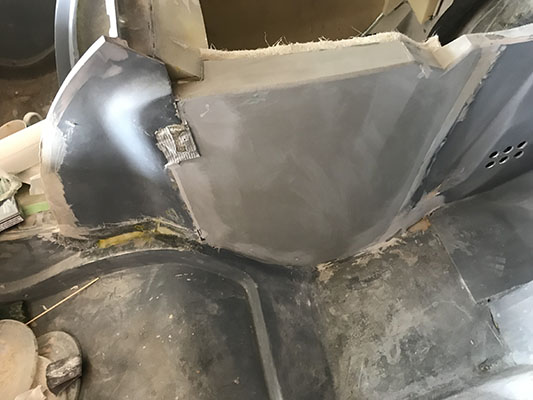
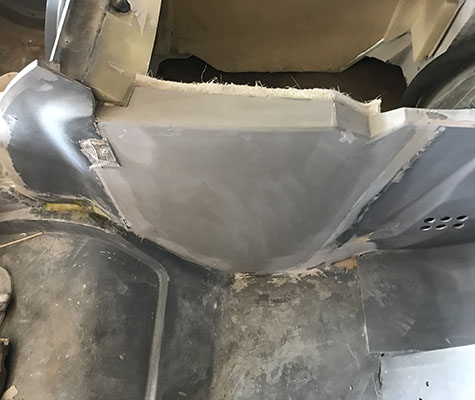
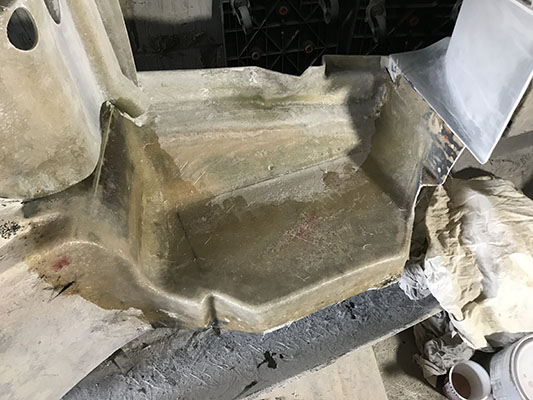
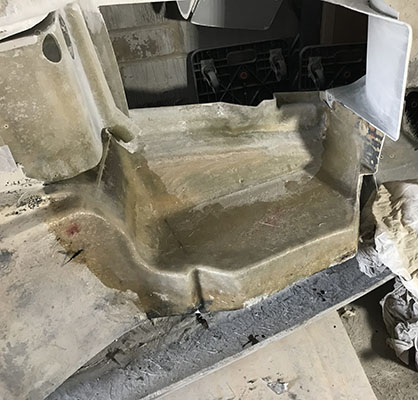
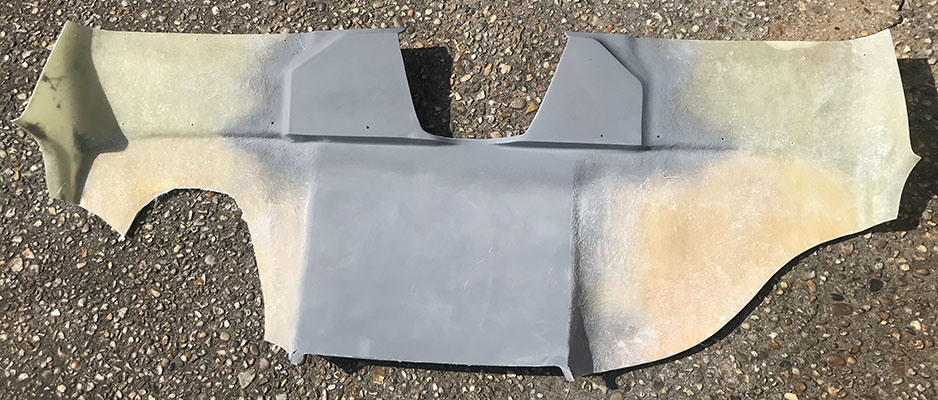
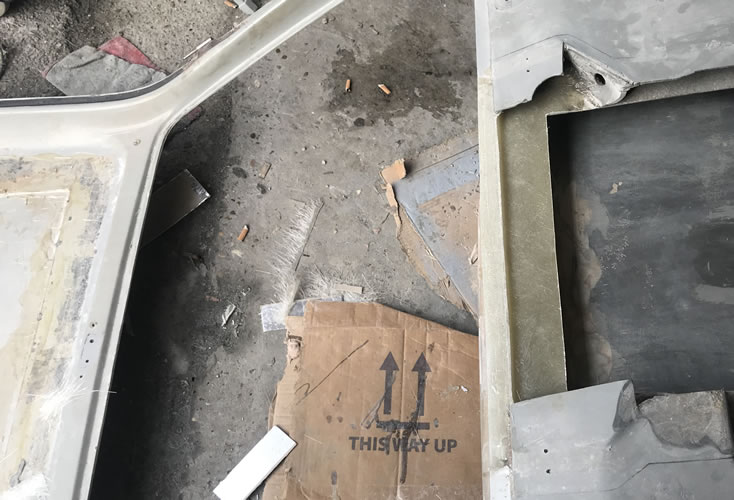
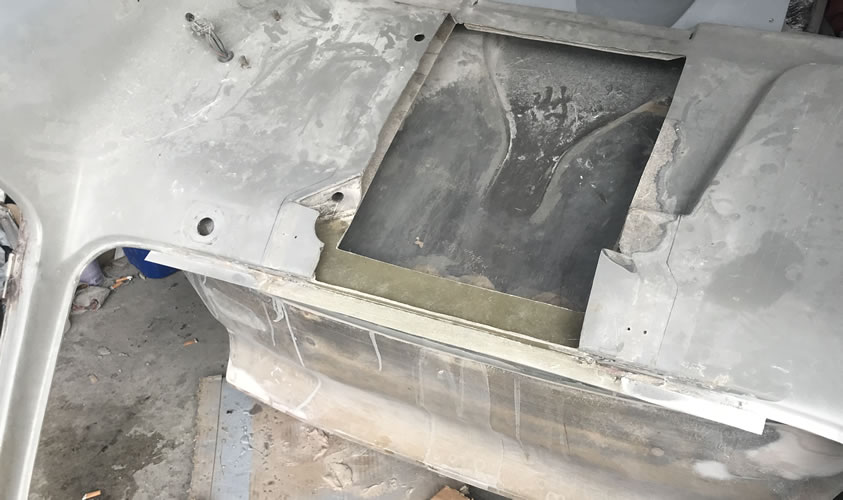
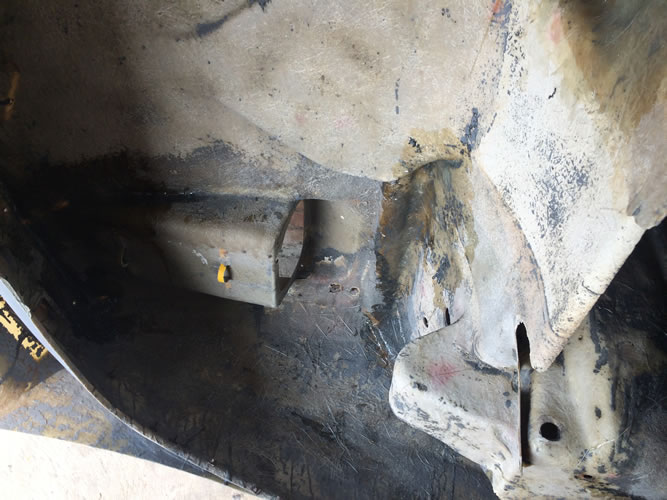
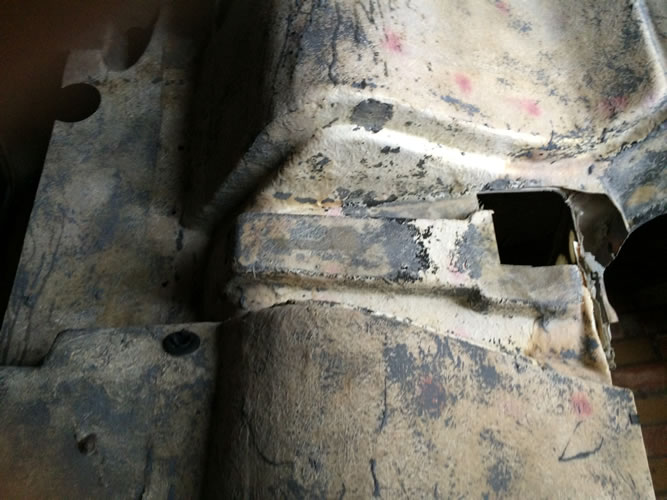
Original body work chopped out ready for new mouldings
Original body work chopped out ready for new mouldings
Original body work chopped out ready for new mouldings
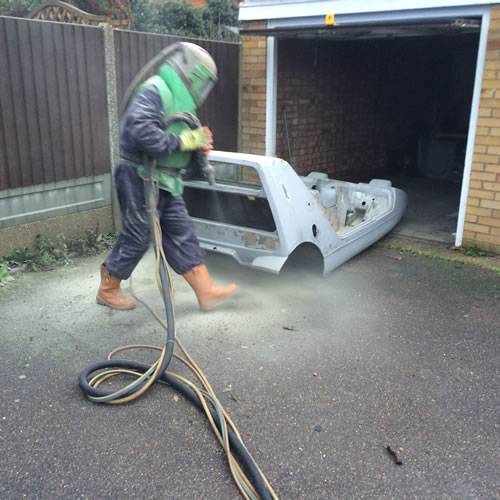
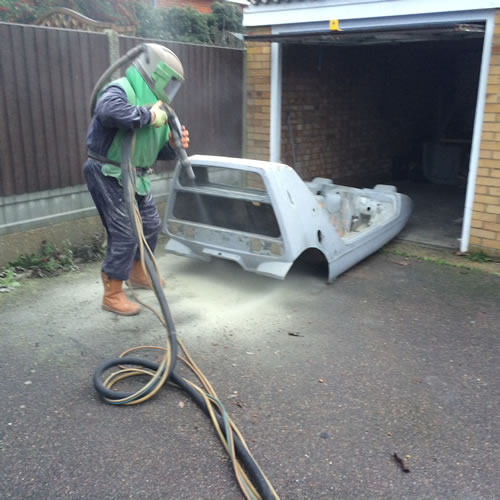
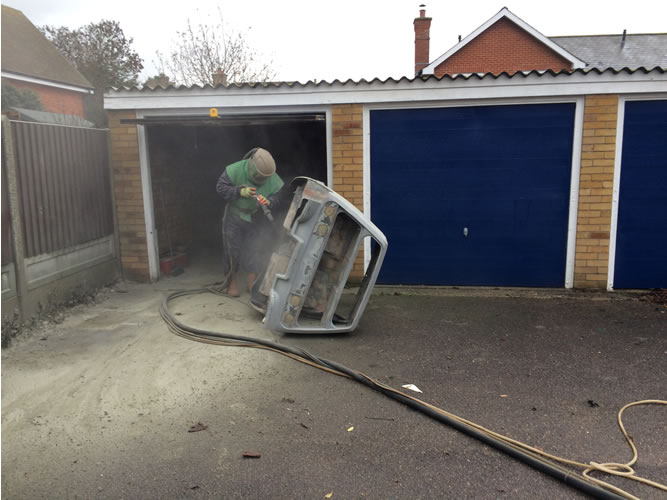
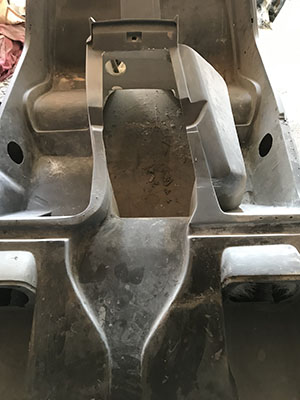
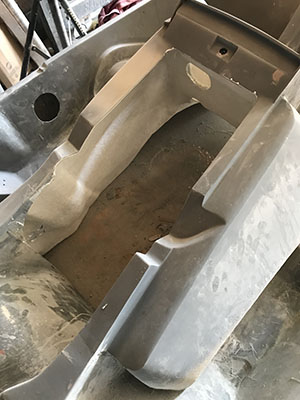
Serious soda blasting kit used
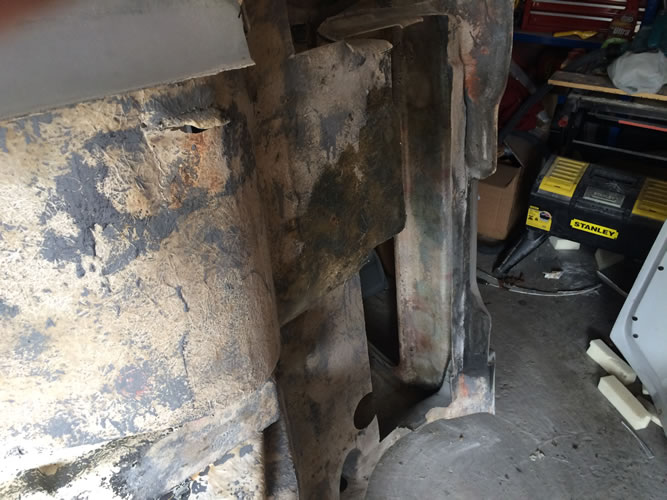
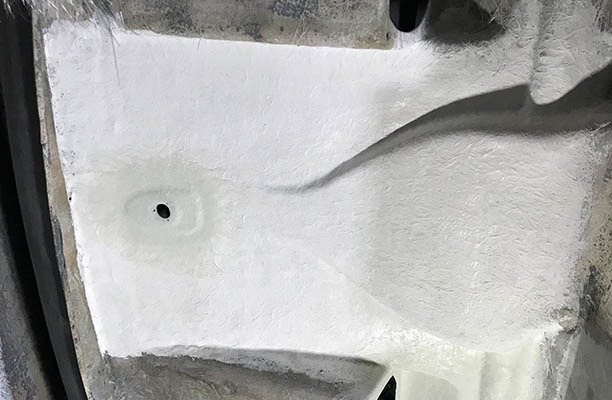
Under body has been soda blasted to remove 40 years of grime and flaking paint

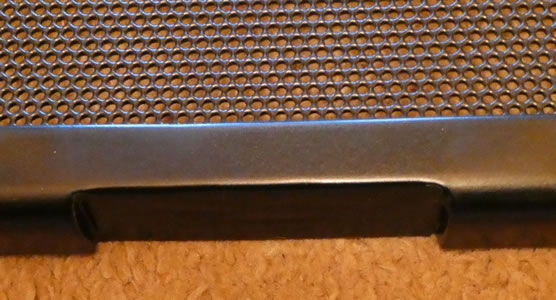
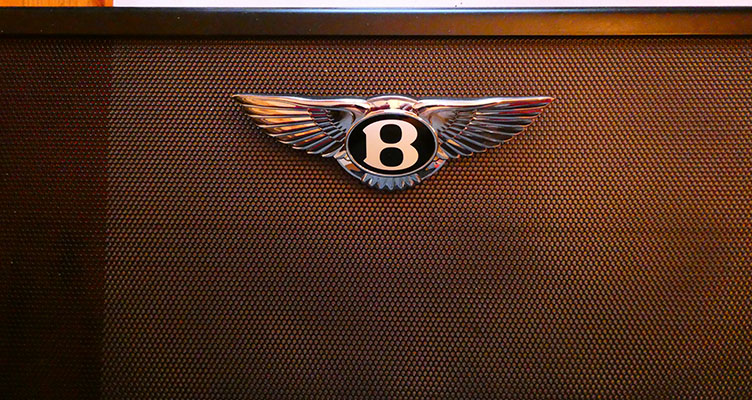
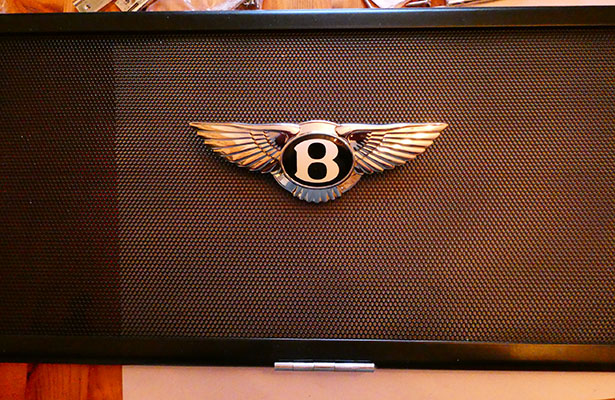
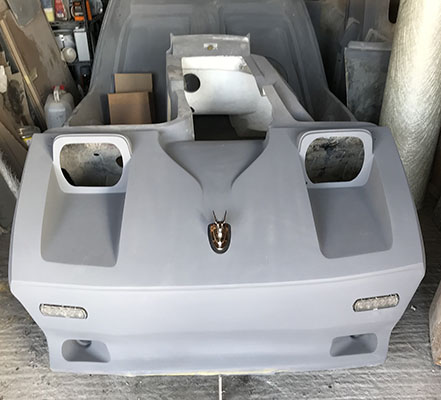
Boot badge - higher or lower ?
![]()

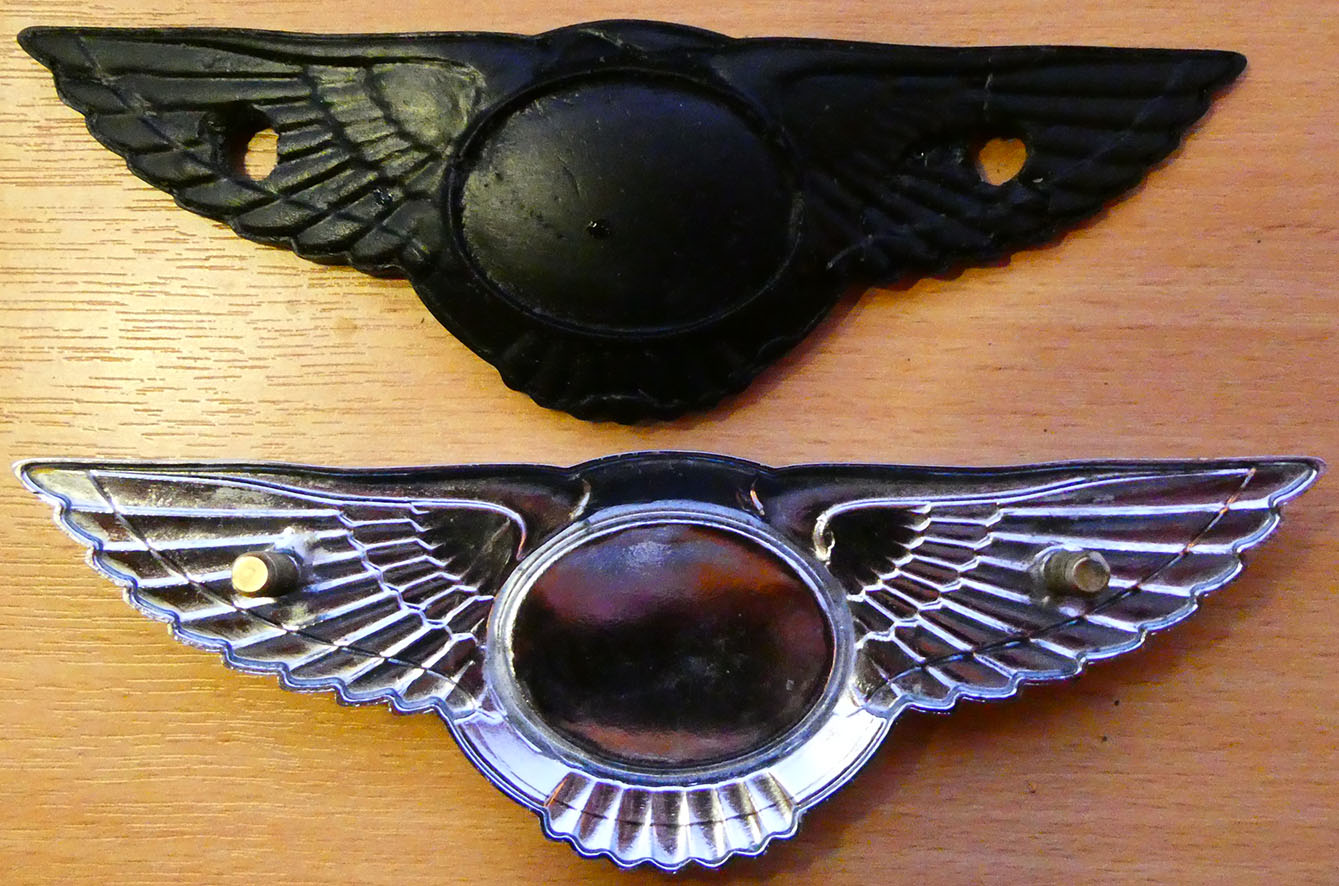
Custom made new badge backing rubber to straighten out concave badge mounting to flat boot lid.
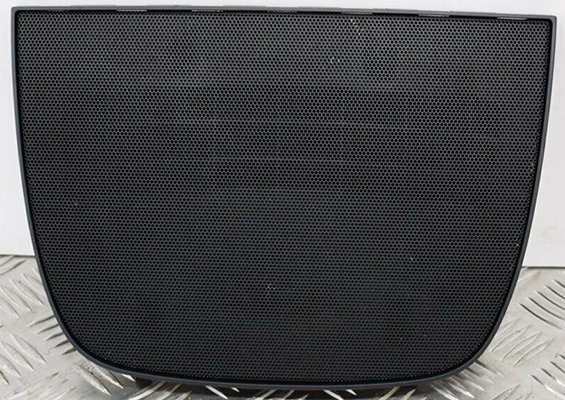
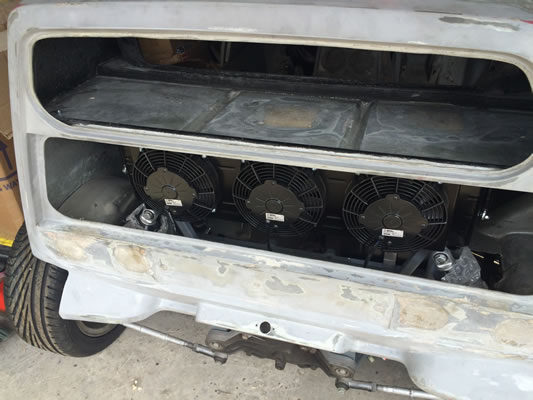
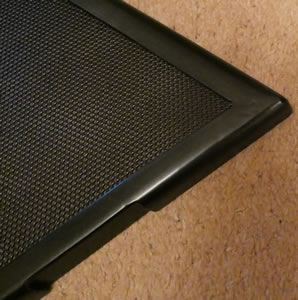
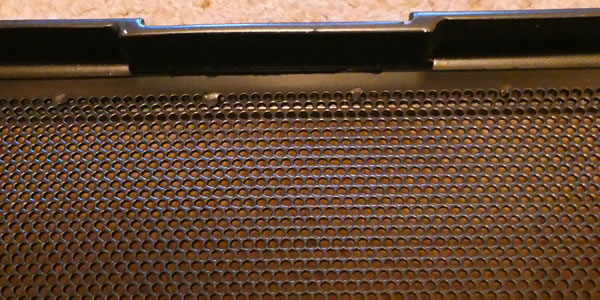
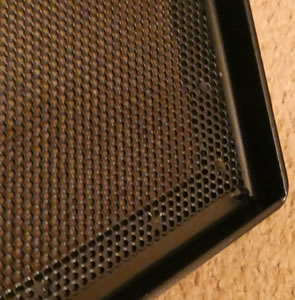
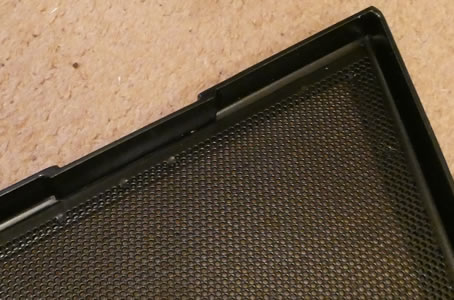
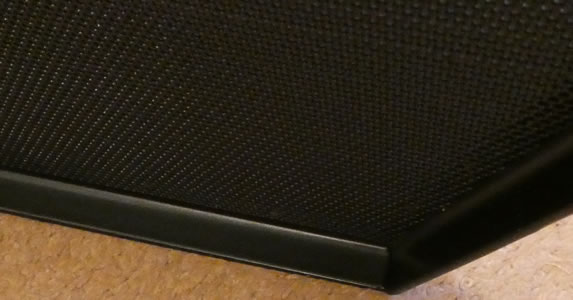
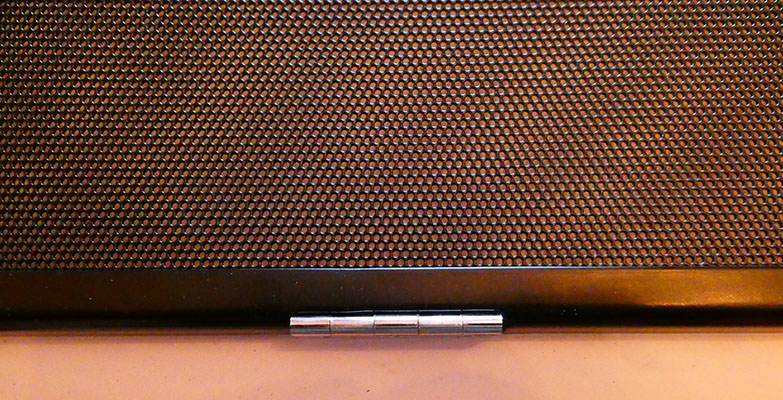
Custom made rear boot in steel with mesh insert to allow triple fan unit to expel air. Crome hinges and Bentley badge added. Boot lid is held in place with remote fob operated magnetic lock.
I have included 'door poppers' so the boot releases and the Classic Mini door straps.